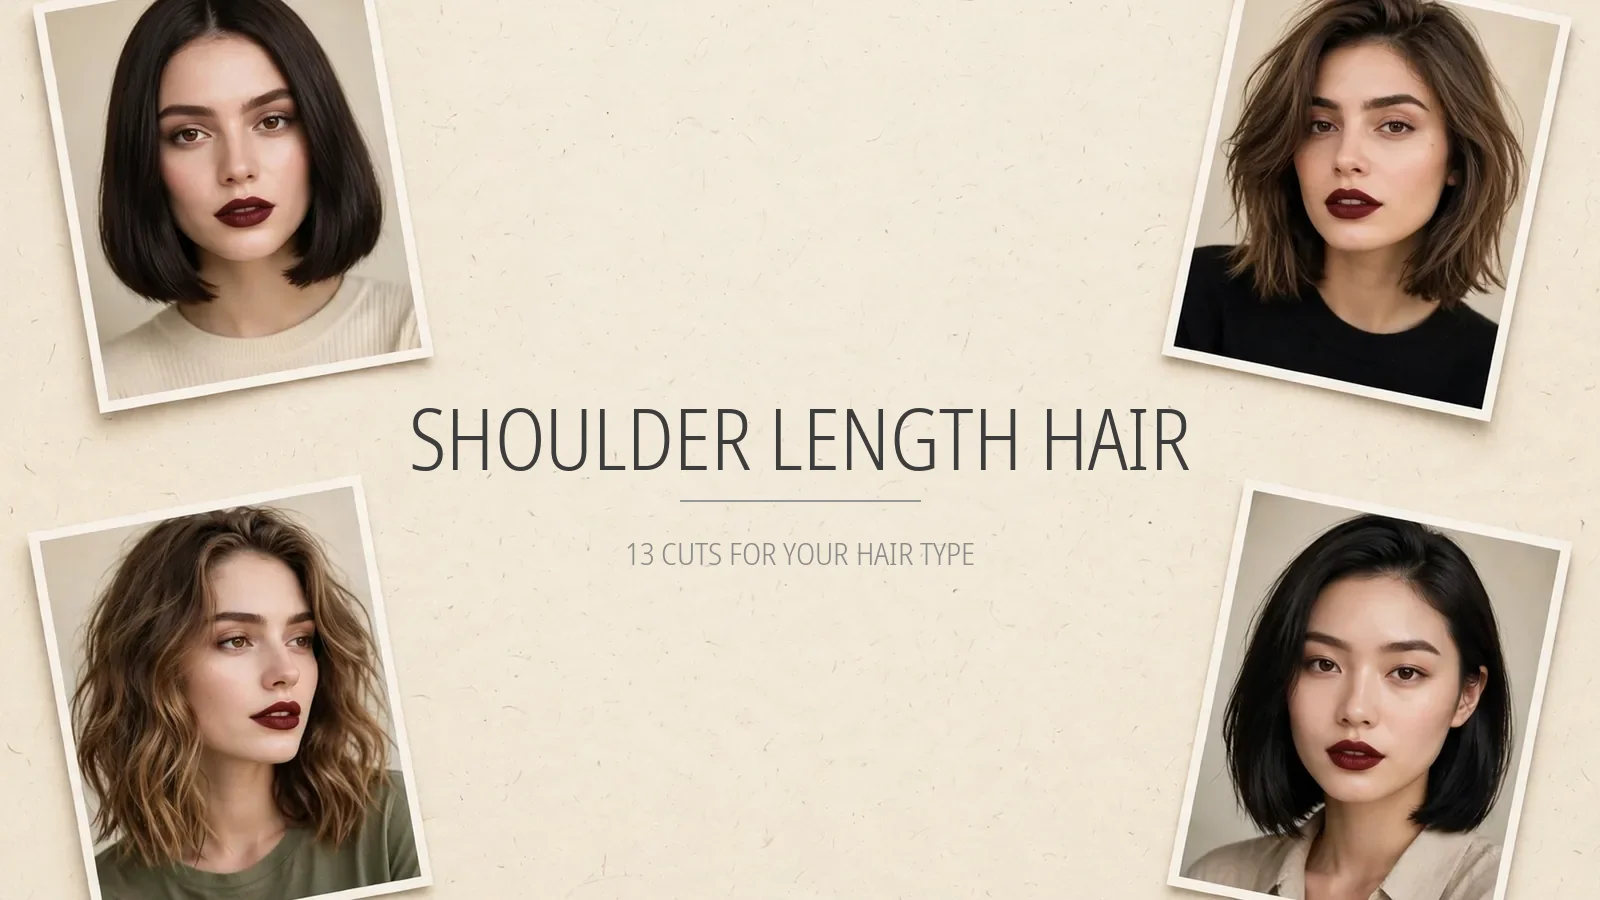
Shoulder Length Hair – 13 Cuts That Suit Your Hair Type
Shoulder length hair looks like the easy middle ground — not short enough to style every morning, not long enough to fight with every night. But anyone who has worn it knows the truth: the wrong shoulder-length cut fights your hair type all day. Fine hair goes flat by noon, thick hair puffs into a triangle, curls spring up shorter than asked for, and that “effortless” lob from the photos turns out to need twenty minutes of heat you were never told about.
The fix is not a different length — it is the right shoulder length hair cut for the hair you actually have. Below are 13 shoulder length cuts matched honestly to hair type and density: which ones air-dry beautifully, which demand daily effort, what to tell your stylist, and the real grow-out timeline for each.
In This Guide
- Shoulder Length Hair Ideas Worth Trying
- 1. Blunt Shoulder-Grazing Bob
- 2. Soft Layered Lob
- 3. Angled Lob
- 4. Collarbone Cut
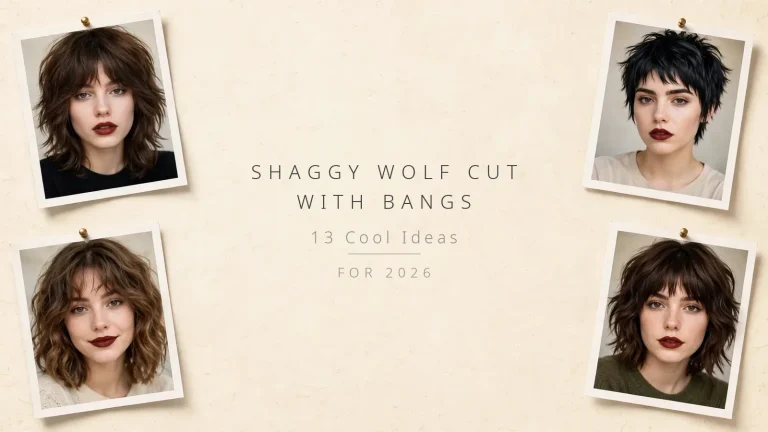
- 5. Textured Mid-Length Shag
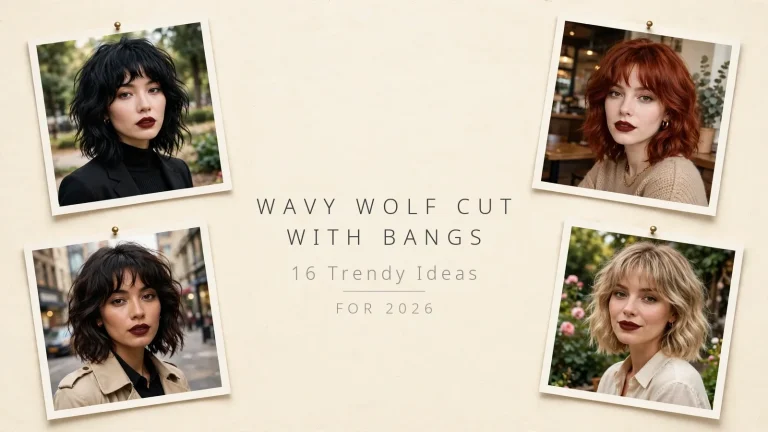
- 6. Shoulder-Length Wolf Cut
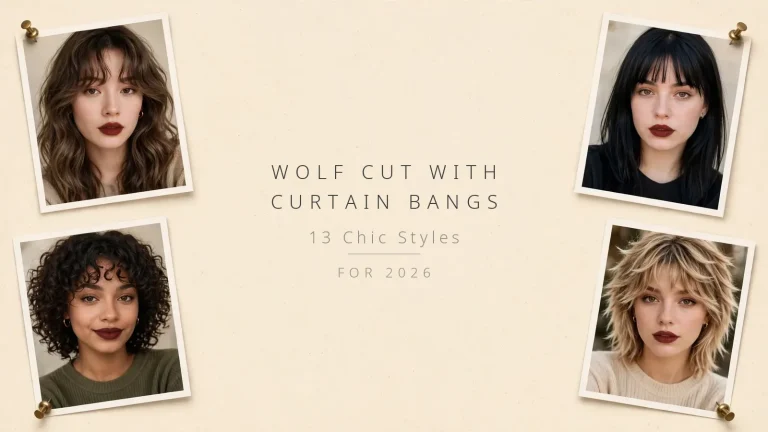
- 7. Layered Cut With Curtain Bangs
- 8. Wispy Bangs With Layers
- 9. Side-Swept Bangs Cut
- 10. Beach Waves With Piecey Layers
- 11. Wavy Lob With Deep Side Part
- 12. Rounded Curly Cut
- 13. Sleek Glassy Cut
- How to Choose the Right Shoulder Length Cut
- Styling Shoulder Length Hair by Hair Type
- Low-Maintenance vs High-Impact: Be Honest About Your Routine
- FAQs
- Will shoulder length hair suit thin, fine hair?
- How long does it take to grow hair to shoulder length?
- How often should I trim shoulder length hair?
- Does shoulder length hair shrink on curly hair?
- Is shoulder length hair good for round faces?
- Can I still put shoulder length hair in a ponytail?
- Should fine hair get layers at shoulder length?
- What should I ask my stylist for?
Shoulder Length Hair Ideas Worth Trying
1. Blunt Shoulder-Grazing Bob

The blunt shoulder-grazing bob is shoulder length hair at its sharpest — one clean, level line kissing the tops of the shoulders. No layers, no texture. The blunt perimeter makes ends look thick and heavy, which is why this is the most requested shoulder-length cut for fine hair. It reads expensive with almost no product.
Benefits:
- Makes fine hair look visibly thicker — the solid edge creates the illusion of density
- Needs the least styling of any cut here; the shape does the work
- Grows out evenly for 6–8 weeks before the line starts to soften
Pro Tip: Ask your stylist to check the line on dry hair. Shoulder length is where hair flips against your shoulders, and a line that looks perfect wet can kick out unevenly once dry.
How To Style: Blow-dry smooth with a paddle brush, tucking ends slightly under. One flat-iron pass on the last two inches fixes daytime flipping. A pea-sized drop of serum keeps the line crisp.
Best For: Straight to slightly wavy hair, fine to medium density. The fine-hair hero of this list. Very thick hair can look helmet-like — dense types should look at the layered options below. Close in spirit to a blunt long bob, but the shorter line keeps it sharper.
2. Soft Layered Lob
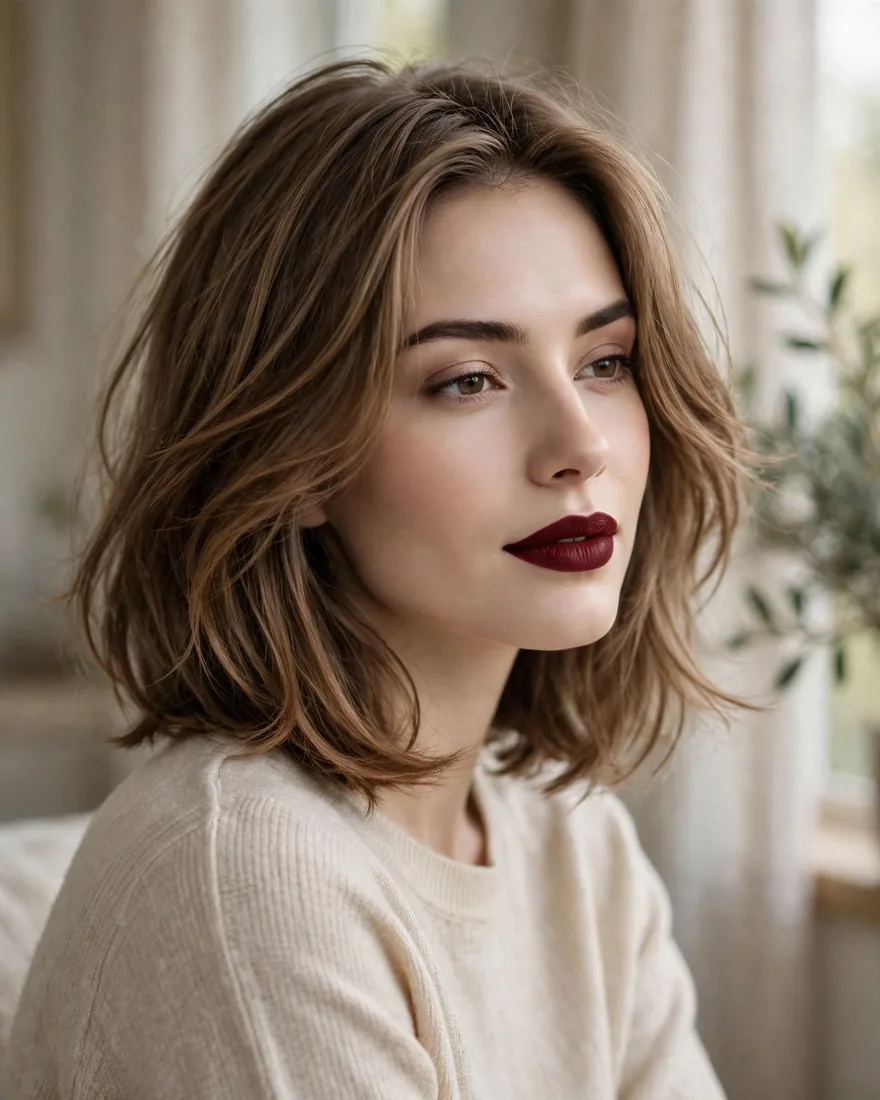
The soft layered lob is the forgiving version of the blunt cut — long, barely-there layers through the bottom third that let ends move instead of sitting in a solid shelf. It is what most people picture when they say “shoulder length hair”: touchable, natural, easy with any parting. The layers stay subtle enough that the perimeter still looks full.
Benefits:
- Removes just enough weight to stop thick hair ballooning at the ends
- Air-dries better than a blunt cut on wavy hair — layers let soft waves form naturally
- Grows out seamlessly with no harsh line to maintain
Pro Tip: Say “long layers, blended ends” — and mean it. Layers cut too short turn this into a shag and cost you the fullness that makes shoulder length flattering. Keep the shortest layer at chin length or below.
How To Style: Scrunch lightweight mousse into damp hair and air-dry, or rough-dry with a round brush for smoothness. Touch up just the front pieces with a wand if they fall flat.
Best For: Medium to thick density, straight to wavy hair. The most versatile cut here and the safest first step into shoulder length.
3. Angled Lob
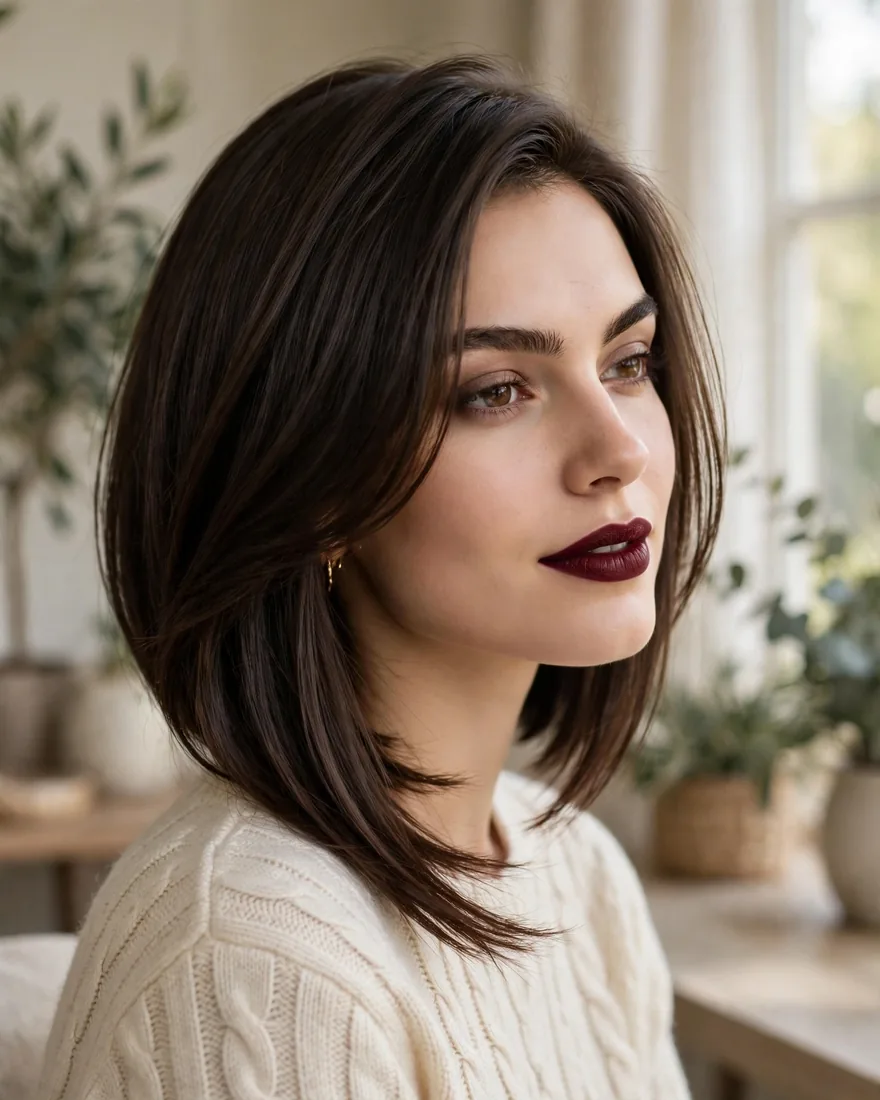
The angled lob runs longer in front and slightly shorter in back, creating a forward-swinging line that elongates the neck and sharpens the jawline. The angle gives shoulder length hair a deliberate, styled look even when you do nothing to it — a strong pick when your face shape benefits from vertical lines over horizontal width.
Benefits:
- The forward angle visually lengthens round and square face shapes
- Looks styled with zero effort — the geometry does the talking
- The shorter back removes bulk where thick hair piles up
Pro Tip: Keep the angle subtle — about an inch of difference front to back is plenty. A dramatic angle grows out awkwardly and the long front pieces refuse to stay in a ponytail.
How To Style: Blow-dry the front pieces forward and slightly under; the back styles itself. Tuck one side behind the ear for an asymmetric finish that shows off the angle.
Best For: Straight to wavy hair, all densities. Round, square, and heart faces gain most from the elongating line. A smart bridge when growing out shorter cuts — it looks intentional at every stage.
4. Collarbone Cut
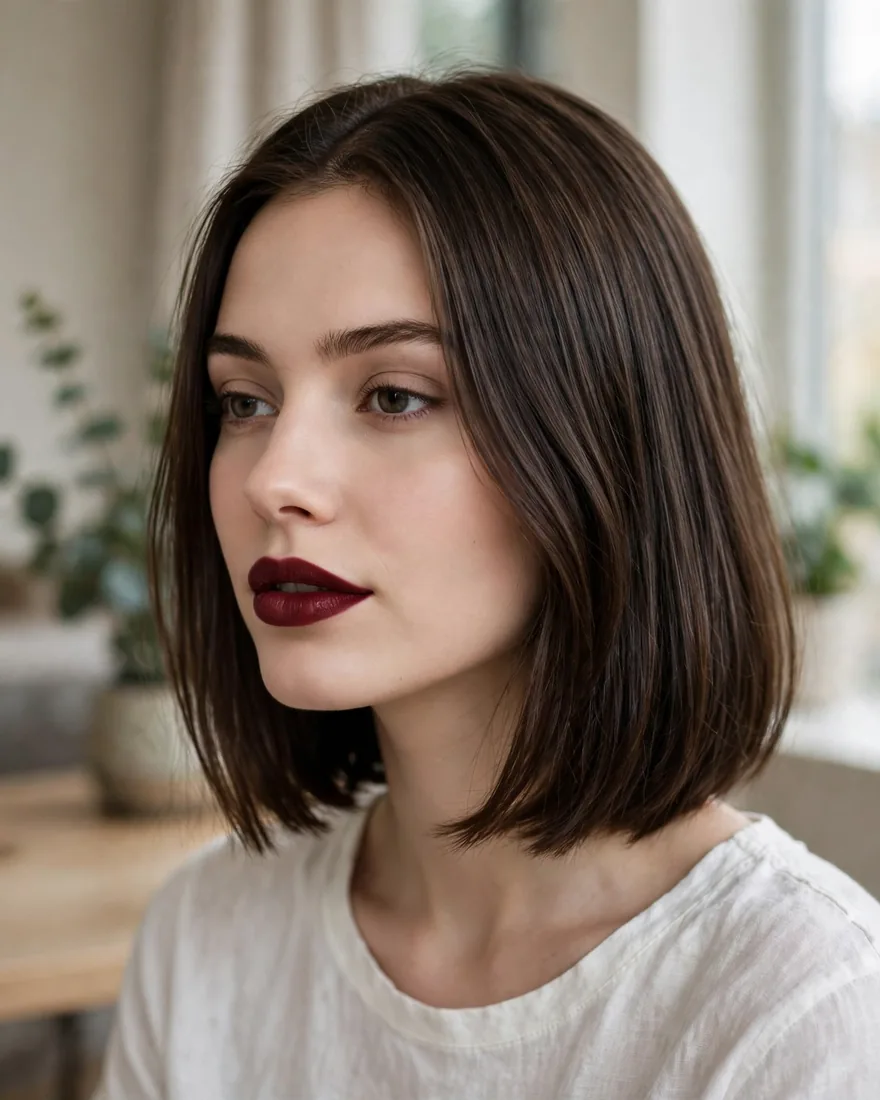
The collarbone cut lands exactly where promised — grazing the collarbone, a touch longer than a bob but shorter than a true lob. It is the sweet spot for people who want shoulder length hair without committing to styling it: long enough to tie back, short enough to air-dry fast, with ends that flatter nearly every neckline.
Benefits:
- The lowest-commitment length here — grows out beautifully in both directions
- Long enough for a ponytail, short enough to wash and wear
- Ends hitting the collarbone draw the eye down, flattering shorter necks
Pro Tip: Have the ends cut on dry hair. Collarbone length is exactly where wave and cowlicks reveal themselves, and a wet cut can spring up a full inch on wavy hair — turning your collarbone cut into a bob overnight.
How To Style: Almost nothing required. Work leave-in cream through damp ends to stop frizz and air-dry. For evenings, a few loose waves through the mid-lengths with a large-barrel iron take five minutes.
Best For: All hair types and densities. The universal donor of shoulder length cuts — when in doubt, ask for this length.
5. Textured Mid-Length Shag

The mid-length shag brings classic shag texture down to shoulder length: choppy layers throughout, piecey ends, and built-in movement that looks better the less you fuss with it. It never looks “done,” and that is the entire point. Modern versions are softer and more wearable than the 70s original.
Benefits:
- The most forgiving grow-out here — choppy layers blur every stage
- Adds visible volume to fine hair without teasing or product buildup
- Looks better on day two and three than freshly washed
Pro Tip: The shag needs weight removed, not length removed. Tell your stylist “internal texture, keep the perimeter” — take too much off the bottom edge and you get a mullet silhouette instead of a shag. See our shag haircuts guide for the full family.
How To Style: Air-dry with salt spray or texture cream scrunched in — heat defeats the purpose. Lift a flat crown with a few minutes of upside-down diffusing. Finger-comb only; a brush turns a shag into frizz.
Best For: Wavy to curly hair, fine to medium density. Thick, very straight hair can look bulky unless the stylist removes serious internal weight.
6. Shoulder-Length Wolf Cut
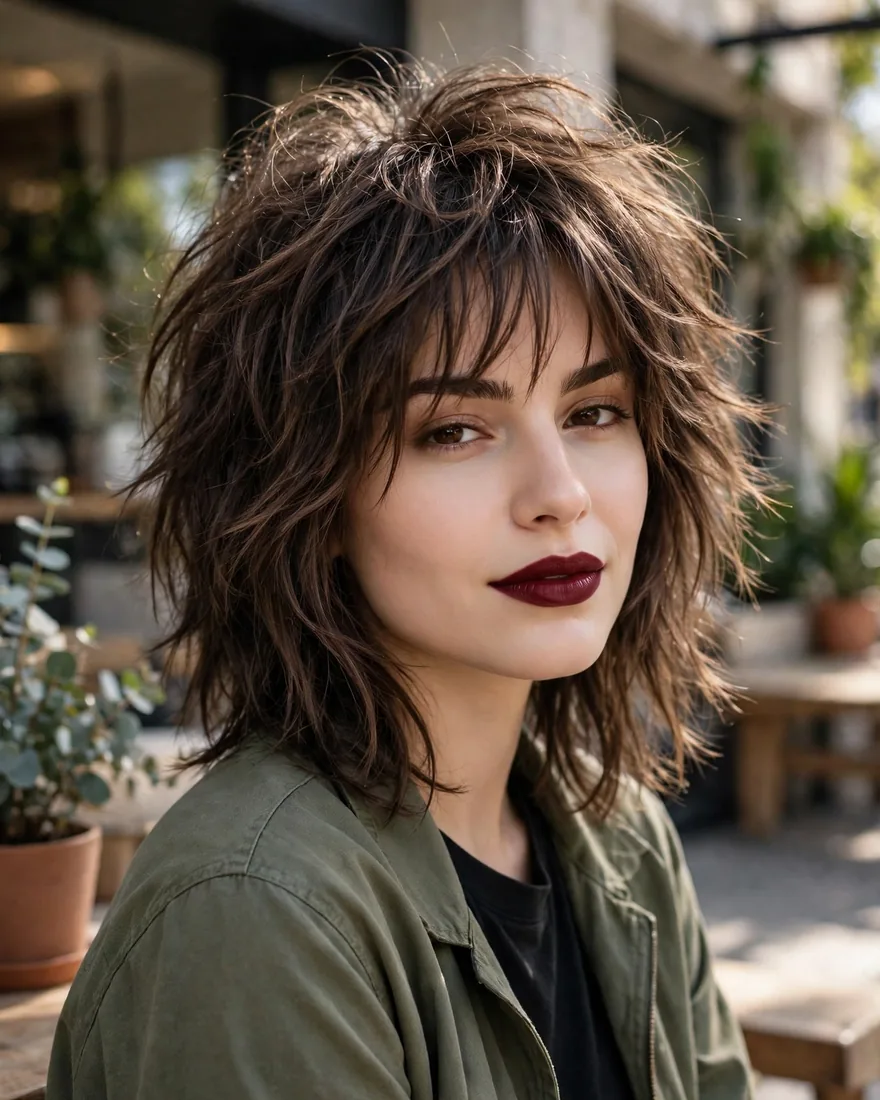
The wolf cut at shoulder length is the shag’s wilder sibling: heavy crown layers, wispy ends, and a deliberately undone silhouette between a shag and a mullet. At this length it is more wearable than the viral long versions — proportions stay balanced instead of top-heavy. It suits people who like visible attitude in their shoulder length hair.
Benefits:
- Maximum texture and movement with minimum styling effort
- Crown layers create volume exactly where fine hair needs it
- Reads as a deliberate style choice, not a grow-out
Pro Tip: This cut lives on the crown layers, so confirm how short the shortest layer will be before the scissors come out. On shoulder length hair, crown layers above the ear can expose scalp on fine hair — “keep the shortest layer at cheekbone” is a safe boundary. See our wolf cut guide for longer variations.
How To Style: Diffuse upside down for crown lift, then let the ends do whatever they want — that is the look. A touch of texture paste on the very ends defines the wispy pieces. Never brush it smooth.
Best For: Wavy and curly hair, medium density. Straight, fine hair works if layers stay conservative. Very thick hair needs aggressive thinning or the crown goes triangular.
7. Layered Cut With Curtain Bangs

Curtain bangs with a layered shoulder-length cut flatter the widest range of faces — the bangs frame the cheekbones while layers keep the length moving. They part in the middle and sweep to each side, softening foreheads and drawing attention to the eyes. Popular for a reason: on the right face, genuinely transformative.
Benefits:
- Face-framing that suits round, square, oval, and heart shapes alike
- Grows out gracefully — bangs simply become face-framing layers
- Instantly updates any shoulder length cut without changing the length
Pro Tip: Curtain bangs need a trim every 3–4 weeks to stay in the sweet spot. Past that they stop parting properly and hang in your eyes. Budget for bang trims between appointments — many salons do them cheap or free.
How To Style: Blow-dry bangs forward with a small round brush, then part in the middle while warm so they set in the curtain shape. The layered length can air-dry or be waved; only the bangs need daily attention.
Best For: Medium to thick density, straight to wavy hair. Fine hair can wear curtain bangs if cut light and wispy; heavy ones expose the scalp.
8. Wispy Bangs With Layers

Wispy bangs are the low-commitment fringe: feathery, see-through, soft enough to sweep aside on days you skip bangs entirely. With layered shoulder length hair they add softness around the face without the maintenance of a full blunt fringe. The fringe to try if you have always wanted bangs but feared the grow-out.
Benefits:
- The easiest fringe to grow out — wispy pieces blend into layers within weeks
- Softens strong jawlines and long foreheads without hiding the face
- Needs trimming only every 5–6 weeks, less than blunt bangs
Pro Tip: Wispy bangs and oily foreheads clash — fine pieces separate and look stringy by midday. Keep blotting papers handy, or have the bangs cut slightly longer for more weight. Dry shampoo on the bangs themselves on day two works well.
How To Style: Blow-dry bangs straight down with your fingers, then piece them out with a touch of pomade. They should look airy, not clumped. The layered length styles however you like.
Best For: Fine to medium density, straight to wavy hair. Long and oval faces gain most from the forehead-softening effect. Very curly hair should skip wispy bangs — they shrink unpredictably.
9. Side-Swept Bangs Cut

Side-swept bangs are the classic fringe for shoulder length hair — longer pieces sweeping diagonally across the forehead, blending into face-framing layers. They add asymmetry and movement to an otherwise simple cut, and they are the most office-friendly way to wear bangs at this length.
Benefits:
- Balances wide foreheads and strong cheekbones with diagonal lines
- Blends into the rest of the cut as it grows — no awkward stage
- Works with both sleek and wavy styling on the length
Pro Tip: Sweep direction matters. Part bangs opposite your natural part for volume; with your natural part for a sleeker finish. Decide before the cut — the bangs are shaped for one direction.
How To Style: Blow-dry bangs across the forehead in the sweep direction with a paddle brush, then set with a cool shot. Tuck the longer end behind the ear or let it graze the cheekbone.
Best For: Medium to thick density, straight to wavy hair. Square and heart faces get the most flattering diagonal balance.
10. Beach Waves With Piecey Layers
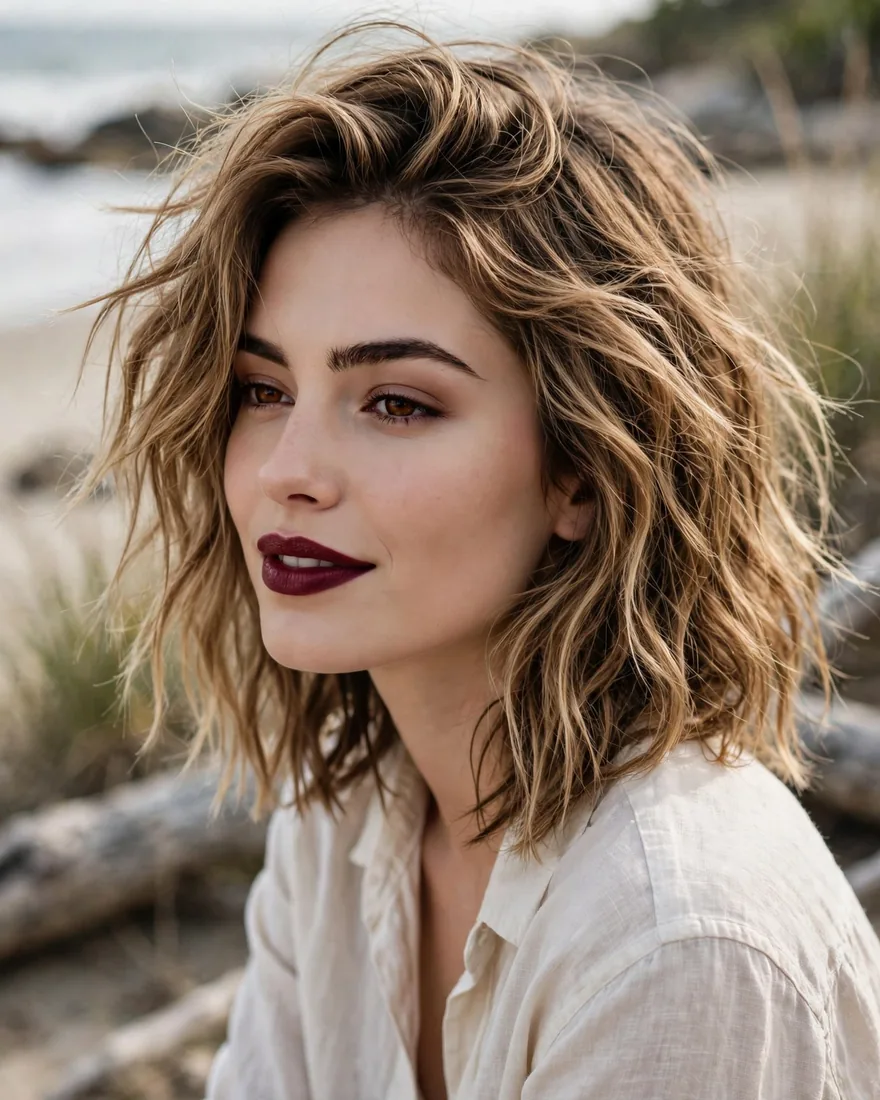
Beach waves in shoulder length hair are the hair equivalent of a vacation photo — loose, separated waves with piecey ends that look sun-touched even in February. The piecey layers make it work at this length: without them, waves collapse into a solid bell shape. With them, every wave moves independently.
Benefits:
- The most photogenic texture at shoulder length — waves catch light beautifully
- Piecey ends create separation and shadow that make hair look thicker
- Second-day hair genuinely looks better than freshly washed
Pro Tip: Salt-spray-and-scrunch only works on natural wave. On straight hair you need heat — no product creates wave from nothing. Straight-haired wearers should budget 15 minutes with a wand; wavy-haired wearers can air-dry their way there.
How To Style: On damp hair, work in salt spray, scrunch upward, and diffuse or air-dry. On straight hair, wrap random sections around a 1.25-inch wand leaving ends out, then break up curls with fingers and texture cream. Never brush.
Best For: Naturally wavy hair, medium density. Lowest-effort if your texture cooperates; highest-effort if it does not. Thick hair needs the layers thinned well or waves get bulky.
11. Wavy Lob With Deep Side Part
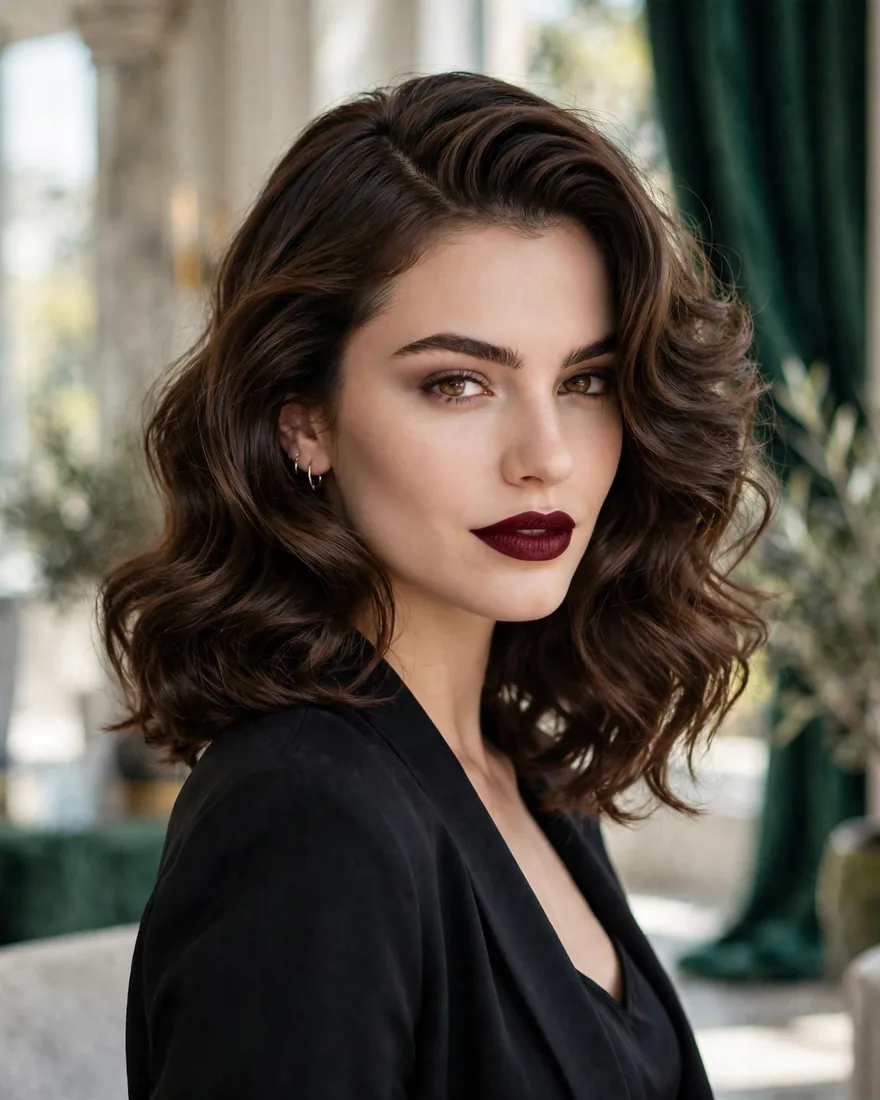
A deep side part is the fastest way to add drama to shoulder length hair without cutting a strand — instant crown volume and an asymmetric fall that reads glamorous with almost no effort. On a wavy lob, the deep part lets one side cascade while the other tucks neatly: two looks from one cut.
Benefits:
- Instant crown volume — the deep part lifts roots a center part flattens
- Makes fine hair look fuller on top where it matters most
- Zero commitment; switch back to a center part anytime
Pro Tip: Train the part while hair is damp. A deep side part fought into dry hair springs back by lunch; set it wet with a little mousse at the roots and it holds all day. Flip sides every few months — hair develops “part memory” and goes flat otherwise.
How To Style: Part deeply on damp hair, apply volumizing mousse at the roots on the heavy side, and blow-dry with a round brush lifting up and over. Let waves fall naturally or add a few wand curls to the longer side.
Best For: Fine to medium density, wavy hair. Round faces should keep the part moderately deep — an extreme part adds width at the cheeks.
12. Rounded Curly Cut

The rounded curly cut is shaped specifically for curls at shoulder length: layers carved to build a soft, rounded silhouette instead of the dreaded triangle. It finally lets curly hair wear shoulder length without the bottom half exploding outward. It must be cut dry, curl by curl — a wet cut on curls at this length is a gamble you will lose.
Benefits:
- Eliminates the triangle effect that ruins most curly cuts at this length
- Defined curls need less daily restyling — the shape holds for days
- Grows out into a rounded shape rather than a shapeless mass
Pro Tip: Shrinkage is significant: tight curls can spring up 2–4 inches from the cut length. For curls to sit at the shoulders dry, the cut must happen well below the shoulders wet. Always ask: “Where will this sit when dry?”
How To Style: Apply curl cream and gel to soaking-wet hair, scrunch, and diffuse or air-dry — then do not touch until fully dry. Refresh day two and three with a water-and-conditioner mist. Pineapple curls at night.
Best For: Naturally curly to coily hair, all densities. The only cut here designed specifically for curls.
13. Sleek Glassy Cut
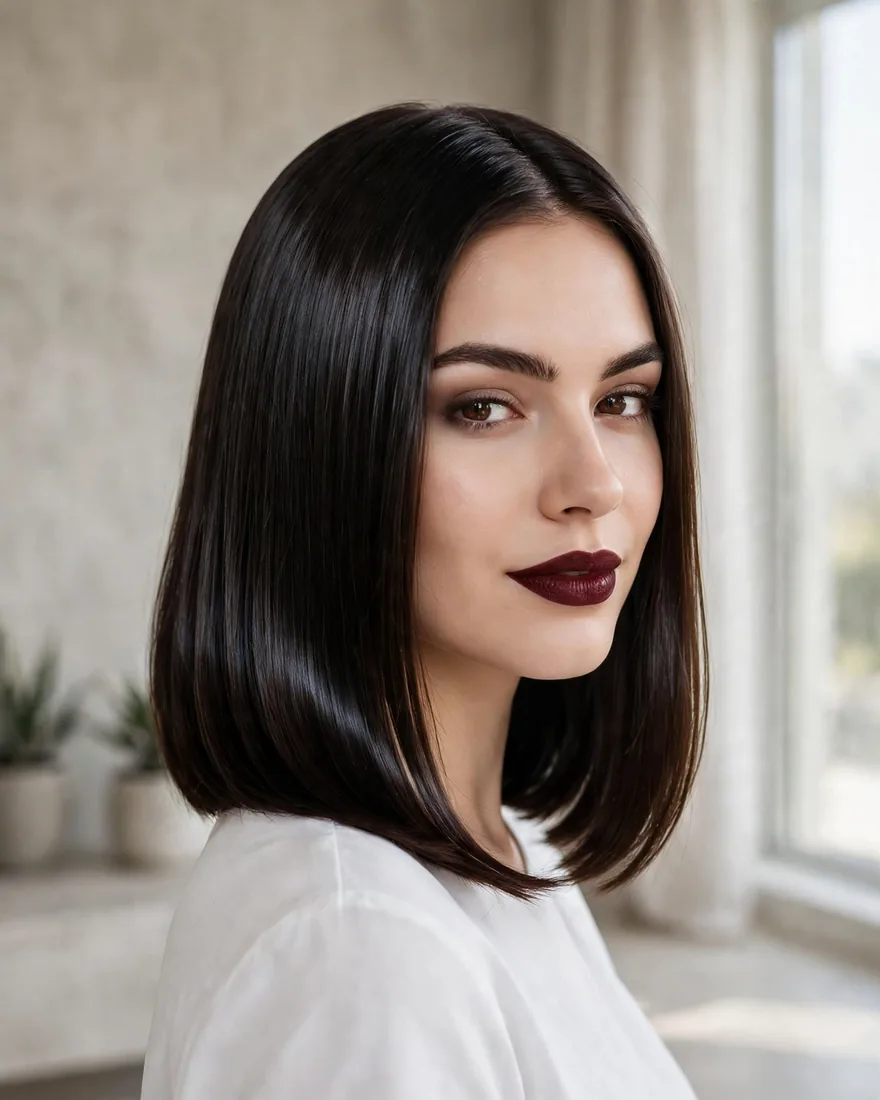
The sleek glassy cut is shoulder length hair polished to a mirror finish — flat-ironed smooth with ends swinging in one fluid sheet. The highest-impact look here, and the most honest about its demands: glass hair never happens by accident. But done right, nothing looks more expensive.
Benefits:
- The most polished, put-together look achievable at this length
- Reflective shine makes even fine hair look healthy and dense
- Holds well in low humidity — one styling lasts days
Pro Tip: Glass hair is 80% prep, 20% flat iron. The shine comes from a smoothing blowout first — ironing damp or rough-dried hair bakes in frizz. Use heat protectant every time; at this length the ends are old hair and fry fast. If you dream of longer lengths, this cut keeps ends healthy enough to grow.
How To Style: Blow-dry smooth with a paddle brush and tension, then flat-iron in small sections with one slow pass each. Finish with shine serum on mid-lengths and ends only. In humidity, anti-frizz spray is non-negotiable.
Best For: Straight to slightly wavy hair, fine to medium density. Thick or very curly hair can achieve it but should budget 30+ minutes of heat — be realistic about doing that daily.
How the 13 cuts compare at a glance:
| Cut | Best Hair Type | Daily Effort |
|---|---|---|
| Blunt Shoulder-Grazing Bob | Straight, fine–medium | Low — blow-dry smooth |
| Soft Layered Lob | Straight–wavy, medium–thick | Low — air-dries well |
| Angled Lob | Straight–wavy, all densities | Low — shape does the work |
| Collarbone Cut | All types | Minimal — wash and go |
| Textured Mid-Length Shag | Wavy–curly, fine–medium | Low — air-dry with texture product |
| Shoulder-Length Wolf Cut | Wavy–curly, medium | Low — diffuse and go |
| Layered Cut With Curtain Bangs | Straight–wavy, medium–thick | Medium — bangs need daily styling |
| Wispy Bangs With Layers | Straight–wavy, fine–medium | Low–medium — quick bang refresh |
| Side-Swept Bangs Cut | Straight–wavy, medium–thick | Medium — sweep needs setting |
| Beach Waves With Piecey Layers | Wavy, medium | Low on wavy hair; high on straight hair |
| Wavy Lob With Deep Side Part | Wavy, fine–medium | Low — part trains easily |
| Rounded Curly Cut | Curly–coily, all densities | Low — wash-day styling lasts days |
| Sleek Glassy Cut | Straight, fine–medium | High — daily heat styling |
How to Choose the Right Shoulder Length Cut
Choosing between these 13 shoulder length hair cuts comes down to two honest assessments: density and texture. Density first. If a standard elastic wraps your ponytail three or more times, you have fine hair — and you want weight, not layers. The blunt bob, collarbone cut, and sleek glassy cut keep every strand working for you. Layers on fine hair remove the bulk you need, which is why so many fine-haired wearers get layers, hate the stringy result, and blame the length instead of the layering.
Thick hair is the mirror image: it needs weight removed or shoulder length turns into a shelf. The soft layered lob, textured shag, and rounded curly cut take bulk from the interior while keeping the perimeter intact. If your stylist reaches for thinning shears on thick hair at this length, that is usually a good sign — just ask them to thin the interior, never the ends. Growing out a pixie or bob? The angled lob and collarbone cut are the kindest transition shapes, far more flattering mid-grow-out than shorter cuts left to their own devices.
Texture changes the math. Curls shrink — sometimes dramatically. A cut landing at the shoulders on wet curly hair can sit at the jawline dry, which is why curly cuts must be done dry, curl by curl. Wavy hair loses about half an inch to an inch, so cut it slightly longer than your target. Straight hair shows every mistake, so precision matters more than creativity — a bad line on straight shoulder length hair has nowhere to hide.
Styling Shoulder Length Hair by Hair Type
Here is the honest styling-time math. If your hair air-dries into something you like, shoulder length hair is genuinely a five-minute cut: the collarbone cut, soft layered lob, textured shag, and rounded curly cut all qualify. Wash, add one product, walk out. Total active styling time: under five minutes.
If your hair air-dries into something you do not like, shoulder length hair costs fifteen to thirty minutes a day — know that before committing. The sleek glassy cut demands a full blowout plus flat ironing daily, because shoulder length is exactly where slept-on straight hair kinks overnight. Beach waves on naturally straight hair are the same story in reverse: fifteen minutes with a wand to build texture your hair lacks.
Most people live in the middle. Curtain and side-swept bangs add about five minutes of focused bang styling to an otherwise easy cut. The deep side part needs a two-minute root lift on wash day and nothing after. Before choosing, time your actual morning routine for one week — then pick a cut whose daily effort fits inside that number, not the number you wish were true.
Low-Maintenance vs High-Impact: Be Honest About Your Routine
Two directions arrive at shoulder length hair, and they need different cuts. Growing out — heading longer — wants no strong shape to lose: the collarbone cut and soft layered lob grow downward gracefully, and you can stretch trims to ten or twelve weeks. Just dust the ends so splits do not travel up and stall growth.
Growing in — from a bob or pixie — is trickier. The angled lob is purpose-built for it: as the back catches up to the front, the angle softens into a collarbone cut with zero awkward months. The textured shag is the other grow-out hero, since choppy layers disguise uneven growth better than any blunt line. A choppy bob with shaping trims every eight weeks lands at the shoulders looking intentional, not neglected.
Fringe changes the maintenance equation. Curtain bangs need reshaping every three to four weeks, side-swept every four to five, wispy every five to six. The honest workaround: grow bangs slightly longer than ideal and learn the twist-trim at home — twist the section, snip a quarter inch off the twisted point, and buy two extra weeks. When bangs grow out fully they become face-framing layers, a style in its own right. The only real fringe mistake is cutting bangs blunt and heavy, then abandoning them.
FAQs
Will shoulder length hair suit thin, fine hair?
Yes — if you choose a cut that keeps weight. The blunt shoulder-grazing bob is the best option for fine hair because the solid perimeter makes ends look thicker. Avoid heavy layering, which removes the bulk fine hair cannot spare.
How long does it take to grow hair to shoulder length?
From a chin-length bob, most people reach the shoulders in four to six months, since hair grows roughly half an inch per month. From a pixie, expect closer to a year. Small trims during the grow-out keep the shape intentional.
How often should I trim shoulder length hair?
Every eight to twelve weeks for most cuts. Blunt cuts show wear sooner, so they sit at the eight-week end; layered and textured cuts hide it better and stretch to twelve. Bangs are separate — curtain bangs need attention every three to four weeks.
Does shoulder length hair shrink on curly hair?
Yes, significantly. Depending on curl tightness, hair can spring up two to four inches from its wet length — a cut touching the shoulders wet may sit at the jawline dry. Always get curly cuts done dry, and confirm where the length will land.
Is shoulder length hair good for round faces?
It can be, with the right cut. The angled lob and long layered cuts with crown height elongate a round face. Avoid cuts ending exactly at chin level with volume at the cheeks — that width mirrors the face shape instead of balancing it.
Can I still put shoulder length hair in a ponytail?
Yes — shoulder length is the shortest length that comfortably gathers into a full ponytail. Layered cuts may leave shorter pieces falling out around the face, which many wear as a feature. The collarbone cut and soft layered lob are the most ponytail-friendly here.
Should fine hair get layers at shoulder length?
Usually not heavy ones. Long, subtle layers through the bottom third are fine, but short or choppy layers remove the density fine hair needs to look full. Volume comes from the cut’s perimeter, not from layering it away.
What should I ask my stylist for?
Bring a photo of the exact cut, then add three sentences: your hair type and density, how much daily styling you will actually do, and where you want the length to sit when dry. That gives your stylist everything they need.
Shoulder length hair earns its reputation as the most wearable length — but only when the cut matches the hair underneath it. Pick the one that fits your texture, your density, and the mornings you actually have, and this length stops fighting you and starts working for you. That is the whole secret, and now you know it.