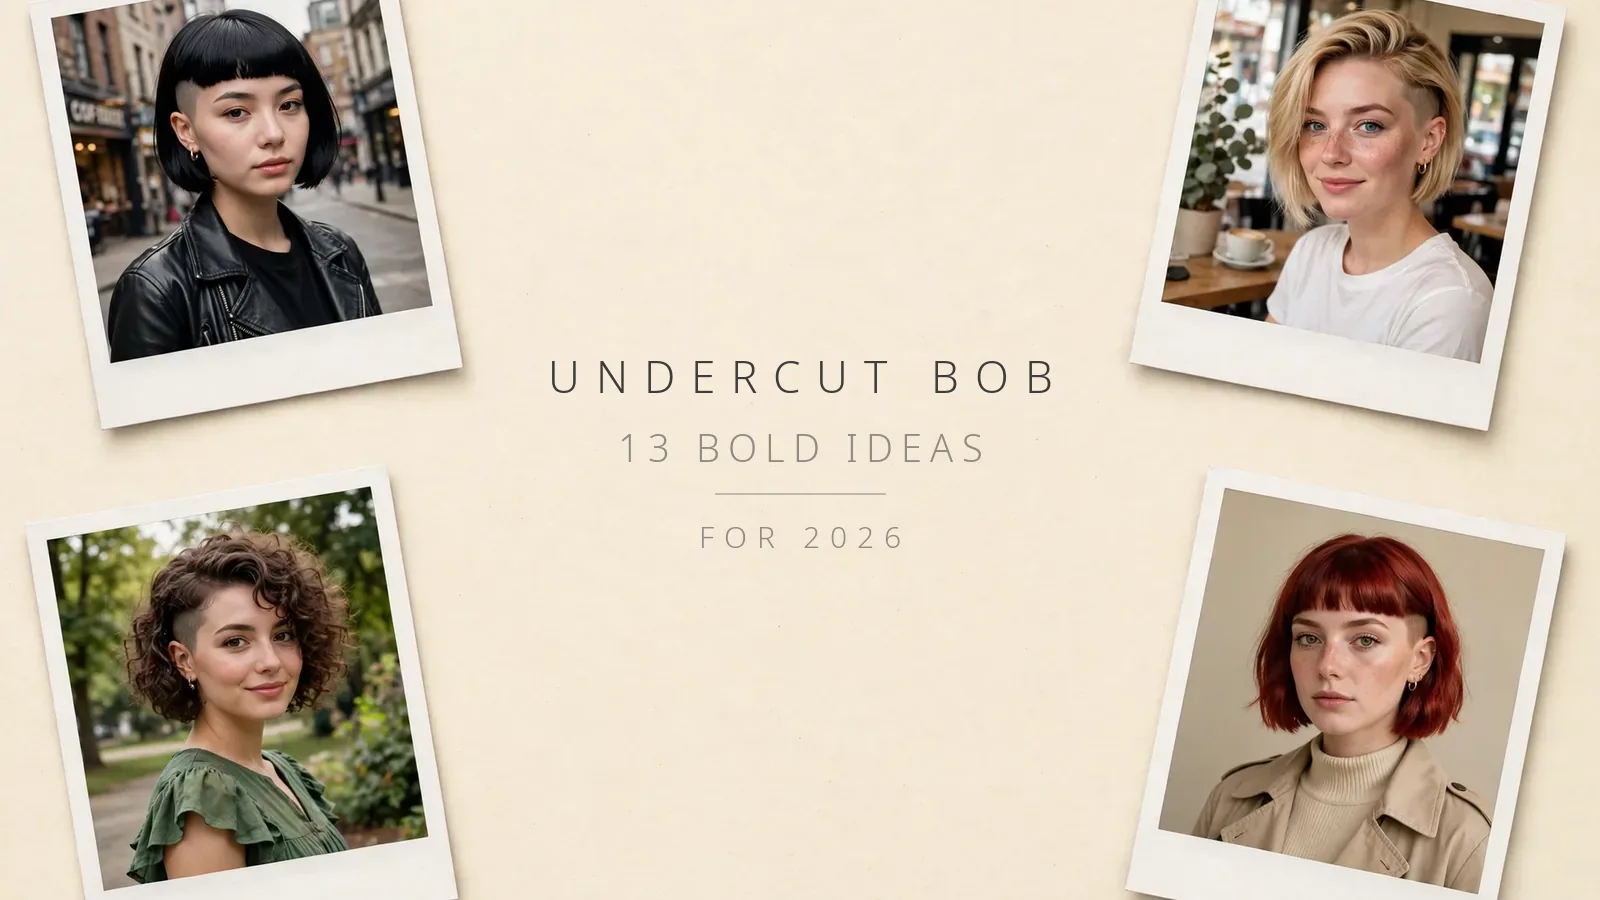
Undercut Bob – 13 Bold Ideas for 2026
Every gallery online shows you the edgy photos, but none of them tell you the truth: an undercut bob is a commitment, not just a haircut. Once the clippers touch your nape or your side, you’re signing up for re-shaves every few weeks and a grow-out phase that no filter can fix. The regret stories all start the same way — someone fell in love with a photo and never asked what happens in week three.
This guide does what the galleries won’t. You’ll get 13 undercut bob ideas with the undercut type and placement named honestly for each one, plus the three sections nobody wrote: how to choose between hidden and visible, exactly what to tell your barber before the clippers come out, and the real maintenance math — re-shave schedule, grow-out reality, and the regret plan. Read the commitment sections first, pick your style second.
Table of Contents
- 13 Undercut Bob Ideas Worth Copying
- 1. The Classic Undercut Bob with a Shaved Nape
- 2. Hidden Nape Undercut Bob
- 3. Asymmetrical Bob with a Shaved Side
- 4. Undercut Pixie Bob for Thick Hair
- 5. Angled Bob with an Undercut Nape
- 6. Blunt Bob with a Nape Design
- 7. Undercut Bob with Bangs
- 8. A-Line Bob with Undercut and Baby Bangs
- 9. Undercut Bob with Tapered Sides
- 10. Curly Undercut Bob
- 11. Undercut Bob with Undercolor
- 12. Inverted Bob with Nape Undercut
- 13. Side-Swept Undercut Bob
- How to Choose the Right Undercut Bob: Hidden vs Visible, Nape vs Side
- What to Ask Your Barber or Stylist Before the Clippers
- The Real Commitment: Re-Shave Schedule, Grow-Out, and the Regret Plan
- Undercut Bob FAQs
13 Undercut Bob Ideas Worth Copying
1. The Classic Undercut Bob with a Shaved Nape
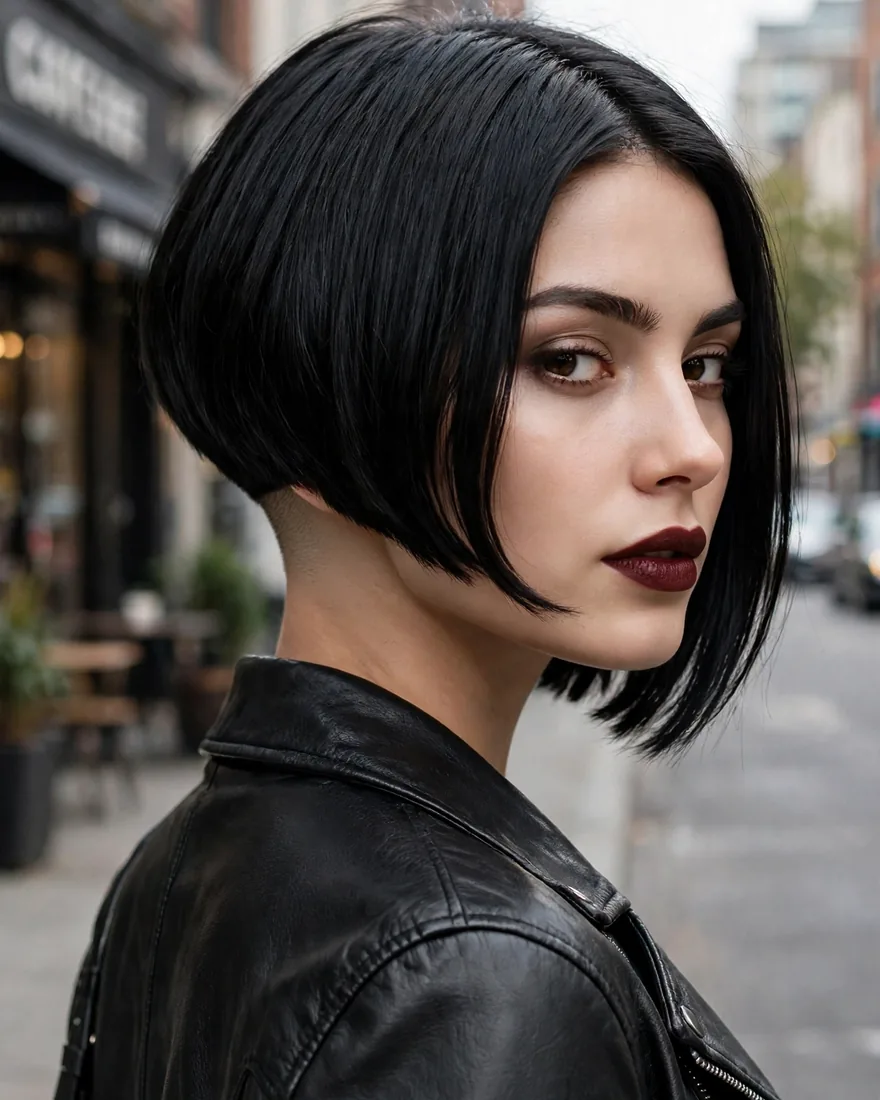
The benchmark every other version is measured against: a chin-to-shoulder bob with the entire nape shaved close to the skin. From the front it reads as a polished, professional bob; from behind it reveals the shaved undercut. The shaved nape removes serious bulk and weight from the back of the head, which is why this cut flatters thick hair so well.
Benefits:
- Removes bulk at the nape, so thick hair sits flatter instead of puffing out
- Looks office-appropriate from the front, edgy from behind
- Ponytails and updos sit cleaner without nape frizz escaping
Pro Tip: Ask for a soft, natural hairline along the undercut rather than a harsh straight line — it grows out far more gracefully between appointments.
How To Style: Blow-dry the top layer smooth with a paddle brush and let the nape be. Refresh the shave every two to three weeks to keep the line crisp.
Best For: Straight to wavy hair with medium to thick density; first-timers who want the look with the lowest visibility risk.
2. Hidden Nape Undercut Bob
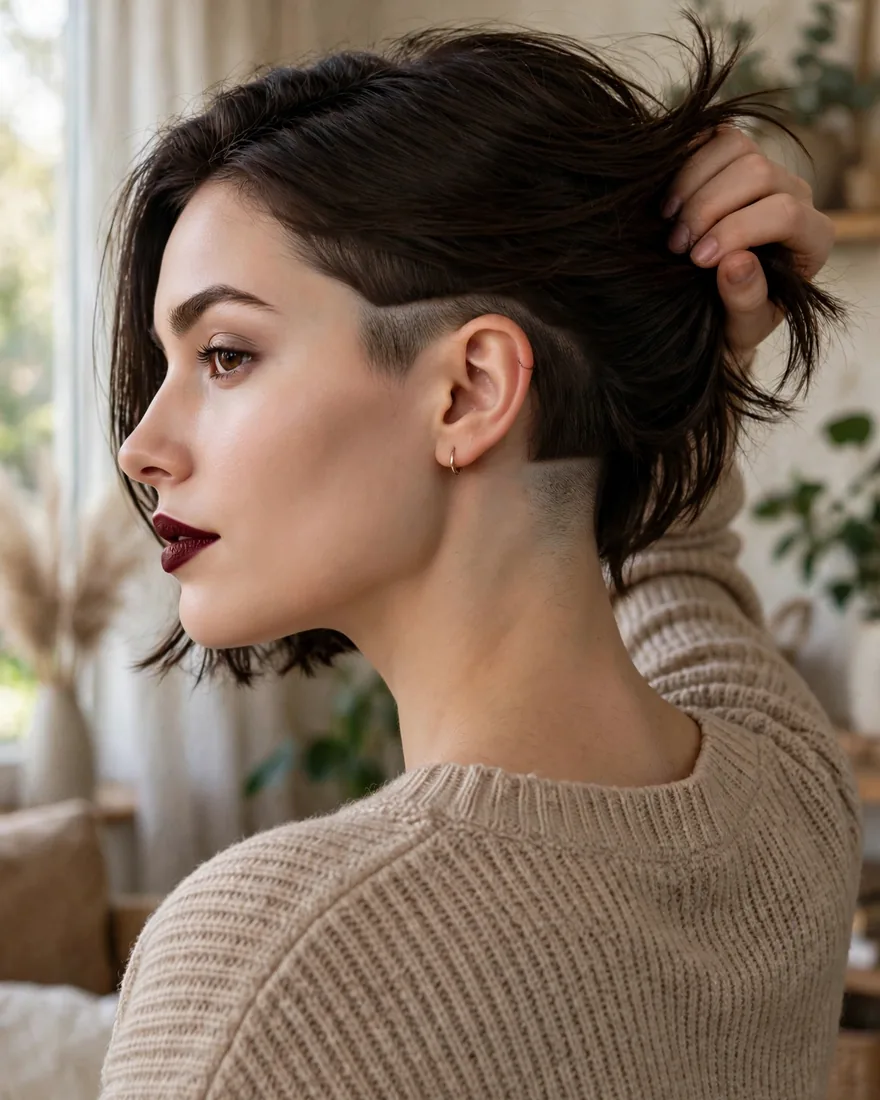
The undercut sits beneath a longer top layer, completely invisible when your hair is down and revealed only when you lift it or tie it up. This is the commitment-light version of the cut — all of the bulk removal, none of the daily visibility. It is the smartest entry point if you are unsure about the look.
Benefits:
- Completely hidden when worn down — zero workplace risk
- Keeps the edgy reveal for ponytails, buns, and half-up styles
- Regrowth stays covered, so re-shaves can stretch a little longer
Pro Tip: The top layer needs enough length and weight to fall cleanly over the undercut — don’t let anyone thin it out aggressively or the shave will peek through.
How To Style: Style it exactly like a classic short hair bob; sweep the top layer back or tie it up whenever you want the undercut seen.
Best For: Anyone who wants the undercut without the daily commitment; fine to medium hair that needs debulking at the neckline.
3. Asymmetrical Bob with a Shaved Side
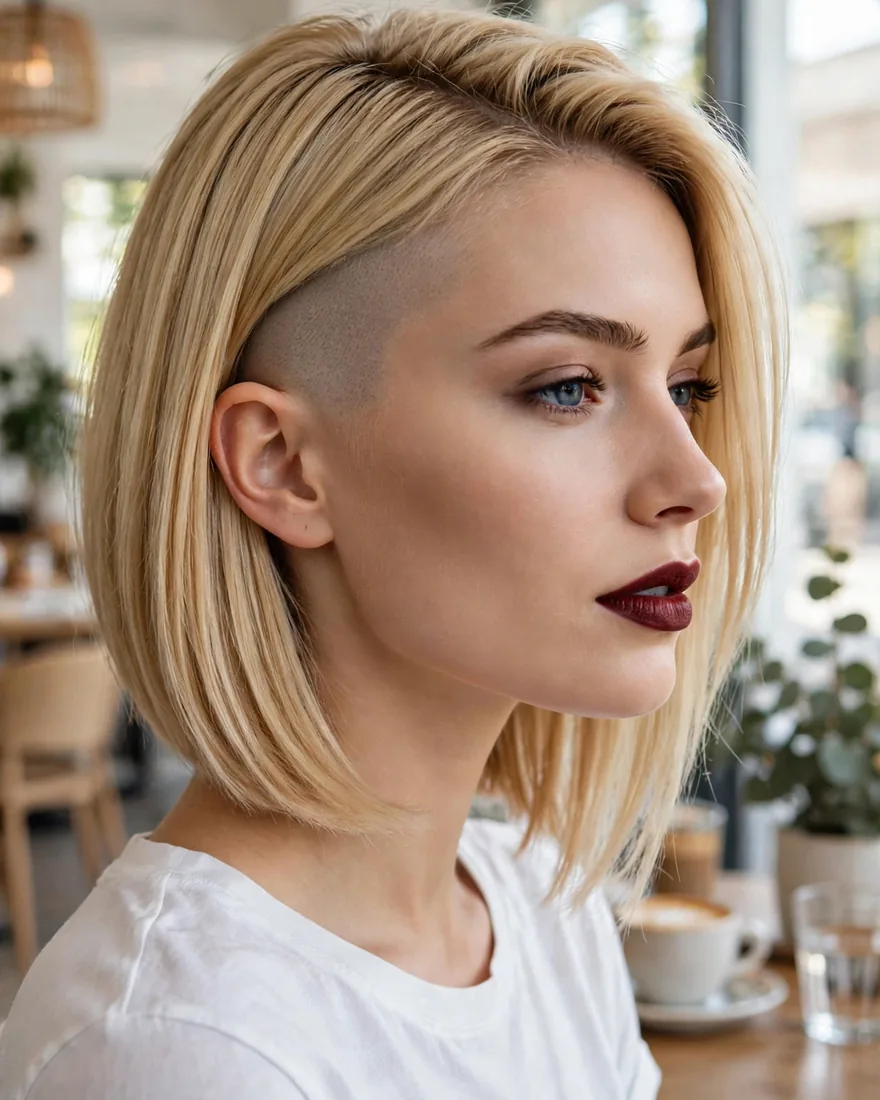
One side cut longer and angled, the other shaved close to the scalp — the asymmetry turns the shaved side into a deliberate design statement. Unlike a nape undercut, this one is visible all the time, which is exactly the point. The long side keeps the cut wearable while the shaved side does the talking.
Benefits:
- Maximum visual impact from a single style decision
- The long side preserves styling versatility
- Draws the eye to cheekbones and jawline
Pro Tip: Decide the shave height before the clippers start — a temple-high shave is dramatically bolder than one that stops behind the ear, and you can’t un-shave it.
How To Style: Tuck the long side behind your ear to frame the shaved side, and add texture spray to the longer lengths for contrast. If you ever want to soften the edge, a buzz cut grow-out guide helps you plan the transition.
Best For: Oval and heart face shapes; confident wearers who won’t miss the hair on the shaved side.
4. Undercut Pixie Bob for Thick Hair
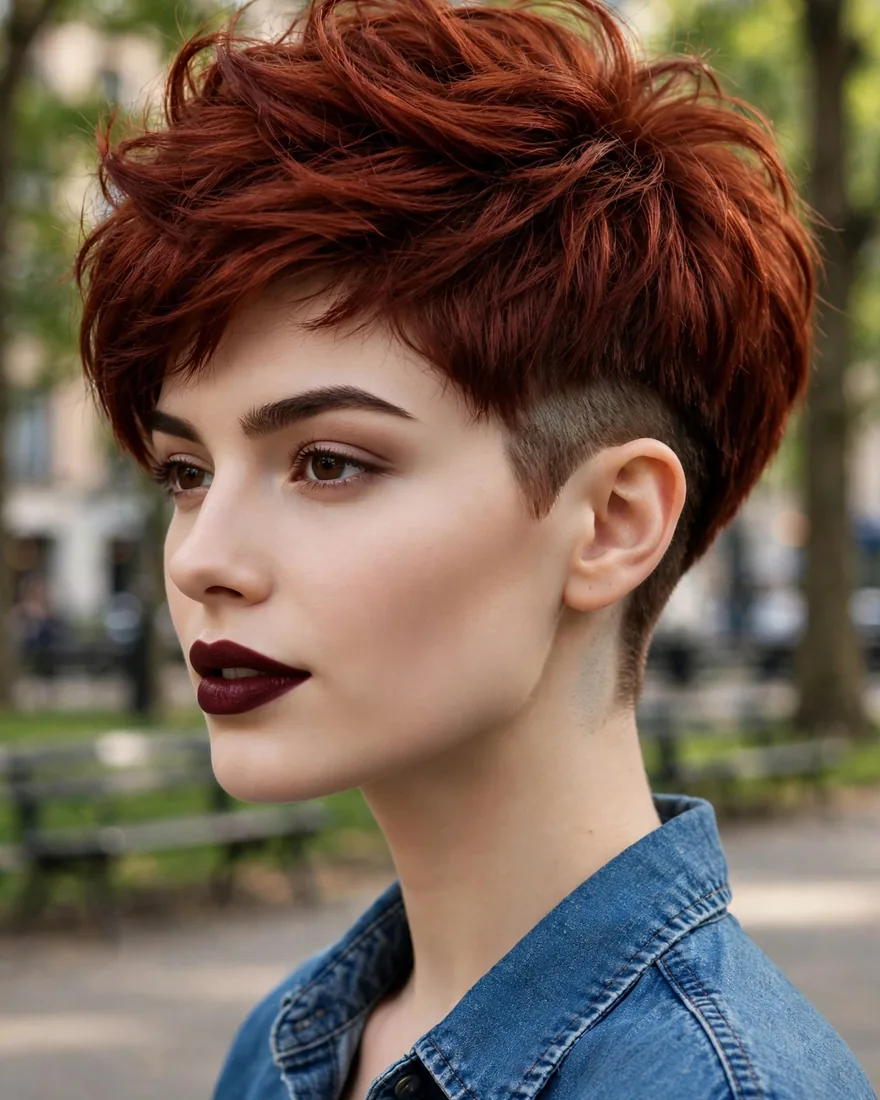
A hybrid that keeps bob length on top with a pixie-short undercut beneath — the classic fix for hair too thick to sit as a bob. The undercut removes the bottom bulk so the top layer falls cleanly instead of triangling outward. If your bobs always puff out at the bottom no matter what your stylist does, this is the cut that finally solves it.
Benefits:
- Removes serious bulk without relying on thinning shears
- Thick hair finally sits flat instead of widening at the ends
- Washes, dries, and styles noticeably faster
Pro Tip: This is the best first undercut for very thick hair — the removed section is large enough to make a real, visible difference in how the bob behaves.
How To Style: Blow-dry the top with a round brush for shape; the undercut layer air-dries on its own. For shorter variations of the concept, see pixie cut inspiration.
Best For: Thick, coarse, or very dense hair; anyone whose bobs always flare out at the bottom.
5. Angled Bob with an Undercut Nape
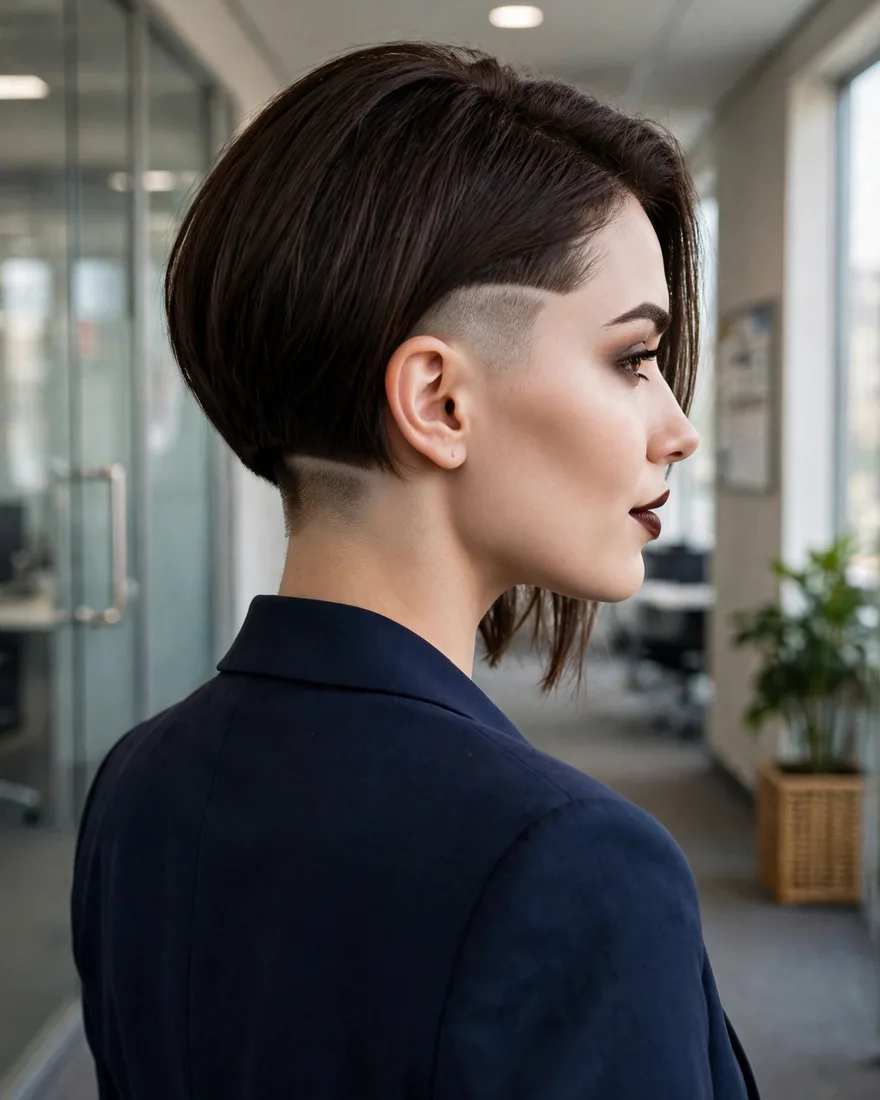
A sharp A-line silhouette — shorter at the back, longer toward the front — with the nape shaved underneath. The undercut sharpens the angle by removing the weight that would otherwise soften and round the back. The front length keeps the cut feminine and wearable while the back stays architectural.
Benefits:
- The undercut makes the A-line angle look sharper and more intentional
- Eliminates bulk at the back of the neck
- Front length keeps it soft and face-framing
Pro Tip: The angle of the cut and the height of the undercut should mirror each other — a mismatch between the two reads as a mistake rather than a design.
How To Style: Flat-iron the front pieces straight for maximum angle definition; tuck one side behind the ear to show off the line.
Best For: Straight or slightly wavy hair; round faces that benefit from the elongating front length.
6. Blunt Bob with a Nape Design
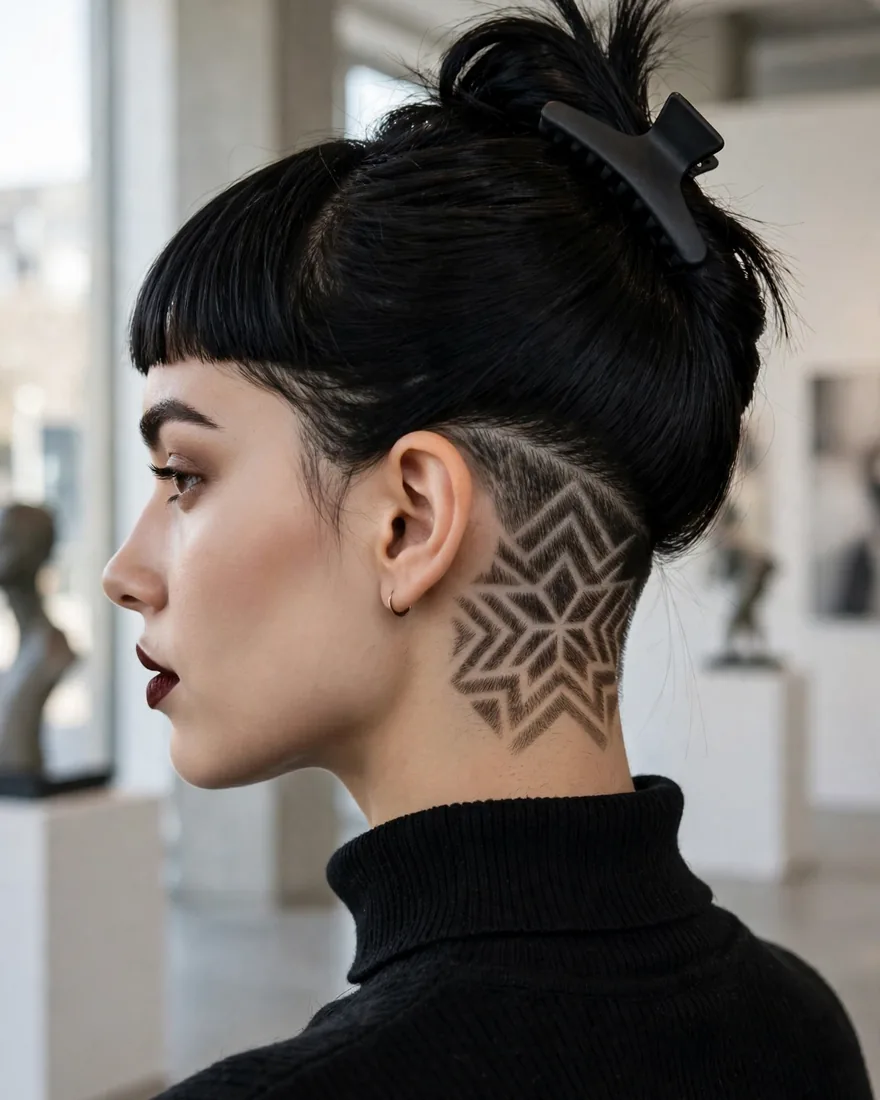
A one-length blunt bob with an etched design — clean lines, a moon, or geometric shapes — carved into the nape undercut. The design is your hidden signature, completely covered when your hair is down and revealed on your terms. It turns routine undercut maintenance into a small piece of personal art.
Benefits:
- The design turns a maintenance appointment into something to look forward to
- Hidden by default and shown only when you choose
- Simple designs stay crisp and readable for weeks
Pro Tip: Simple geometric designs grow out better than intricate ones — bold lines stay readable far longer than fine detailed work.
How To Style: Wear it down for a classic blunt bob; sweep it into a low ponytail or bun to reveal the design.
Best For: Straight hair, where etched designs read cleanest; anyone who wants their undercut to feel personal rather than generic.
7. Undercut Bob with Bangs
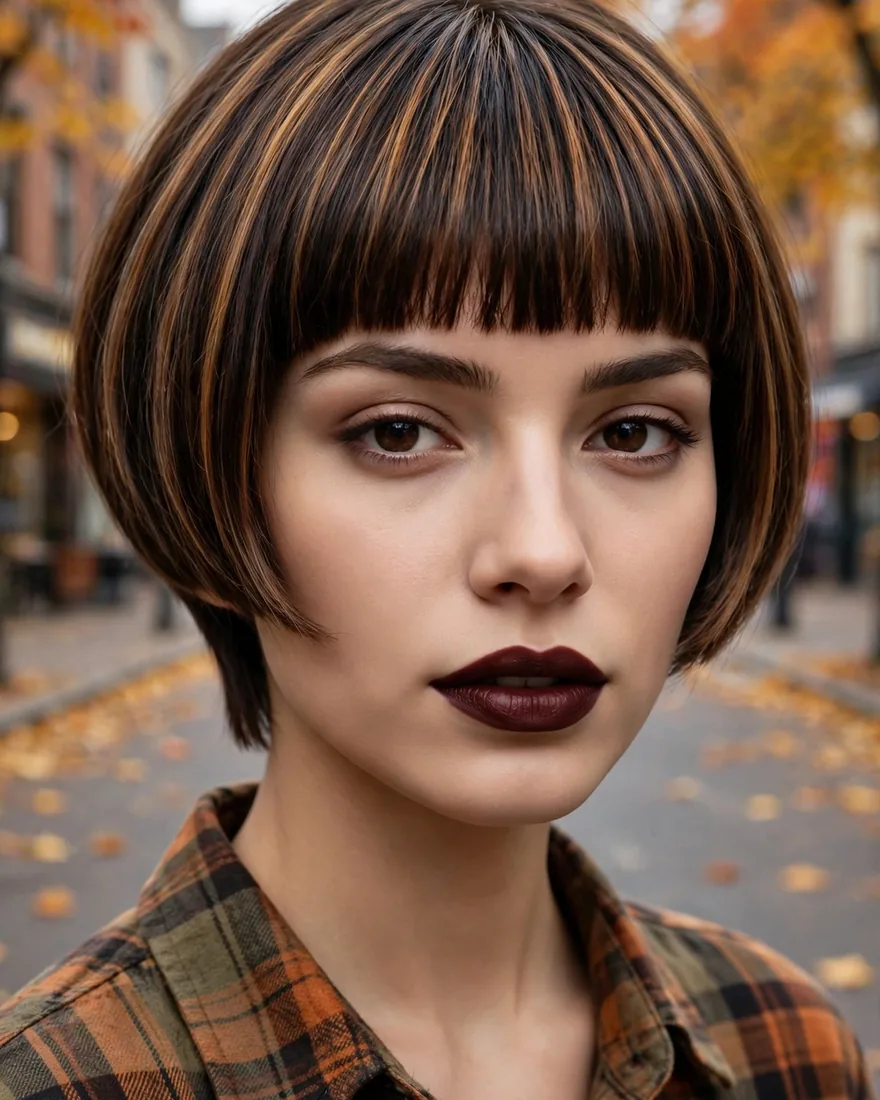
Bangs across the forehead with a shaved nape underneath — the contrast between the soft fringe and the hard undercut is the entire appeal. It works with blunt bangs, wispy bangs, or curtain bangs, and the fringe choice completely changes the personality of the cut.
Benefits:
- Bangs keep the front soft while the back stays edgy
- The undercut lightens the overall weight of the style
- Endless fringe variations to make it yours
Pro Tip: Keep the bangs slightly longer than you normally would — the undercut already supplies plenty of edge, so the fringe can afford to stay soft.
How To Style: Blow-dry bangs forward with a small round brush; the nape needs no styling at all. Browse types of bangs to pick the fringe that suits your face shape.
Best For: All face shapes, as long as the bang style is chosen to suit; straight to wavy textures.
8. A-Line Bob with Undercut and Baby Bangs
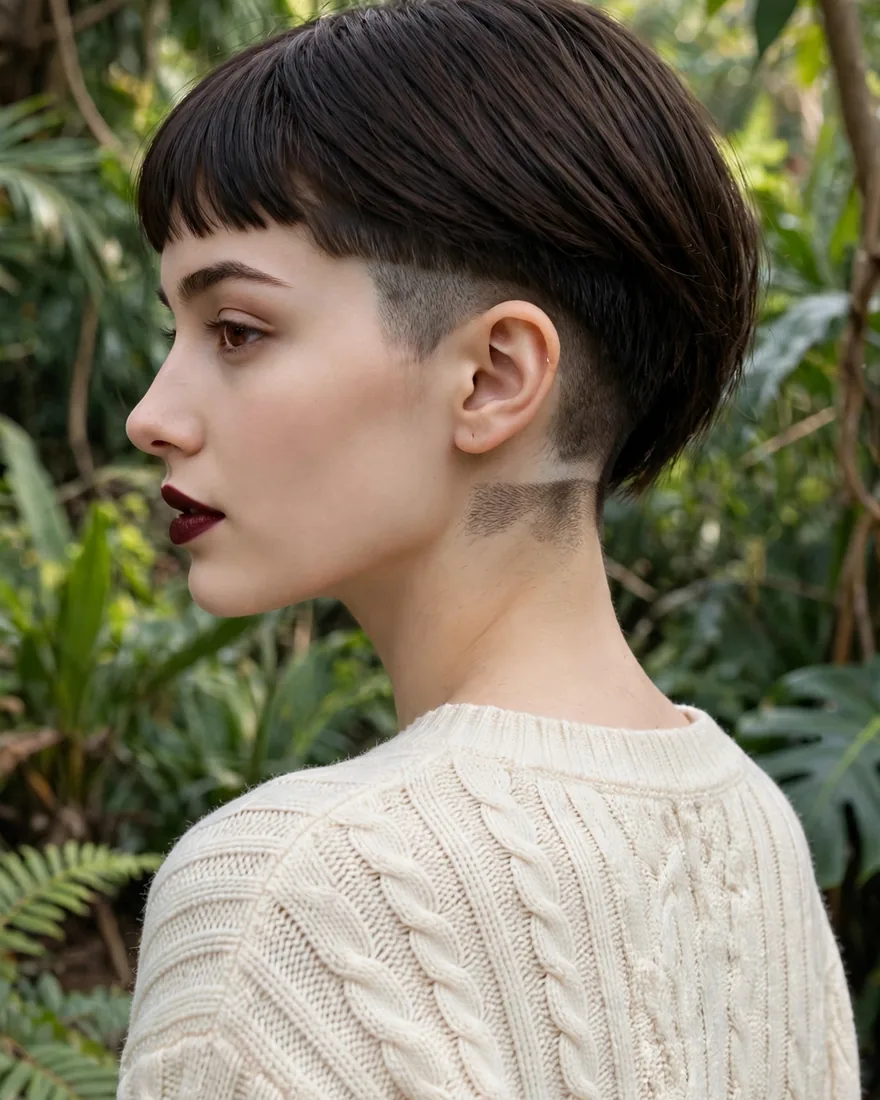
An angled bob paired with short baby bangs and a hidden nape undercut — a fashion-forward combination that reads editorial rather than everyday. The baby bangs are the visible statement; the undercut is the secret underneath that keeps the whole cut feeling light.
Benefits:
- High-fashion look without a complicated cut
- Baby bangs draw attention straight to the eyes
- The undercut keeps the back from feeling heavy or dated
Pro Tip: Baby bangs need trimming every two to three weeks to hold their length — budget that maintenance into your plan alongside the undercut re-shaves.
How To Style: Keep the bob sleek and smooth; work a touch of pomade through the bangs to keep them piecey rather than flat.
Best For: Oval and longer face shapes; fashion-forward wearers who like a statement fringe.
9. Undercut Bob with Tapered Sides
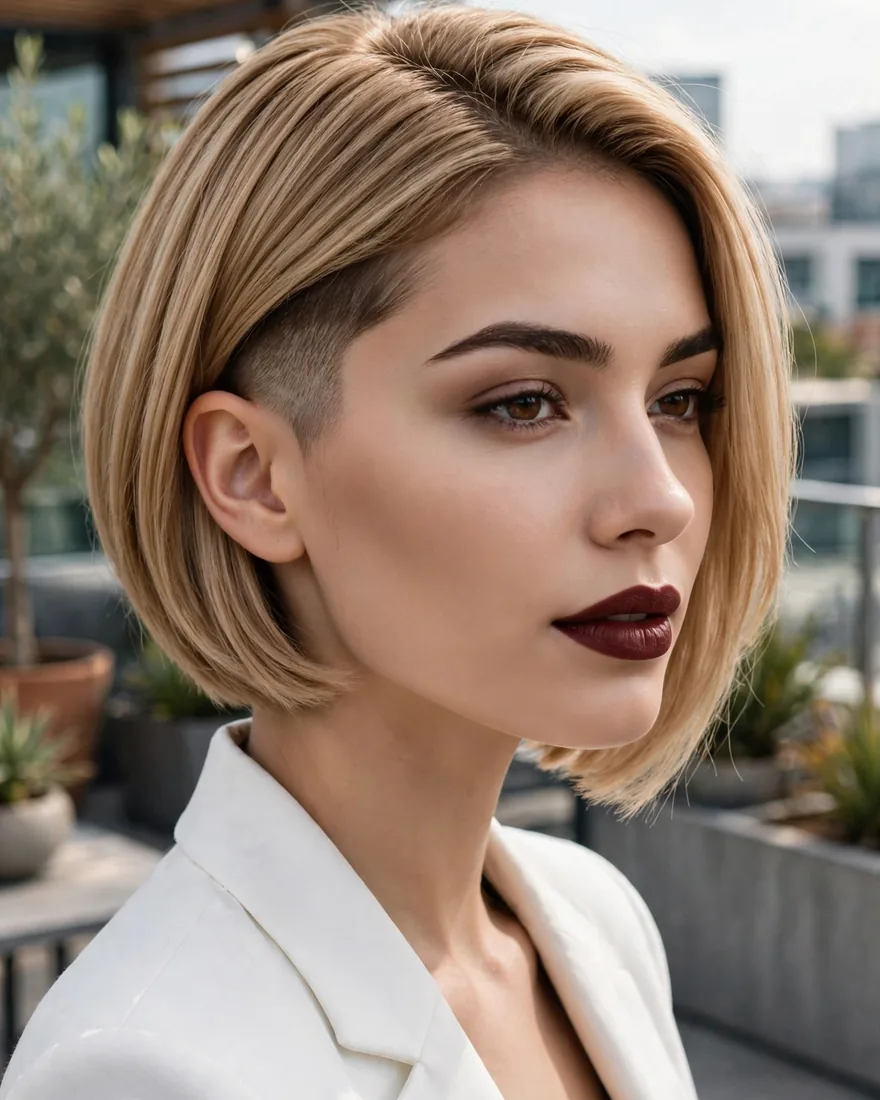
Instead of a hard shaved line, the sides taper gradually from the top length down toward the skin — a softer undercut that blends rather than contrasts. The fade-like transition looks deliberate and, importantly, grows out far more gracefully than a stark shave.
Benefits:
- Softer grow-out than a hard-line undercut
- The taper looks polished even between barber visits
- Reads as more professional than a stark shaved side
Pro Tip: Ask for a low taper that stays below the top layer’s fall line, so the blend stays hidden until you deliberately reveal it.
How To Style: Style the top exactly like a normal bob; the tapered sides need no daily attention.
Best For: Fine to medium hair; anyone nervous about committing to a harsh shaved line.
10. Curly Undercut Bob
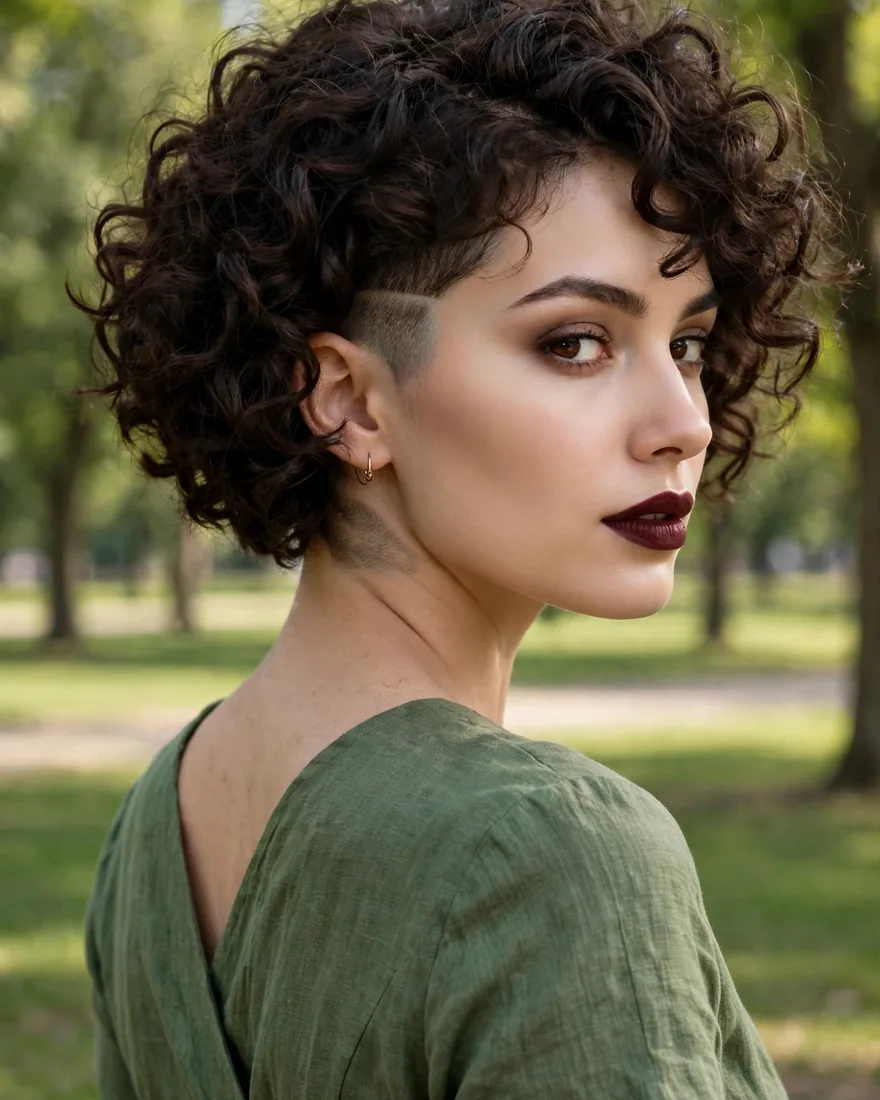
Curls on top with the nape and sides shaved underneath — the undercut removes the bottom bulk that makes curly bobs widen into a triangle. With the weight gone, the curls spring up with their natural shape instead of fighting gravity, and the whole silhouette stays controlled.
Benefits:
- Removes the bulk responsible for the dreaded curly-bob triangle
- Curls spring up with more definition and less weight
- Less hair to diffuse, dry, and style every wash day
Pro Tip: Leave the undercut slightly longer — a number two or three guard rather than skin-close — because a bare shave under tight curls can look patchy as it starts growing back.
How To Style: Define curls with your usual wash-day routine; the undercut section needs nothing. More curl-specific cutting advice lives in our curly hairstyles guide.
Best For: 3A to 3C curl patterns; thick curly hair that has always resisted neat bob shapes.
11. Undercut Bob with Undercolor
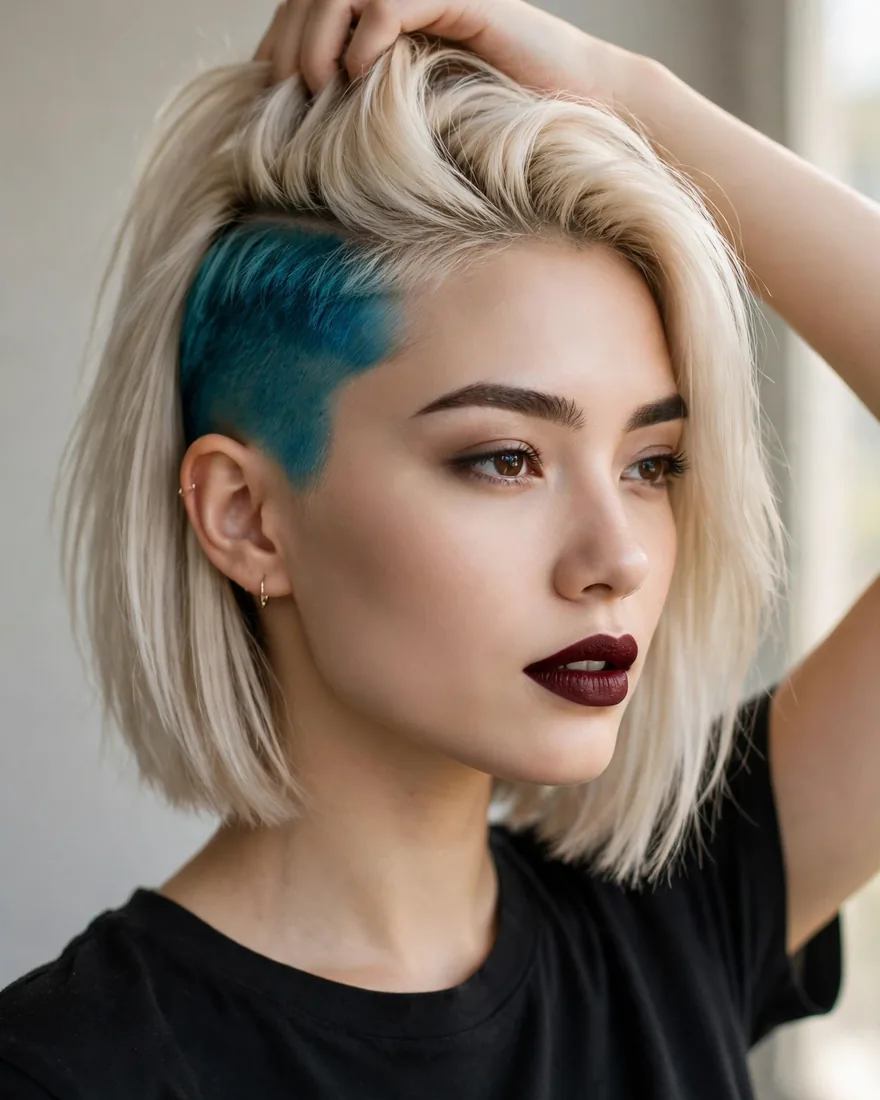
A hidden nape undercut dyed in a contrasting shade — platinum under dark hair, pastel under brown, copper under black. The color only appears when the hair is lifted, which turns every ponytail into a small reveal. It’s fashion color with training wheels.
Benefits:
- Bold color without committing your visible hair
- The small undercut section is quick and inexpensive to color
- Easy to change or grow out since it stays hidden
Pro Tip: The undercut area is small, so vivid or pastel shades are genuinely low-risk here — if you hate the color, it grows out under cover and nobody sees the awkward phase.
How To Style: Wear it down for your natural color; tie it up whenever you want the undercolor on display.
Best For: Dark hair, where the contrast pops hardest; anyone curious about fashion color without the full commitment.
12. Inverted Bob with Nape Undercut
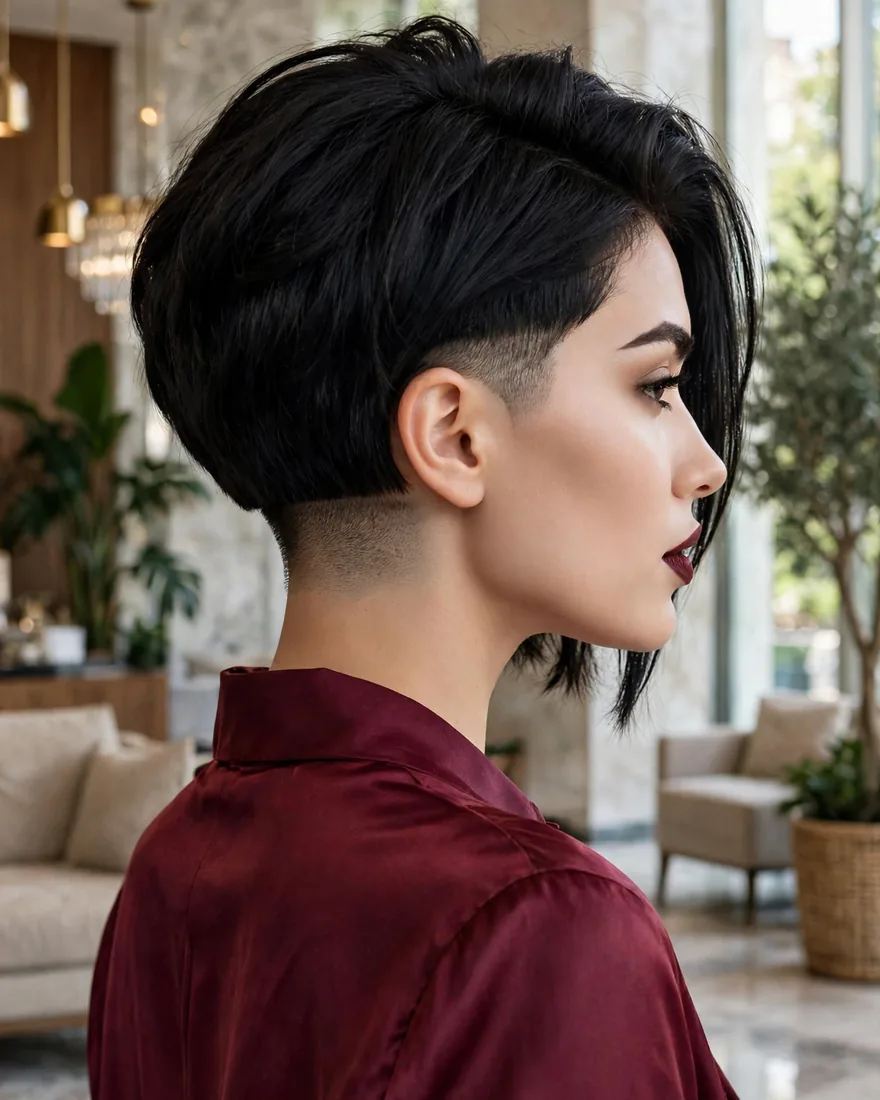
A stacked, graduated bob — shorter at the back, building volume through the crown — with the nape shaved clean underneath. The undercut replaces the stacked bulk that normally sits heavy at the neckline, so you keep the crown volume and lose the weight.
Benefits:
- The classic stacked shape without the heavy neckline
- Crown volume stays while nape weight disappears
- Looks precise and architectural from every angle
Pro Tip: The graduation line and the undercut height need to align cleanly — a visible step between the two reads as a cutting error, not a design choice.
How To Style: Blow-dry with a round brush, directing the back section under; finish with a light smoothing serum through the ends.
Best For: Straight hair; fine to medium density that wants volume at the crown without weight at the nape.
13. Side-Swept Undercut Bob
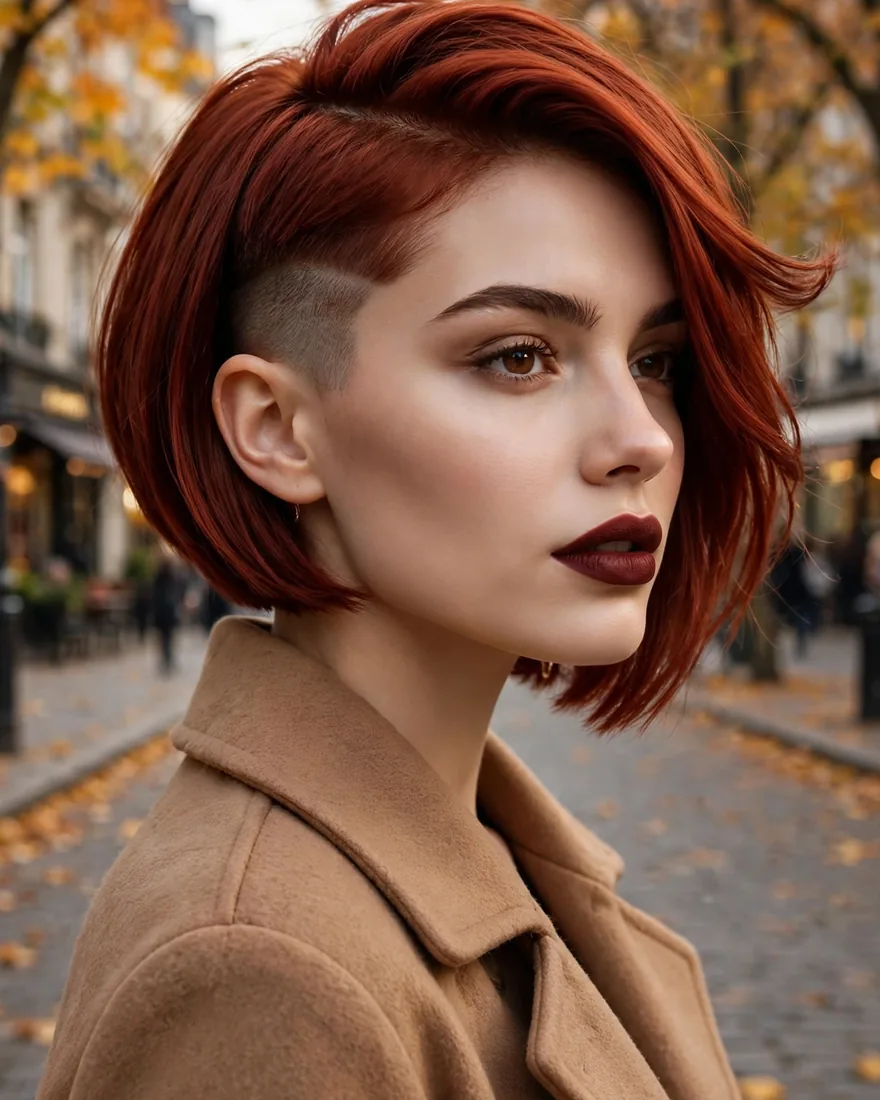
A deep side part with the undercut on the lighter side — the sweep of hair covers the shave completely, and tucking it back reveals it in seconds. It’s one cut with two personalities: hidden and visible on demand, which makes it the most versatile cut on this list.
Benefits:
- One cut, two looks — sweep over to hide, tuck back to reveal
- The deep part builds natural volume at the crown
- Flattering asymmetry that suits most face shapes
Pro Tip: Part on the side opposite your natural growth pattern — fighting your cowlick slightly gives the sweep more dramatic lift and hold.
How To Style: Blow-dry with a deep side part and set the sweep with a light-hold spray. For more textured takes on the shape, see choppy bob hairstyles.
Best For: Most face shapes; anyone who wants to control exactly when the undercut shows.
How the 13 undercut bob styles compare at a glance:
| Style | Undercut Type | Commitment Level |
|---|---|---|
| Classic | Shaved nape | Medium — visible from behind |
| Hidden Nape | Hidden nape undercut | Low — invisible when down |
| Asymmetrical Side | Visible shaved side | High — always on show |
| Pixie Bob | Pixie-short underlayer | Medium — hidden, high bulk removal |
| Angled | Shaved nape | Medium — visible from behind |
| Nape Design | Etched nape design | Medium — needs design upkeep |
| With Bangs | Shaved nape | Medium — bangs add trim visits |
| A-Line, Baby Bangs | Hidden nape undercut | Medium — bang trims required |
| Tapered Sides | Gradual taper | Low-medium — graceful grow-out |
| Curly | Shaved nape and sides | Medium — curls hide regrowth well |
| Undercolor | Hidden nape, dyed | Medium — color fades need refresh |
| Inverted | Shaved nape | Medium — precision cut upkeep |
| Side-Swept | Shaved side, covered | Low-medium — hide or reveal at will |
How to Choose the Right Undercut Bob: Hidden vs Visible, Nape vs Side
The single most important decision isn’t which style photo you like — it’s how much of the undercut the world gets to see. A hidden nape undercut disappears completely under a top layer, which means no workplace conversations and no daily explaining. A visible shaved side is a public statement you wear every single day, and it needs to match your actual life, not just your Pinterest board. Be honest about your job, your social circles, and how much attention you genuinely want before you pick.
Placement matters just as much as visibility. The nape is the forgiving zone: it’s easy to hide, simple to grow out under longer hair, and flattering on nearly everyone. The side is the bold zone: it reshapes your whole silhouette, draws the eye to one side of your face, and takes months longer to grow out because there’s no top layer to cover it. If this is your first undercut, start at the nape — you can always go bolder later, but you can’t un-shave a side. And if you love short, high-impact cuts in general, our very short hairstyles guide covers more ways to wear the drama.
Who should skip it entirely? If your workplace has a strict appearance policy you can’t negotiate, if you hate regular salon appointments, or if you’re growing your hair out toward a longer goal, the undercut works against you on all three fronts. There’s no shame in admiring the look and choosing a cut with less upkeep — the wrong commitment always looks worse than the right compromise.
What to Ask Your Barber or Stylist Before the Clippers
Walk in with specifics, because “just shave a bit underneath” is how regret stories begin. Start with placement and size: nape only or nape plus sides, and exactly how high the shave should go — two finger-widths above the hairline is subtle, up to the occipital bone is bold. Then talk guard length: a number one guard leaves visible stubble, a two or three leaves soft shadow, and skin-close (no guard) gives the starkest contrast but the most obvious grow-out. Ask whether they recommend a hard line or a fade into the longer hair — a fade blends better and buys you an extra week between appointments.
Next, settle the hairline shape of the undercut itself. A straight horizontal line is classic and clean; a V-shape at the nape looks sharper and more deliberate, especially with angled and inverted bobs. If you want a design etched in, bring a reference photo and ask how often it needs re-carving — fine detail fades fast. Finally, ask the question most people forget: “show me exactly where the top layer falls when my hair is down.” You need to see the coverage with your own eyes before the clippers start, not discover a gap in the bathroom mirror later. For cuts that play with similar disconnected lengths, short shaggy hair is worth a look too.
The Real Commitment: Re-Shave Schedule, Grow-Out, and the Regret Plan
Here’s the part the galleries never mention: a fresh undercut stays crisp for about two weeks. By week three the stubble softens the line, and by week four you’re either re-shaving or living with a fuzzy grow-out. That means a barber or salon visit roughly every two to four weeks, indefinitely, for as long as you keep the cut. Those visits are quick and usually inexpensive individually, but they add up over a year into a real line item in your beauty budget — factor it in honestly before you commit.
The grow-out is the harder truth. A shaved nape grows back under cover and the awkward phase stays mostly hidden, but a shaved side has nowhere to hide. Growing out a side undercut takes several months, and the middle stage — too long to look shaved, too short to blend — is genuinely awkward. The graceful exit strategy is a tapered grow-out: ask your barber to blend the regrowth with progressively longer guards instead of letting it grow wild, and use headbands, scarves, or strategic tucking during the worst weeks.
None of this means you shouldn’t get one — it means you should get one with open eyes. People who love their undercut aren’t the ones with the boldest photos; they’re the ones who budgeted the maintenance, picked a placement that fit their life, and knew the grow-out plan before day one. The clippers are a ten-minute decision with a months-long tail. Respect the tail.
Undercut Bob FAQs
How often does an undercut need re-shaving?
Plan on every two to four weeks. A fresh undercut stays crisp for about two weeks; by week three the regrowth softens the line, and by week four it looks grown out. Hidden nape undercuts can stretch a little longer since the top layer covers the regrowth, but visible shaved sides need the full schedule to stay sharp.
Will an undercut bob work for fine hair?
It can, but choose carefully. A hidden nape undercut works well on fine hair because it removes a small amount of weight at the neckline without thinning the visible lengths. Avoid large shaved sections or pixie-short underlayers on fine hair — removing too much can make the remaining hair look thinner, which defeats the purpose.
Can I hide an undercut bob for work?
A hidden nape undercut is completely invisible when your hair is worn down, so yes — it’s the safest option for conservative workplaces. Tapered sides also stay discreet. A visible shaved side cannot be hidden without styling tricks, so skip that placement if your job has a strict appearance policy.
How long does it take to grow out a shaved side?
Several months. Hair grows roughly half an inch per month, and a shaved side needs to reach two to three inches before it can blend into the longer hair. The middle stage — too long to look shaved, too short to lie flat — is the awkward part. A barber can taper the regrowth with progressively longer guards to make the transition less jarring.
Does an undercut damage your hair?
Clippers don’t damage hair the way bleach or heat does — you’re simply cutting it very short. The main risk is mechanical: repeated close shaving can irritate the scalp if done too aggressively, and etched designs need a light touch. Keep the shaved area moisturized and you won’t have damage issues.
What guard length should I ask for?
A number one guard leaves visible stubble and the boldest look; a two or three guard leaves soft shadow that’s more forgiving as it grows. Skin-close with no guard gives maximum contrast but the most obvious regrowth. For a first undercut, a two guard is the sweet spot — clearly an undercut, but not shocking.
Is this haircut high maintenance?
More than a regular bob, less than you’d fear. The daily styling is actually easier — there’s less hair to wash, dry, and manage. The maintenance cost is the calendar: re-shave appointments every two to four weeks. If you’re someone who already visits the salon monthly, it barely changes your routine.
Who should skip this style?
Skip it if your workplace won’t allow visible shaved sections, if you dislike regular salon appointments, or if you’re actively growing your hair toward a longer goal — the undercut works against length goals. Also reconsider if you have scalp conditions like psoriasis or severe sensitivity in the nape area, since frequent clipper work can aggravate them.
An undercut bob rewards the honest and punishes the impulsive — and now you’re in the first group. You know the re-shave rhythm, the grow-out reality, and exactly what to tell your barber before the clippers come out. Pick the placement that fits your actual life, not just the photo that tempted you, and the cut will feel like freedom instead of a chore. The boldest version of this haircut isn’t the shaved side or the etched design — it’s the one you chose with your eyes open.