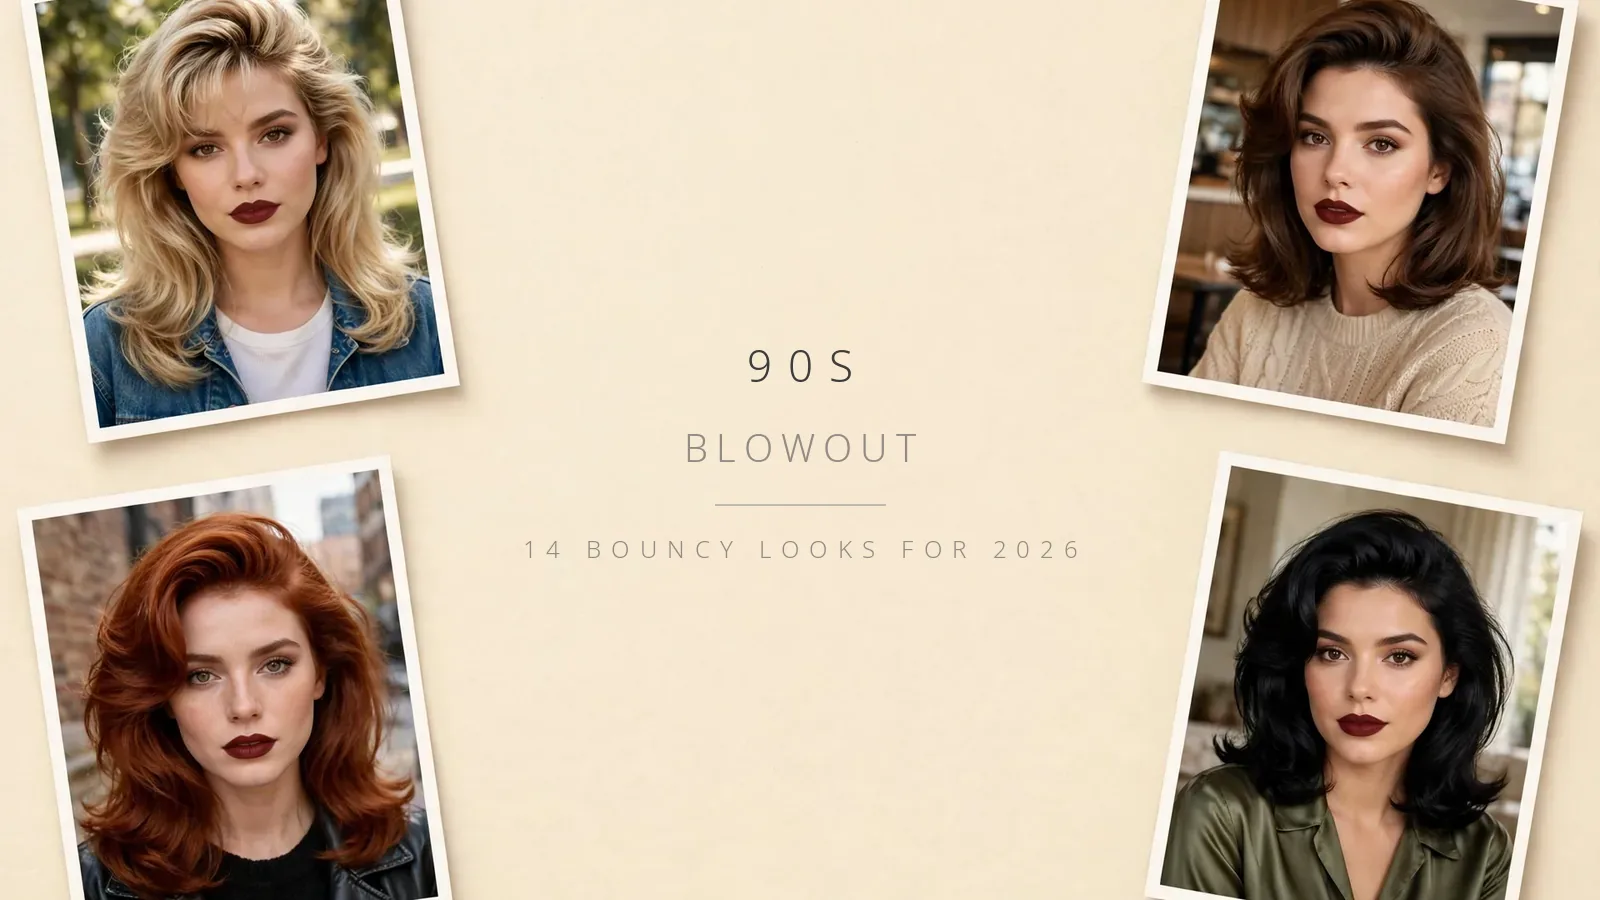
90s Blowout – 14 Bouncy Looks for 2026
Getting a real 90s blowout at home feels like a magic trick everyone else learned except you — the salon version floats and swings, while yours falls flat before you leave the house. Most tutorials skip the parts that actually matter: which method fits your hair type, how long the volume honestly lasts, and what to ask for at the salon.
This guide fixes that. You get 14 distinct 90s blowout ideas, each with honest styling notes, followed by the decision layer competitors skip — a method comparison on time and cost, a hair-type chooser, and a real plan for making the volume survive past day one.
Table of Contents
- 14 90s Blowout Ideas Worth Trying
- Classic Supermodel Blowout
- Face-Framing Layer Blowout
- Long Blowout with Flipped Ends
- Shoulder-Length Bouncy Blowout
- Rounded Blowout Bob
- Blowout with Curtain Bangs
- Deep Side-Part Blowout
- Middle-Part Soft Blowout
- 90s Blowout Lob
- Butterfly-Layer Blowout
- Blowout for Fine Hair
- Blowout for Thick Hair
- Wavy-Hair Blowout
- Heatless Roller Blowout
- How to Choose the Right 90s Blowout for Your Hair Type
- Round Brush vs Rollers vs Heatless: Time, Cost, and Trade-Offs
- How to Make Your Blowout Last Three Days
- Frequently Asked Questions
- How long does a 90s blowout actually last?
- Can I do a 90s blowout on fine hair without damage?
- What should I ask for at the salon for a 90s blowout cut?
- Round brush vs blowout brush — which is better?
- Why does my blowout fall flat within hours?
- Can curly or coily hair get a 90s blowout?
- How do I refresh a second-day blowout?
- Is a salon blowout worth it vs doing it at home?
14 90s Blowout Ideas Worth Trying
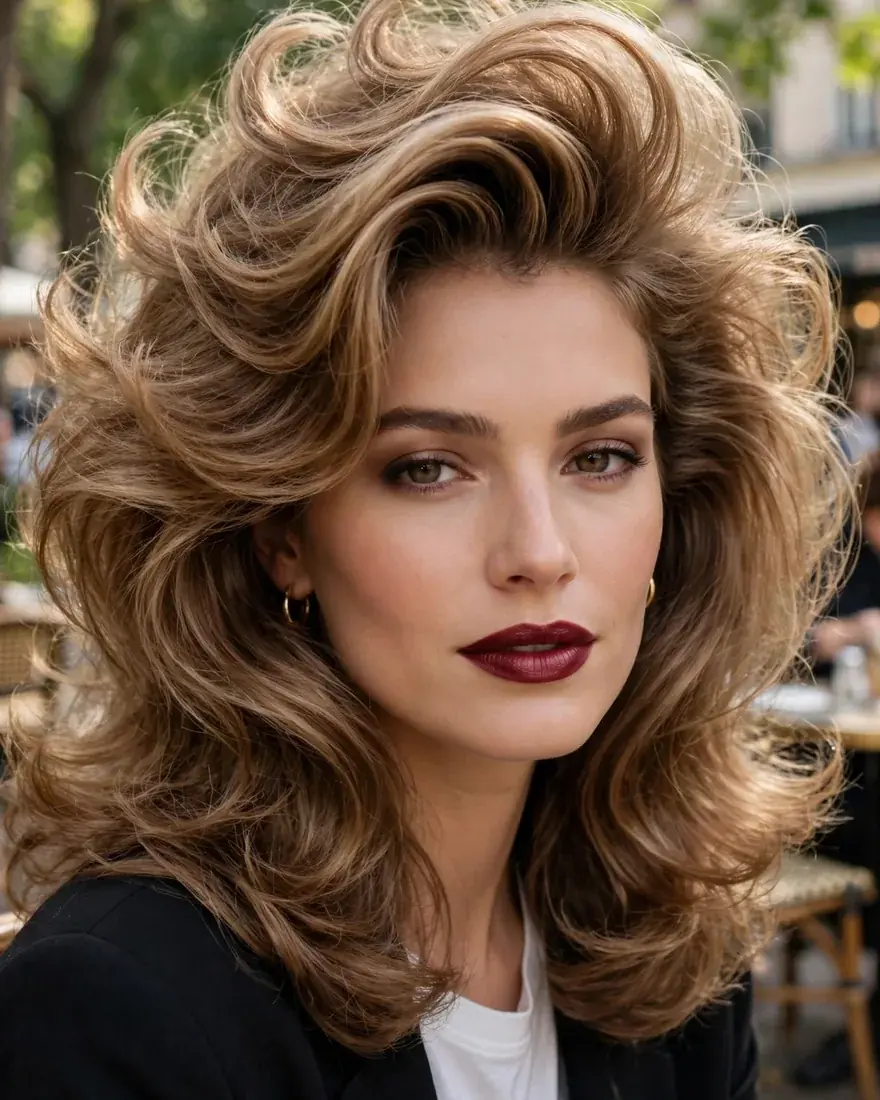
1. Classic Supermodel Blowout
https://fashionsparkzone.com/wp-content/uploads/2026/10/classic-supermodel-blowout.webp
The one that started it all — massive root lift, rolled-under ends, and that glossy, camera-ready swing. This is the Cindy Crawford silhouette everyone pictures when they hear the words 90s blowout.
Benefits:
- Instantly recognizable, photo-ready volume
- Works on long and medium lengths
- The reference point every stylist understands
Pro Tip: Rough-dry to about 80 percent before you touch the round brush — starting on soaking hair doubles your time and flattens the lift.
How To Style: Apply root-lifting mousse on damp hair, then blow-dry in 2-inch sections with a large round brush, overdirecting each section upward at the root and rolling the ends under. Cool-shot every section before moving on.
Best For: Medium to long hair with medium density; the easiest version to learn first.
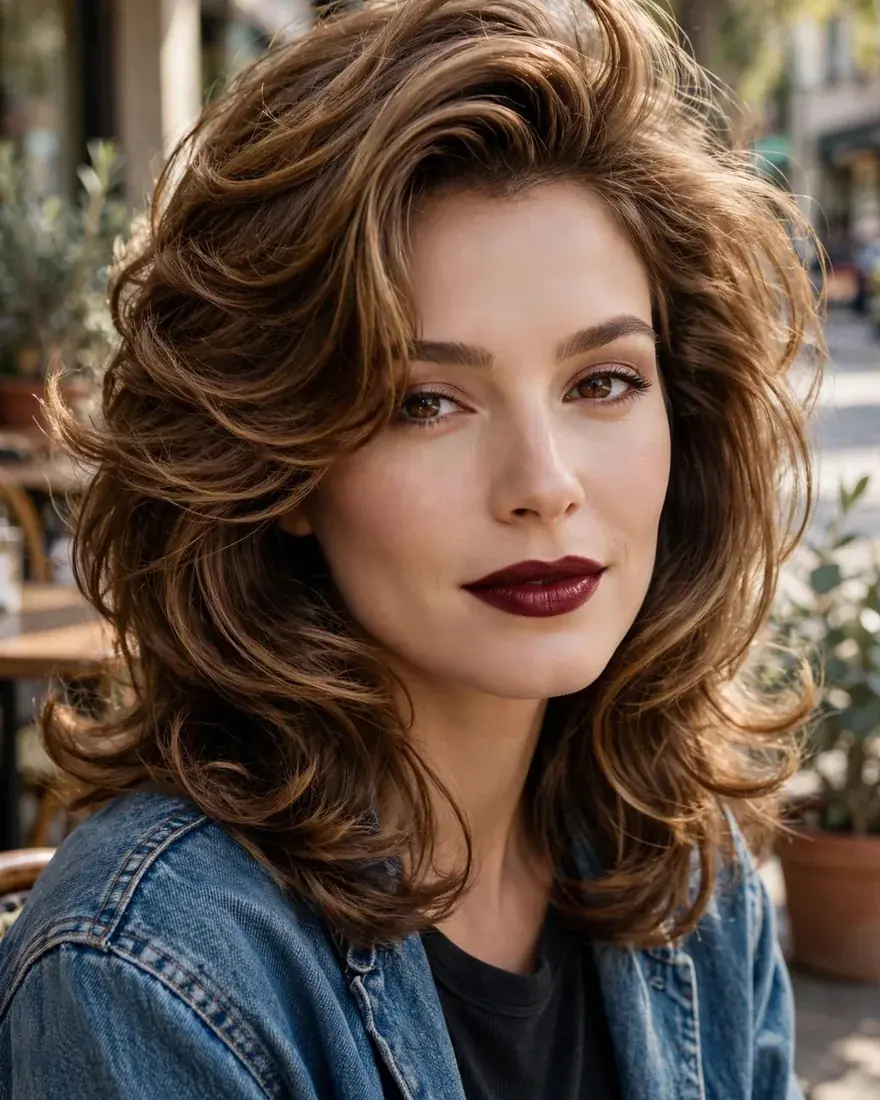
2. Face-Framing Layer Blowout
https://fashionsparkzone.com/wp-content/uploads/2026/10/face-framing-layer-blowout.webp
Long connected layers get brushed outward and away from the face, so the front of your hair sweeps open like curtains. It softens strong jawlines and gives fine hair the illusion of movement.
Benefits:
- Makes fine hair look fuller around the face
- Grows out gracefully between cuts
- Flattering on round and square face shapes
Pro Tip: Brush the two front sections forward and outward — not straight down — to get that open, airy sweep instead of limp strands stuck to your cheeks.
How To Style: On damp hair, apply heat protectant and a pea-sized amount of mousse. Blow-dry the back smooth, then take the front layers on the round brush and roll them away from the face, finishing with a cool shot.
Best For: Long hair with face-framing layers; great for first-timers who want visible change without a big cut.
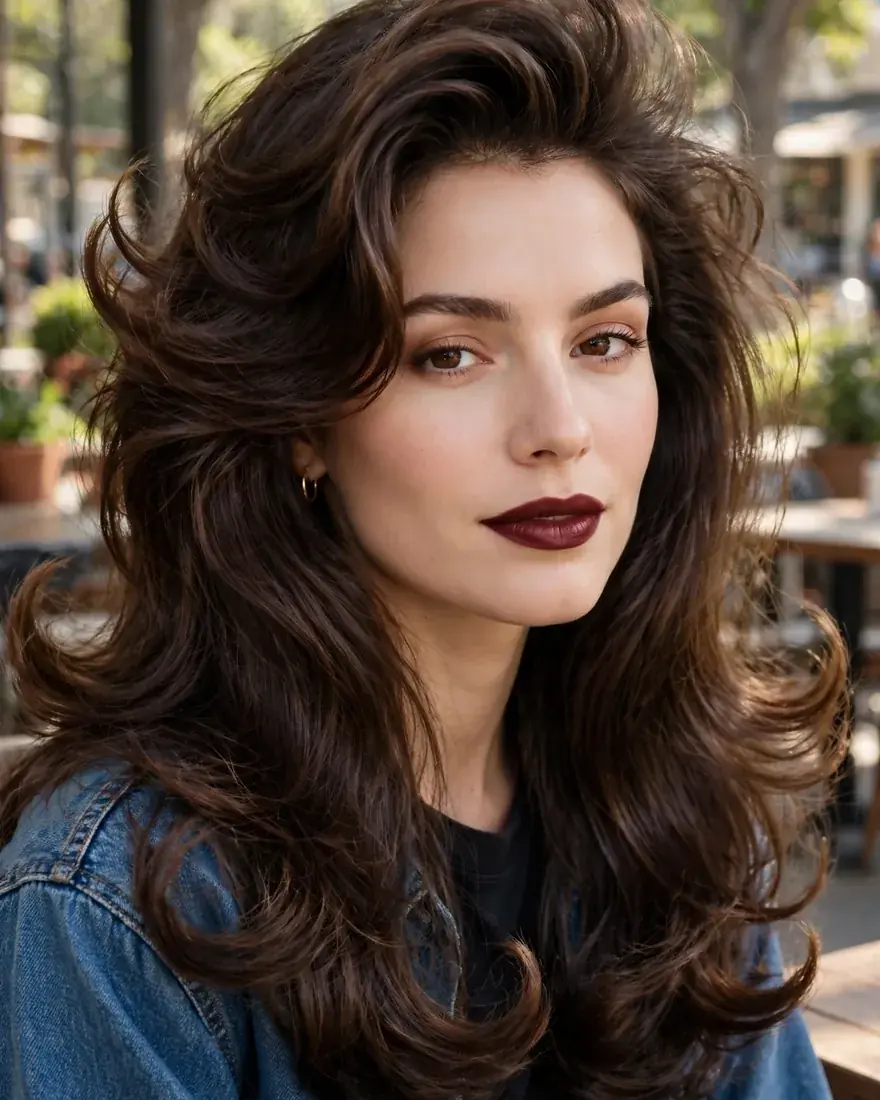
3. Long Blowout with Flipped Ends
https://fashionsparkzone.com/wp-content/uploads/2026/10/long-blowout-with-flipped-ends.webp
The ends kick outward instead of curling under, which gives long hair a bouncy, playful finish rather than a polished one. It reads younger and more casual than the classic supermodel version.
Benefits:
- Adds bounce without adding layers
- Keeps very long hair from looking heavy
- Photographs beautifully from the side
Pro Tip: Flip each section up and over the brush at the very end of the stroke — the flick comes from the wrist turn, not from holding the dryer there longer.
How To Style: Blow-dry sections smooth and straight, then re-roll just the last 2-3 inches over the round brush with the ends pointing up and out. Set with a cool shot and a light flexible hairspray.
Best For: Long, straight or slightly wavy hair that holds a shape; needs at least bra-strap length for the flip to read.
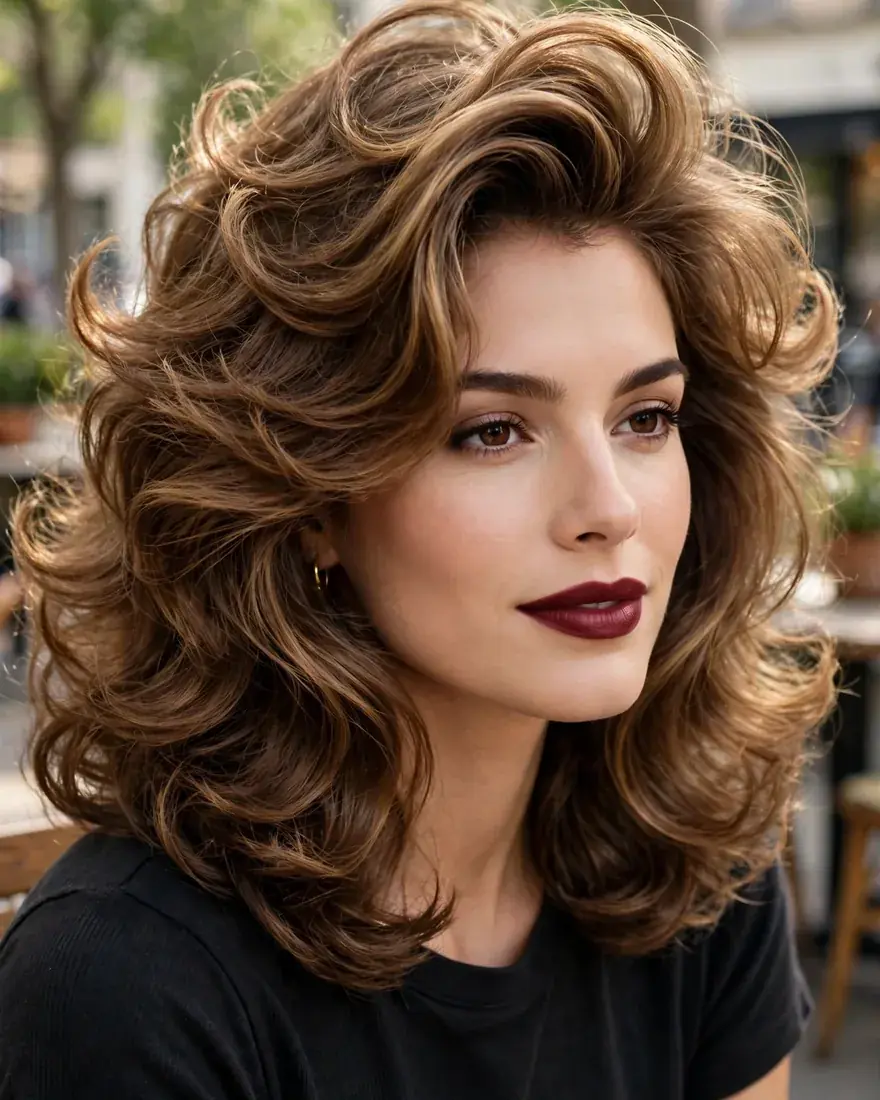
4. Shoulder-Length Bouncy Blowout
https://fashionsparkzone.com/wp-content/uploads/2026/10/shoulder-length-bouncy-blowout.webp
Shorter hair actually holds a blowout better — there is less weight pulling the volume down. This is the swingy, touchable version that bounces when you walk.
Benefits:
- Volume lasts longer than on long hair
- Quickest version to style at home
- Ideal grow-out stage cut
Pro Tip: Use a medium round brush, not a large one — a brush that is too big for shoulder length just slides through without gripping.
How To Style: Section into top and bottom halves. Blow-dry the bottom smooth, then take the top in 2-inch sections, lifting at the root and rolling ends under. Finish with the cool shot and brush through once.
Best For: Shoulder-length cuts of any texture; the best starter length for learning the round-brush technique.
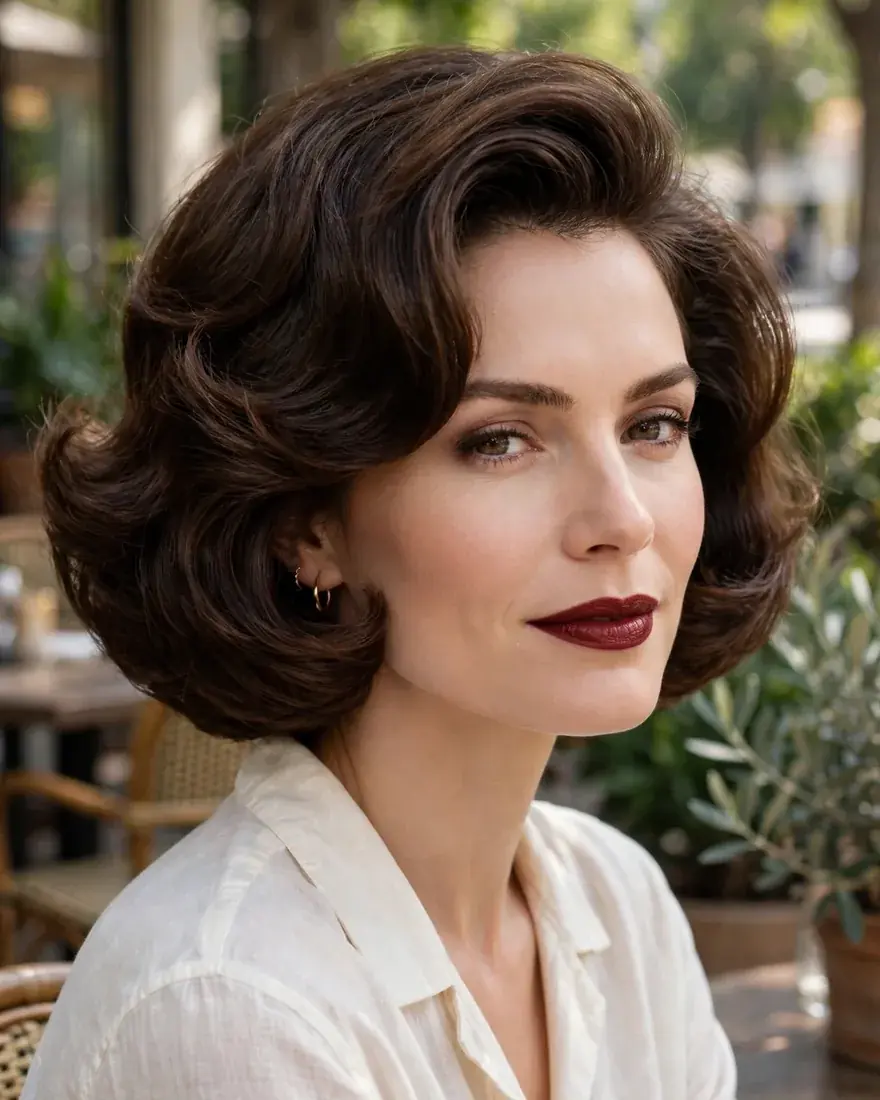
5. Rounded Blowout Bob
https://fashionsparkzone.com/wp-content/uploads/2026/10/rounded-blowout-bob.webp
A chin-to-neck-length bob blown into a smooth, rounded bell shape with tucked-under ends. It is the most polished of the 90s blowout family and the closest to a salon-finish look.
Benefits:
- Looks expensive and intentional
- Minimal daily styling once cut right
- Strong option for job interviews and events
Pro Tip: The cut does 70 percent of the work — ask for a graduated, stacked back with soft internal layering so the round shape forms naturally.
How To Style: Blow-dry with a medium round brush, wrapping each section fully around the brush and rolling under. Tuck the ends in with the brush on the final pass, cool-shot, and smooth with shine serum.
Best For: Straight to slightly wavy bobs; see also our long bob guide if you want more length with the same finish.
6. Blowout with Curtain Bangs

https://fashionsparkzone.com/wp-content/uploads/2026/10/blowout-with-curtain-bangs.webp
The blowout gets paired with parted, face-framing fringe that opens in the middle and blends into the layers. The bangs get the same round-brush treatment so everything moves as one piece.
Benefits:
- Bangs and blowout styled together, not fighting
- Hides a high forehead elegantly
- The most requested salon combination of the decade
Pro Tip: Dry the bangs first, while they are still very damp — wet fringe sets into cowlicks fast, and you cannot fix it once it is dry.
How To Style: Place a velcro roller in each bang section while it is still warm from the brush, pointing outward. Leave the rollers in while you finish the rest of the hair, then remove and brush through.
Best For: Curtain or bottleneck fringe on medium to long hair; check our types of bangs guide to pick your fringe first.
7. Deep Side-Part Blowout
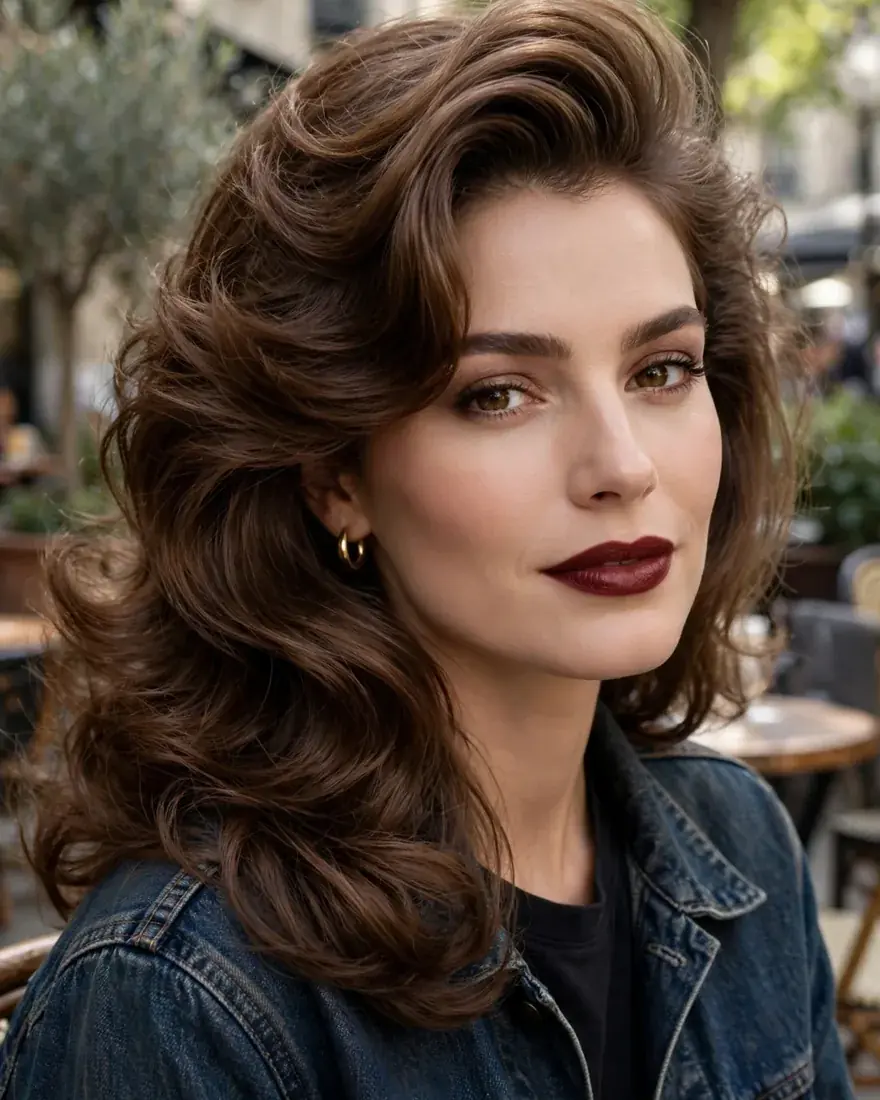
https://fashionsparkzone.com/wp-content/uploads/2026/10/deep-side-part-blowout.webp
Parting deep on one side throws a heavy sweep of volume across the forehead and gives the whole style an asymmetric, editorial feel. It is the fastest way to make a standard blowout look different.
Benefits:
- Instant drama with zero extra tools
- Adds volume at the crown for free
- Great for camouflaging thinning at the part
Pro Tip: Set the part while hair is soaking wet — trying to force a deep part into dry hair just creates a fight you will lose by noon.
How To Style: Comb the deep part in on wet hair, then blow-dry the heavy side overdirected to the opposite side for maximum lift before sweeping it back into place.
Best For: Anyone wanting a change without a cut; works on all lengths past the chin.
8. Middle-Part Soft Blowout
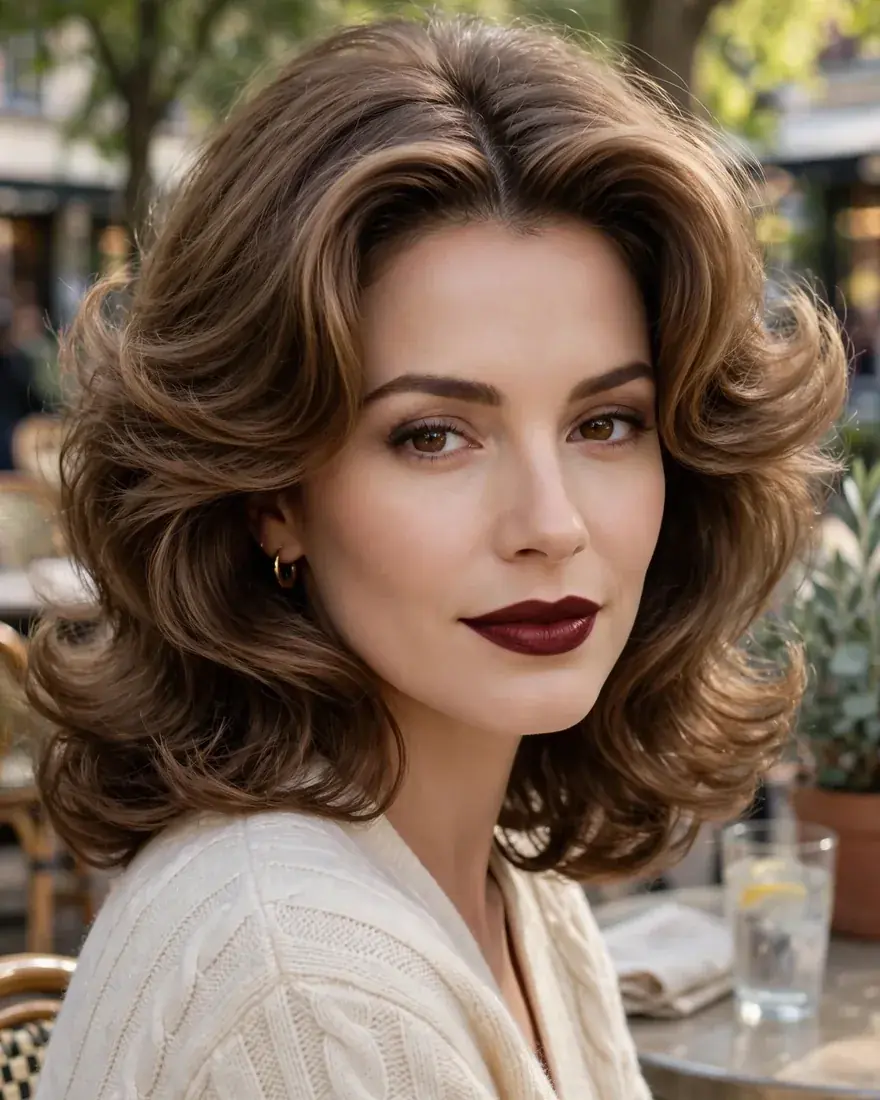
https://fashionsparkzone.com/wp-content/uploads/2026/10/middle-part-soft-blowout.webp
A centered part with softer, less exaggerated volume — the everyday-wearable version. The ends still turn under, but the overall effect is relaxed rather than red-carpet.
Benefits:
- The most versatile, low-drama option
- Suits oval and heart face shapes
- Easiest to refresh on day two
Pro Tip: Keep the root lift moderate — overdoing it with a middle part tips the look into costume territory fast.
How To Style: Blow-dry with a large round brush, lifting roots just slightly and rolling ends under with a loose wrap rather than a tight roll. Brush out thoroughly for softness.
Best For: Oval, heart, and diamond face shapes; fine to medium density.
9. 90s Blowout Lob

https://fashionsparkzone.com/wp-content/uploads/2026/10/90s-blowout-lob.webp
The collarbone-length sweet spot: long enough to show the signature flip and bounce, short enough to hold volume for days. The lob is arguably the best canvas for this style.
Benefits:
- Holds volume longer than longer lengths
- The most requested salon length for blowouts
- Grows out into the shoulder-length version cleanly
Pro Tip: Ask for long, blended layers rather than choppy ones — disconnected layers fight the smooth 90s finish.
How To Style: Blow-dry in horizontal sections with a large round brush, rolling everything under and away from the face. Velcro rollers on the top section while it cools add extra staying power.
Best For: The short hair curious who are not ready for a bob; medium density and up.
10. Butterfly-Layer Blowout
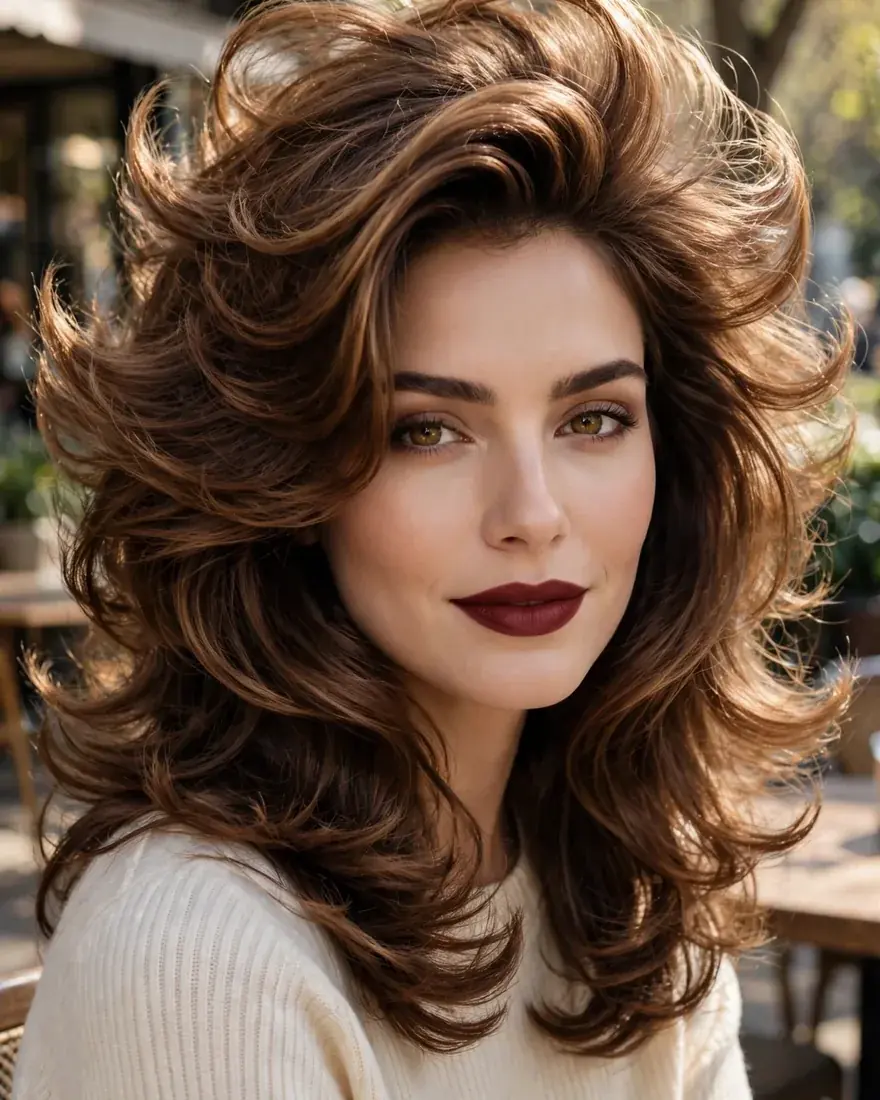
https://fashionsparkzone.com/wp-content/uploads/2026/10/butterfly-layer-blowout.webp
Short, bouncy layers on top with long lengths underneath, all blown out to flip and flutter like wings. It is the 90s blowout merged with the butterfly cut — maximum movement.
Benefits:
- Huge visual volume even on fine hair
- The layers do half the styling work
- Very forgiving as it grows out
Pro Tip: The top layers must be genuinely short (cheekbone to chin) for the wing effect — long layers just look like a regular blowout.
How To Style: Dry the short top layers first, flicking them outward with the round brush, then smooth the long under-layers with ends turned under. The contrast between the two is the whole point.
Best For: Fine to medium hair wanting big volume; pairs with our medium shag haircuts if you want a more textured take.
11. Blowout for Fine Hair
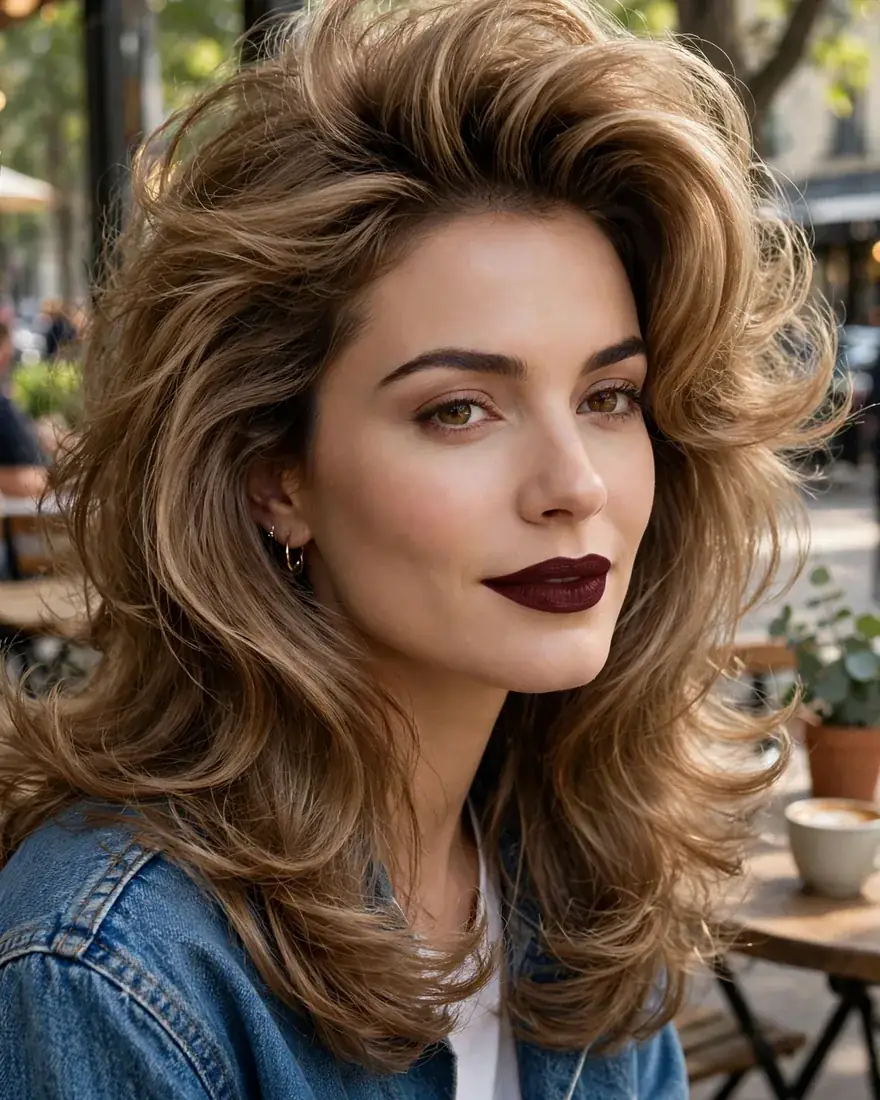
https://fashionsparkzone.com/wp-content/uploads/2026/10/blowout-for-fine-hair.webp
A lighter-touch version built for hair that goes flat by lunchtime: less product, smaller sections, and heat discipline. Done right, fine hair actually holds a blowout surprisingly well because there is less weight.
Benefits:
- Proves fine hair can do big volume
- Uses minimal product so hair stays clean
- Teaches heat discipline that protects hair long-term
Pro Tip: Skip heavy conditioners on blowout day — a lightweight conditioner on the ends only keeps roots from going limp.
How To Style: Work in 1.5-inch sections (smaller than you think), overdirect every section straight up at the root, and cool-shot each one. Velcro rollers on the crown while you do makeup lock in the lift.
Best For: Fine, low-density hair; anyone who heat-styles several times a week.
12. Blowout for Thick Hair
https://fashionsparkzone.com/wp-content/uploads/2026/10/blowout-for-thick-hair.webp
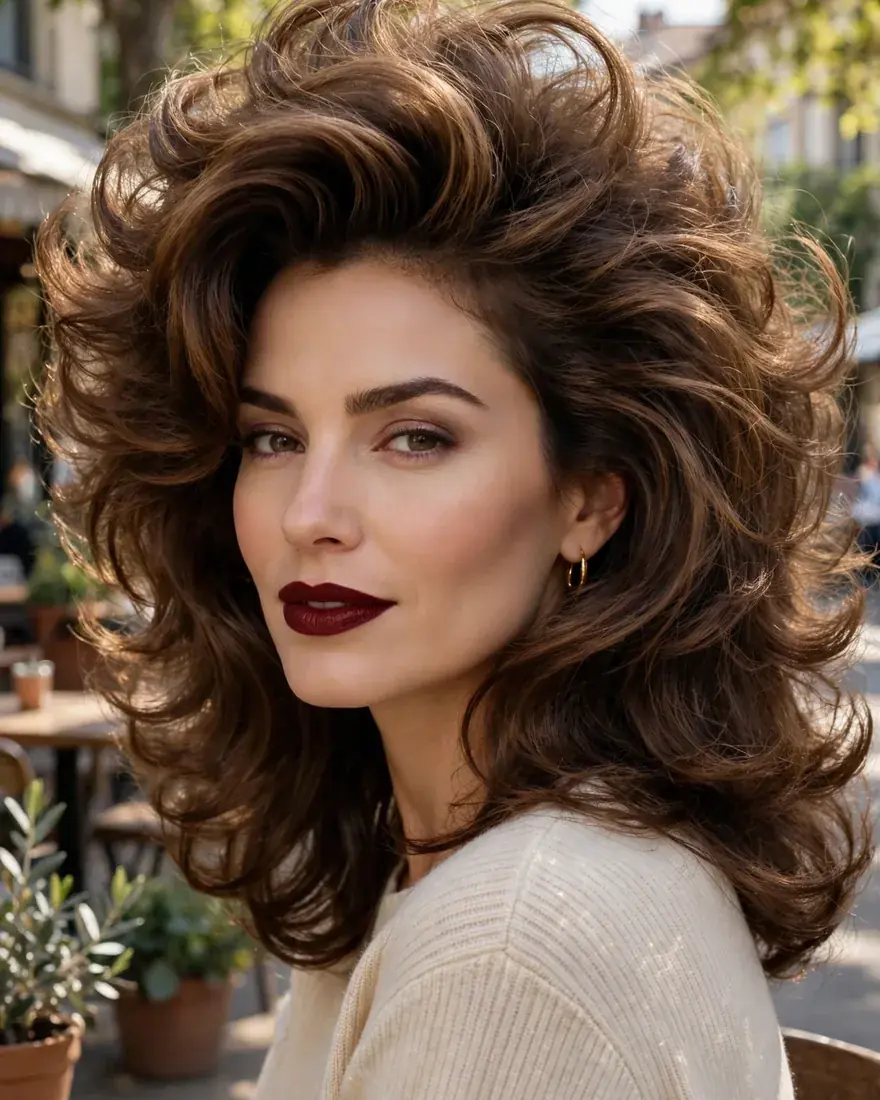
Thick hair needs sectioning discipline and patience, but the payoff is a blowout that lasts for days. The enemy here is rushing — big sections never dry fully and collapse by evening.
Benefits:
- Lasts 3-4 days once done properly
- Tames bulk into smooth, swingy shape
- Reduces daily heat exposure overall
Pro Tip: Divide hair into at least four zones (not two) — thick hair dried in two giant sections stays damp inside and falls flat.
How To Style: Rough-dry to 80 percent first to remove bulk moisture, then work through small sections with the round brush, rolling ends under. Pin the top sections into loose barrel curls while warm and release when fully cool.
Best For: Thick, dense, or coarse hair; set aside 35-45 minutes.
13. Wavy-Hair Blowout
https://fashionsparkzone.com/wp-content/uploads/2026/10/wavy-hair-blowout.webp
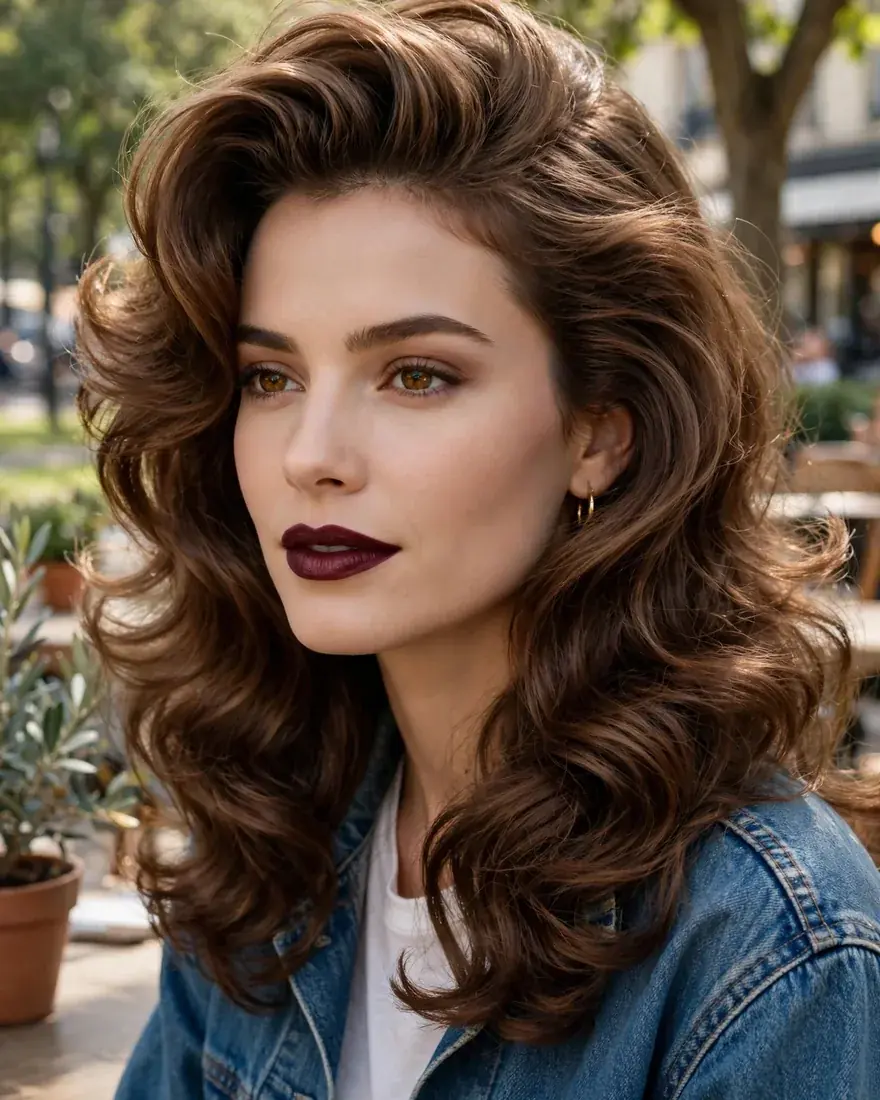
Natural waves get smoothed into the uniform 90s curve rather than fought into pin-straight submission. You keep some of your texture’s body while gaining the polished finish.
Benefits:
- Works with your texture instead of against it
- Less heat damage than full straightening
- Holds longer in humidity than sleek styles
Pro Tip: Do not brush waves out dry before starting — detangle only when wet with conditioner in, or you create frizz you then have to iron out.
How To Style: Apply smoothing cream to damp hair, then blow-dry with a paddle brush first to stretch the wave, followed by the round brush for the signature rolled ends. Cool-shot to lock.
Best For: Type 2A-2C wavy hair; the humidity-friendly choice.
14. Heatless Roller Blowout
https://fashionsparkzone.com/wp-content/uploads/2026/10/heatless-roller-blowout.webp
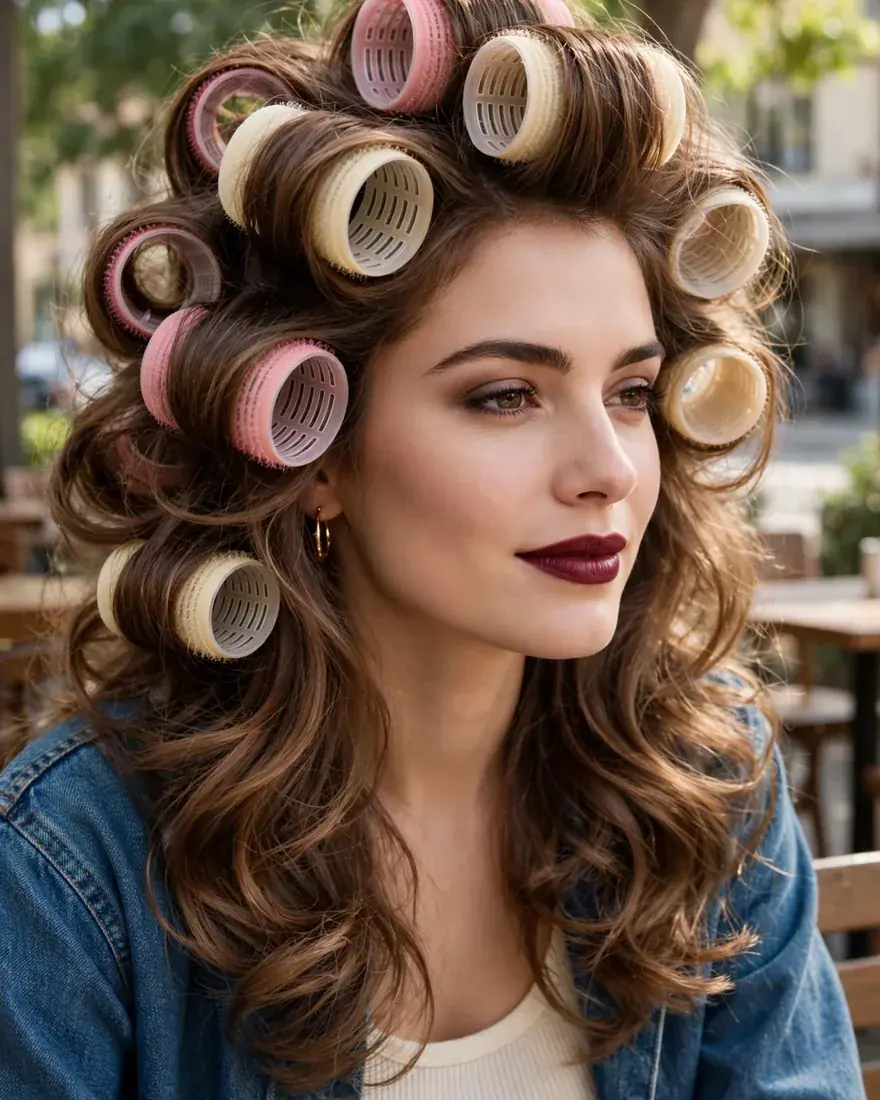
Velcro or foam rollers set on damp hair overnight (or for a few hours) mimic the round-brush shape with zero heat. The volume is softer and looser, but for many people it is 80 percent of the look with none of the damage.
Benefits:
- Zero heat damage
- Set it and forget it while you sleep
- Best option for fragile or recovering hair
Pro Tip: Hair must be 80-90 percent dry going into the rollers — soaking wet hair will still be damp in the morning and the set will fall.
How To Style: On nearly-dry hair, wrap 2-inch sections around large velcro rollers, rolling away from the face, and secure. Sleep in them or leave for 3+ hours, then remove, flip your head upside down, and brush through.
Best For: Heat-damage recovery, fine fragile hair, or anyone who wants the look without the dryer commitment.
How the 14 90s blowout ideas compare at a glance:
| Style | Standout Strength | Best Length | Effort |
|---|---|---|---|
| Classic Supermodel Blowout | Maximum volume, iconic shape | Medium–long | Moderate |
| Face-Framing Layer Blowout | Softness around the face | Long with layers | Easy |
| Long Blowout with Flipped Ends | Playful bounce | Very long | Easy |
| Shoulder-Length Bouncy Blowout | Fastest to style | Shoulder length | Easy |
| Rounded Blowout Bob | Most polished finish | Bob length | Moderate |
| Blowout with Curtain Bangs | Bangs + blowout in one | Medium–long with fringe | Moderate |
| Deep Side-Part Blowout | Instant drama, no cut | Chin length+ | Easy |
| Middle-Part Soft Blowout | Everyday wearable | Medium–long | Easy |
| 90s Blowout Lob | Best volume retention | Collarbone | Moderate |
| Butterfly-Layer Blowout | Biggest visual volume | Medium with layers | Moderate |
| Blowout for Fine Hair | Volume without weight | Fine, any length | Moderate |
| Blowout for Thick Hair | Multi-day staying power | Thick, any length | Involved |
| Wavy-Hair Blowout | Works with texture | Wavy (2A–2C) | Moderate |
| Heatless Roller Blowout | Zero heat damage | All, esp. fragile | Easy (passive) |
How to Choose the Right 90s Blowout for Your Hair Type
Start with density, not length. Fine hair should pick the Blowout for Fine Hair, the Butterfly-Layer Blowout, or the Shoulder-Length Bouncy Blowout — all three build volume without weight. Thick hair does best with the Blowout for Thick Hair method or the 90s Blowout Lob, where the cut supports the style for days.
Then match your texture. Wavy hair (type 2A–2C) should lean into the Wavy-Hair Blowout rather than fighting for pin-straight smoothness. Curly and coily hair can absolutely wear this look, but it works as a stretched blowout — expect significant shrinkage as humidity hits, and plan for a silk wrap at night. Straight hair has the easiest path: any of the 14 work, so choose by the occasion.
Finally, be honest about your mornings. If you will not spend 30 minutes with a round brush, choose the Heatless Roller Blowout or book the salon version monthly and refresh at home. The wrong method for your routine is worse than no blowout at all — a half-done round brush job looks messier than air-dried hair. For related layered inspiration, see butterfly cut ideas.
Round Brush vs Rollers vs Heatless: Time, Cost, and Trade-Offs
Round brush + dryer (25–40 minutes): the gold standard for lift and polish. Cost is one large round brush and a dryer you probably own. The trade-off is skill — your first five attempts will be humbling — and heat exposure, which matters if you do this several times a week.
Hot rollers / velcro roller set (30–45 minutes, mostly hands-off): easier than the round brush and gentler per session, since heat is indirect and brief. Rollers excel at the crown and front sections. The trade-off is less root precision and a softer, less sculpted finish.
Heatless overnight rollers (10 minutes active, hours passive): zero damage and genuinely easy, but the volume is looser and shorter-lived — expect one good day, not three. Best as a low-commitment entry point or for hair recovering from damage.
Salon blowout (45–60 minutes in the chair): the best result with zero effort from you, lasting 3–5 days on most hair. The trade-off is purely cost and scheduling — it adds up fast as a weekly habit, which is exactly why learning one at-home method pays for itself.
How to Make Your Blowout Last Three Days
Night one: loosely twist hair into a high, loose bun (a pineapple) or wrap it in a silk scarf. Cotton pillowcases create friction that kills volume by morning — silk or satin preserves it. Never sleep with it down and loose.
Day two refresh: flip your head upside down and blast roots with the dryer on cool for 60 seconds, then work a small amount of dry shampoo into the roots with your fingertips — not sprayed from a foot away, which just coats the surface. Smooth the ends with the round brush for two minutes, only where needed.
Day three: this is a half-up or low-pony day for most people, and that is fine. Gather the top half back to show off the remaining volume while the underneath stays tucked. A light mist of flexible hairspray at the crown buys a few more hours.
The honest limits: humidity, workouts, and rain are the three horsemen of blowout death. In humid climates, a blowout is a one-to-two-day style no matter what you do — plan around it rather than fighting it. Fine hair typically gets two good days; thick hair often stretches to four.
Frequently Asked Questions
How long does a 90s blowout actually last?
On most hair types, two to three days with proper nighttime protection (silk pillowcase or wrap) and a day-two refresh. Thick hair often stretches to four days; fine hair in humidity may get just one to two. Sweat, rain, and sleeping on cotton are what kill it fastest.
Can I do a 90s blowout on fine hair without damage?
Yes, with discipline: use heat protectant every time, keep the dryer moving instead of parking it on one section, work in small sections so each pass is quick, and limit full round-brush blowouts to two or three times per week. The heatless roller version is the safest daily option.
What should I ask for at the salon for a 90s blowout cut?
Ask for long, connected layers with face-framing pieces — not choppy or disconnected layers. For the classic look, request soft internal layering that removes weight without visible steps, and curtain or bottleneck fringe if you want the full effect. Bring a reference photo; every stylist interprets words differently.
Round brush vs blowout brush — which is better?
A traditional round brush with a separate dryer gives more control and root lift, which is what the 90s look needs. Heated blowout brushes (like one-step stylers) are faster and easier but produce a softer, less sculpted result. Beginners often start with the heated brush and graduate to the round brush.
Why does my blowout fall flat within hours?
The three usual culprits: sections were too big (the inside stayed damp), you skipped the cool shot (heat shapes hair, cold sets it), or you used too much product at the roots. Try smaller sections, cool-shot every single one, and keep conditioner and oils off the roots on blowout day.
Can curly or coily hair get a 90s blowout?
Yes, as a stretched blowout — the hair is blow-dried smooth and then shaped with the round brush. Expect the style to be more vulnerable to humidity (reversion), so plan for silk nighttime protection and accept a shorter lifespan than straight hair gets. Deep condition before, heat protectant during.
How do I refresh a second-day blowout?
Flip your head upside down, blast the roots with cool air for about a minute, work dry shampoo into the roots with your fingertips, then quickly re-roll just the front sections and ends with the round brush. Two to five minutes total — you are reviving, not redoing.
Is a salon blowout worth it vs doing it at home?
For events and photos, absolutely — a stylist’s result lasts longer and looks more polished than most at-home attempts. As a weekly habit it gets expensive fast, which is why learning the at-home round-brush or roller method pays off. Many people do a hybrid: salon monthly, refresh at home.
The 90s blowout endures because it is a technique, not just a haircut — once you learn the round-brush fundamentals, every one of these 14 variations becomes reachable. Pick the version that matches your hair type and your real morning routine, protect your hair with heat protectant and cool shots, and give yourself permission for the first few attempts to be imperfect. The volume is worth the practice.