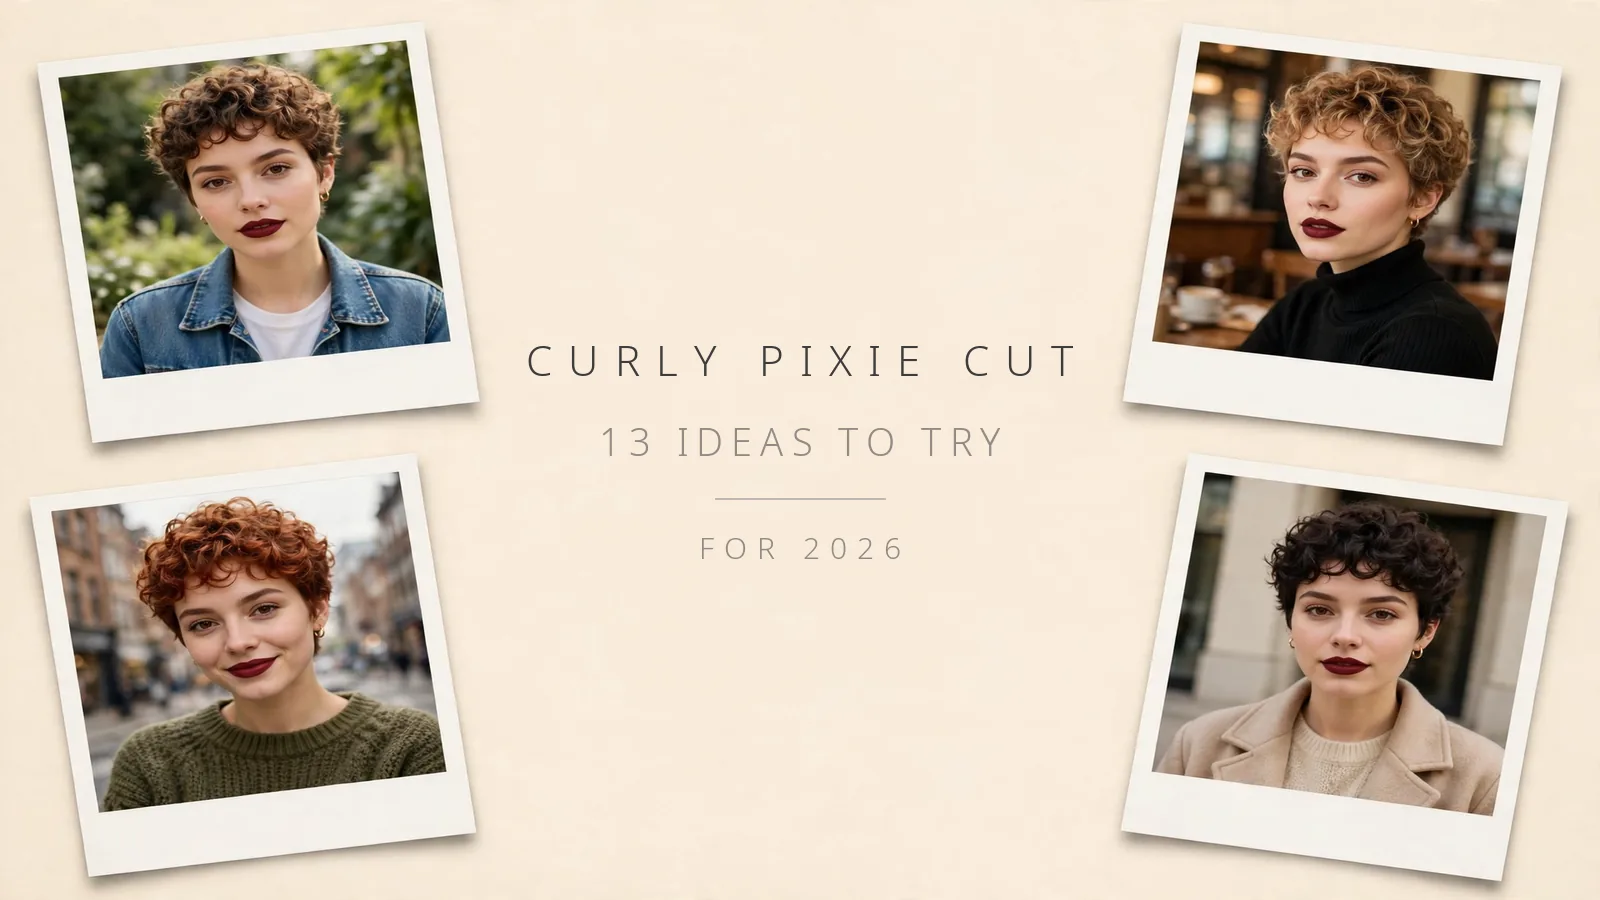
Curly Pixie Cut – 13 Ideas to Try in 2026
A curly pixie cut is one of those haircuts people romanticize and then regret booking — not because it is a bad cut, but because almost nobody explains the real commitment behind it. Short curls behave completely differently from long ones: they shrink more, they grow out into awkward phases fast, and a bad consultation can leave you waiting months for it to look right again.
The good news is that a well-planned curly pixie cut can be the lowest-effort, highest-impact hairstyle you ever wear. The 13 ideas below are built around honest decision-making — which curl patterns and face shapes each one suits, what the maintenance actually costs, and exactly how to style each cut at home.
Table of Contents
- 13 Curly Pixie Cut Ideas Worth Copying
- 1. Classic Tapered Curly Pixie
- 2. Voluminous Curly Pixie for Fine Hair
- 3. Curly Pixie with Long Top and Undercut Sides
- 4. Curly Pixie with Sweeping Bangs
- 5. Asymmetrical Curly Pixie
- 6. Stacked Curly Pixie
- 7. Shaggy Curly Pixie
- 8. Curly Pixie Bob with Long Bangs
- 9. Gray-Blending Curly Pixie
- 10. Wet-Look Slicked-Back Curly Pixie
- 11. Curly Pixie with Temple Shave
- 12. Messy Long-Layered Curly Pixie
- 13. Curly Pixie with Short Micro Fringe
- How to Choose the Right Curly Pixie Cut for Your Curl Pattern and Face Shape
- The Real Maintenance Cost: Trim Schedule, Grow-Out Plan, and Morning Refresh
- Curly Pixie Cut for Thin or Thinning Hair: What Actually Works
- Curly Pixie Cut FAQs
- Will a curly pixie cut work with my curl pattern?
- Does a curly pixie cut age you?
- How often does a curly pixie cut need trimming?
- How long does it take to grow out a curly pixie cut?
- Can I get a curly pixie cut with thin or fine curls?
- Should curly hair be cut wet or dry for a pixie?
- How do I refresh a curly pixie in the morning?
- Will a curly pixie cut suit a round face?
13 Curly Pixie Cut Ideas Worth Copying
1. Classic Tapered Curly Pixie
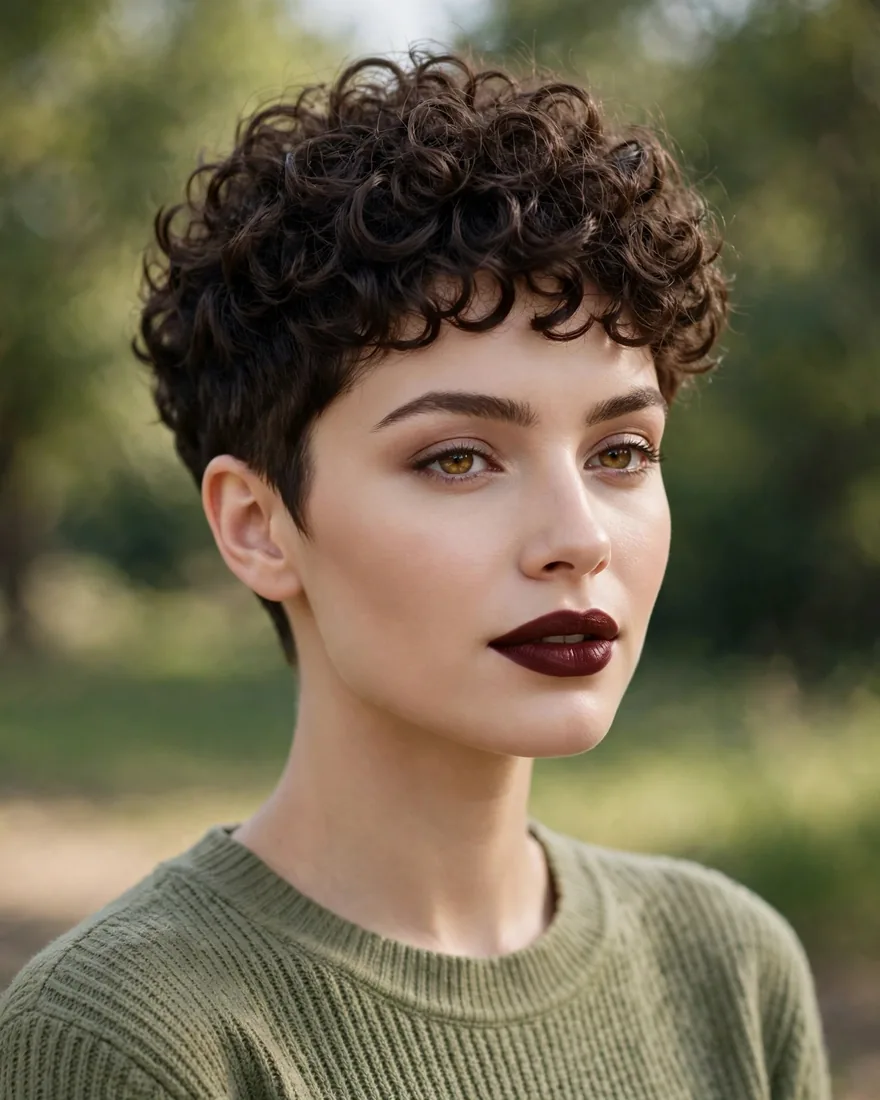
The original curly pixie: clean tapered sides and nape with length left on top so your curl pattern can do the talking. It is the version most curl specialists cut first, because it is forgiving — the taper gives structure while the top stays flexible enough for wash-and-go styling.
Benefits:
- Works on every curl pattern from 2C to 4A
- Tapered sides keep the silhouette neat for weeks
- Professional enough for conservative workplaces
- Easy to grow out — the taper blends as length comes back
Pro Tip: Ask for the taper to be cut with the grain of your curl direction, not against it — tapered sides cut against tight coils can frizz out within days.
How To Style: Work curl cream through damp hair, finger-shape the top forward, and diffuse on medium heat or air-dry. Smooth the tapered edges with a dab of edge gel if your hairline frizzes.
Best For: First-time short-curl cutters, oval and heart faces, 3A–3C patterns, anyone who wants a safe but striking curly pixie cut.
2. Voluminous Curly Pixie for Fine Hair
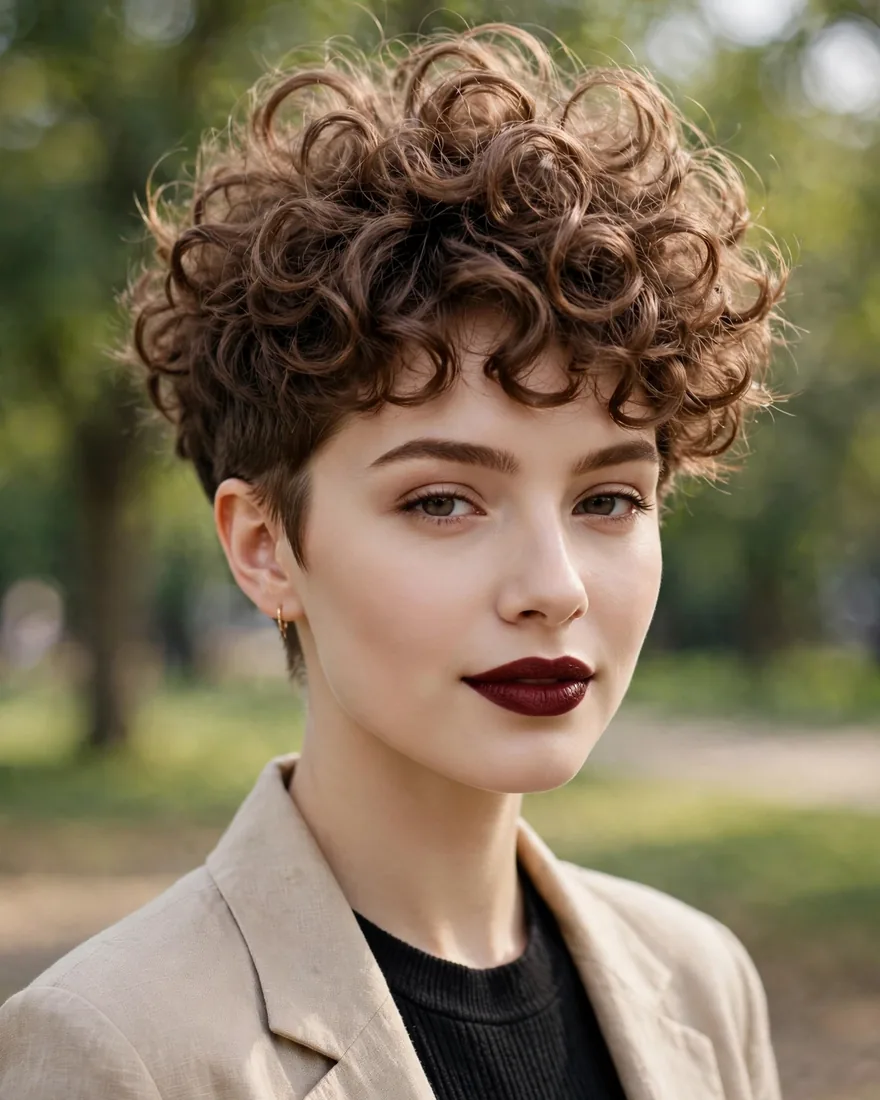
Built for curls that need help looking full: stacked layers concentrate density at the crown so fine hair reads thick and bouncy instead of flat and sparse. The layers are cut to let each curl sit on top of the one below it, creating natural lift without teasing.
Benefits:
- Makes fine curls look visibly thicker
- Crown-focused volume flatters long and narrow faces
- Holds its shape well between trims
- Low product needs — a little mousse goes far
Pro Tip: Skip any stylist who wants to razor-thin fine curls. If you want more ideas for short fine curls, browse these short curly hairstyles for volume-friendly shapes to show your stylist.
How To Style: Scrunch a golf-ball of mousse into soaking-wet hair, flip your head over, and diffuse upside down on low heat until 80% dry — then let the rest air-dry for maximum lift.
Best For: Fine or low-density 2C–3B curls, longer face shapes, anyone whose curls fall flat by midday.
3. Curly Pixie with Long Top and Undercut Sides
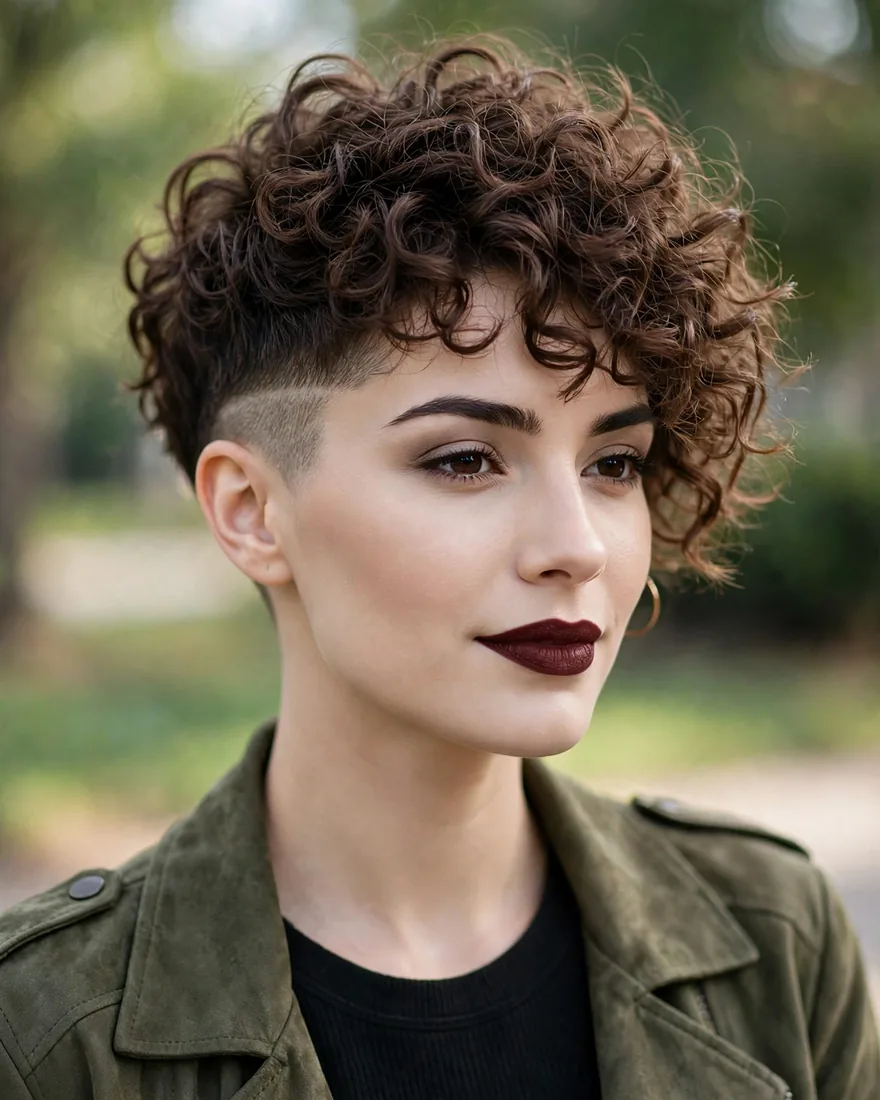
A bold contrast cut: the sides are clipped to a tight undercut while the top stays long enough for real curls to form. It reads edgy but stays practical — the undercut cuts drying time in half and the long top gives you endless styling options.
Benefits:
- Dramatically cuts wash-and-dry time
- Long top suits ringlets and coils that need length to curl
- Edgy look that still grows out gracefully
- Undercut keeps thick hair from mushrooming outward
Pro Tip: Keep the transition line clean by booking nape-and-side cleanups between full cuts — a blurry undercut line ruins the whole contrast.
How To Style: Define the top with curl cream and a diffuser, scrunching upward for lift. Smooth the undercut with a light pomade for shine, or leave it natural if you like the texture contrast.
Best For: Thick 3B–4A hair, square and round faces (the height balances width), anyone ready for an undercut commitment.
4. Curly Pixie with Sweeping Bangs
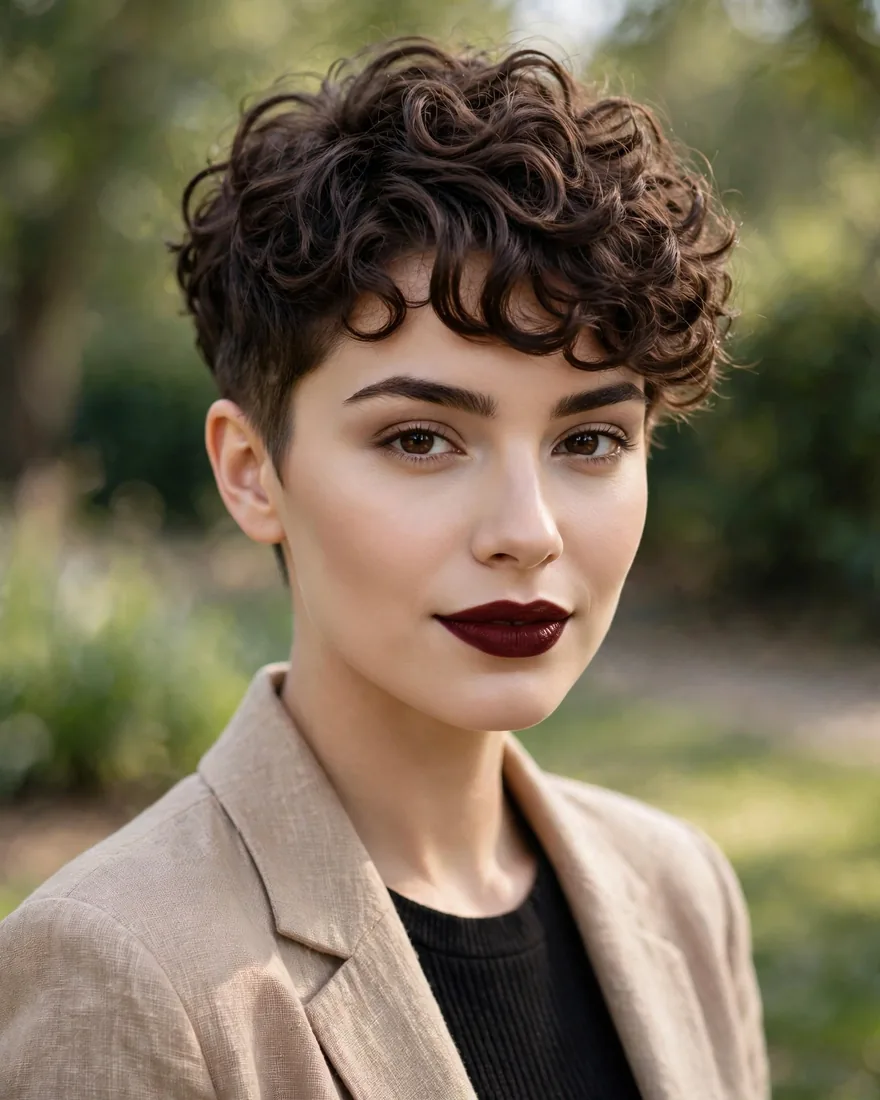
A soft take on the curly pixie cut: the sides stay short but the front grows into a sweep of curls across the forehead. The sweeping bangs add movement and femininity, and they are the easiest part of the cut to reshape if you want a change.
Benefits:
- Softens strong jawlines and wide foreheads
- Bangs camouflage a high hairline
- Easy to grow out — bangs blend into a longer top
- Works with glasses and statement earrings
Pro Tip: Train the sweep from day one by drying the bangs toward the opposite side. For more bang ideas that pair with short cuts, see these pixie cut variations.
How To Style: On damp hair, comb the bangs to the side with a little gel, then twist each curl clump into place and air-dry. Finger-fluff once dry — never brush the bangs dry or they will frizz into a halo.
Best For: High foreheads, heart and square faces, 2C–3B curls that fall naturally to the side.
5. Asymmetrical Curly Pixie
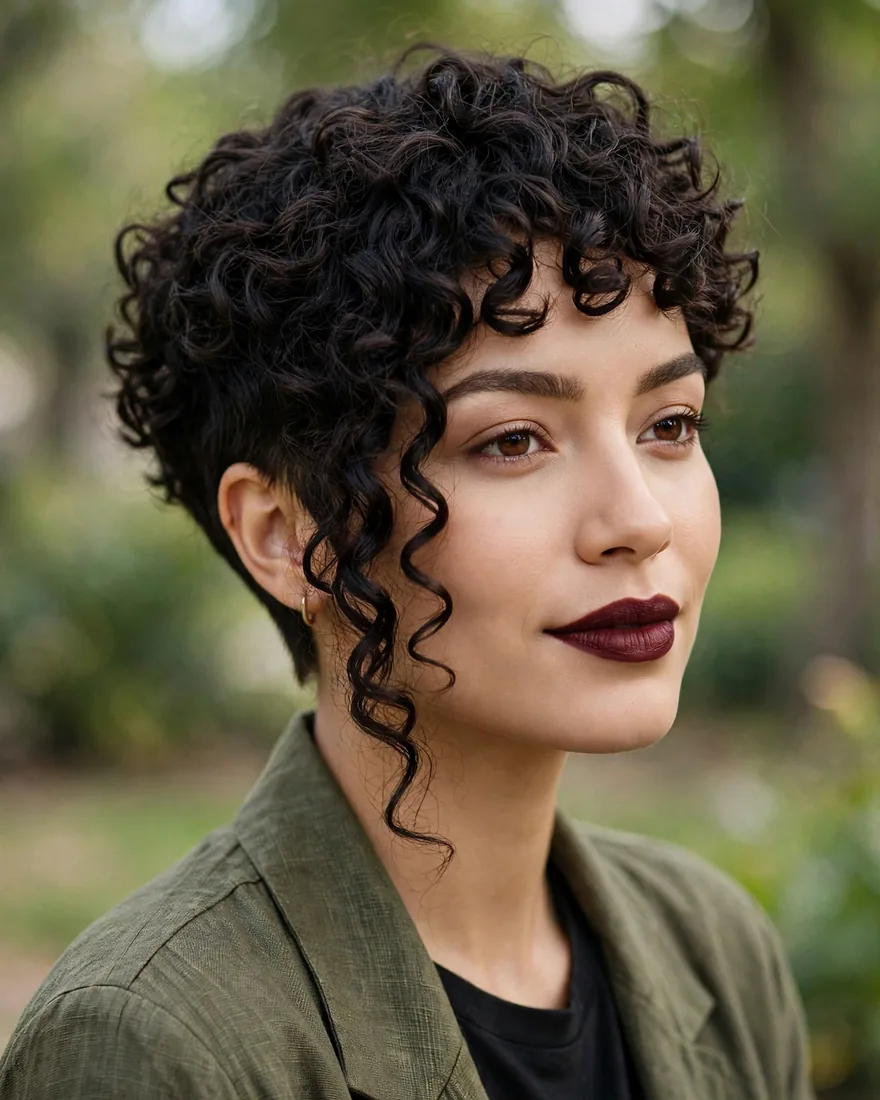
One side sits close and cropped while the other sweeps longer across the cheek — an architectural cut that turns curls into the statement. The asymmetry draws the eye diagonally, which is one of the most flattering tricks for round and square faces.
Benefits:
- Creates the illusion of length on round faces
- High-fashion look with everyday wearability
- Hides uneven curl patterns by design
- Grows out into an interesting lob rather than a blob
Pro Tip: The asymmetry only works if the long side is cut to your natural fall direction — tell the stylist which side your hair naturally parts before they pick up the clippers.
How To Style: Define the long side with curl cream and let it fall naturally; keep the short side neat with a tiny amount of wax. Diffuse the long side forward for extra drama.
Best For: Round, square and heart faces, confident dressers, 3A–3C curls with good spring.
6. Stacked Curly Pixie
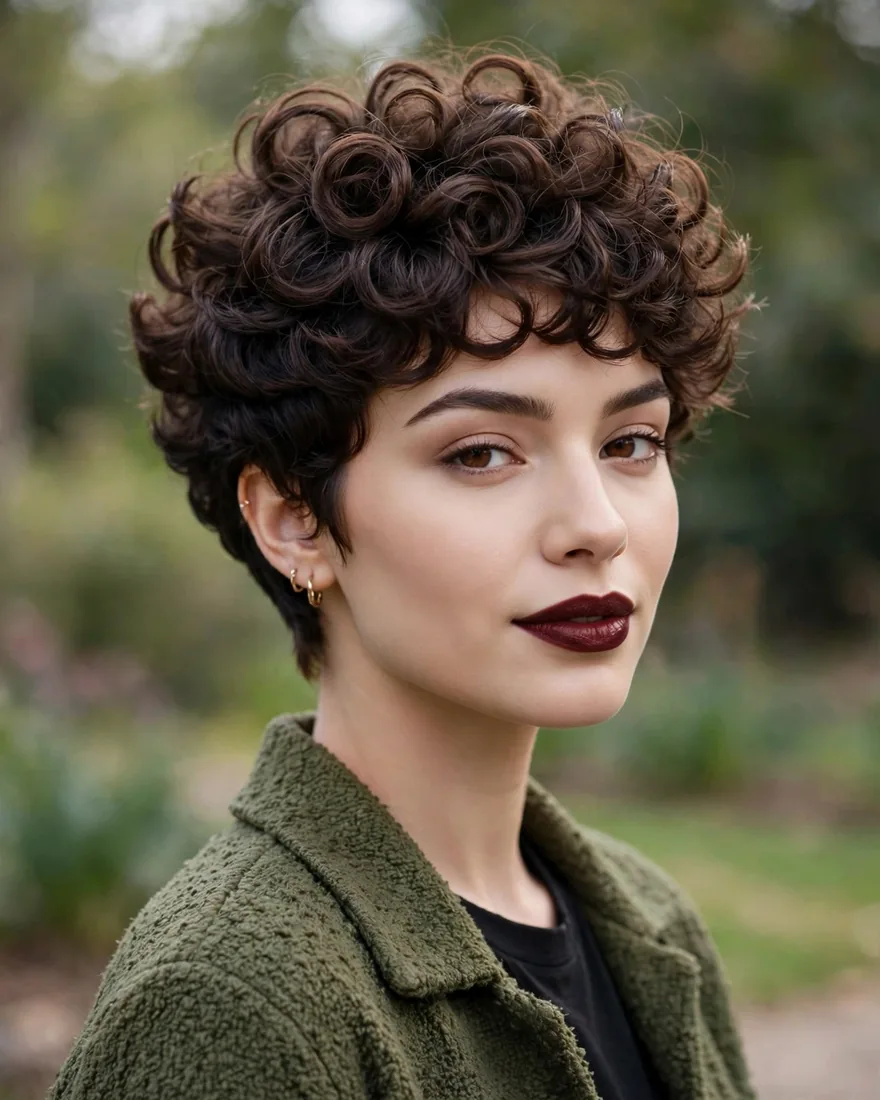
Borrowed from the classic stacked bob: graduated layers at the back build a rounded, full silhouette while the front stays soft. On curls, the stacking amplifies natural volume at exactly the spot where most pixies go flat.
Benefits:
- Maximum volume with minimal effort
- Rounded back shape looks polished from every angle
- Excellent on curls that lose volume at the crown
- Aged-well look that suits women over 40
Pro Tip: Stacking works best when the nape is kept tight and clean — let the back grow even a little and the rounded shape collapses into bulk.
How To Style: Scrunch mousse into wet hair, then diffuse the back sections upward toward the crown. Finish with a pea-sized amount of curl cream smoothed over the very top to keep the surface defined.
Best For: Flat-crowned curl patterns, oval and long faces, mature clients wanting fullness without frizz.
7. Shaggy Curly Pixie
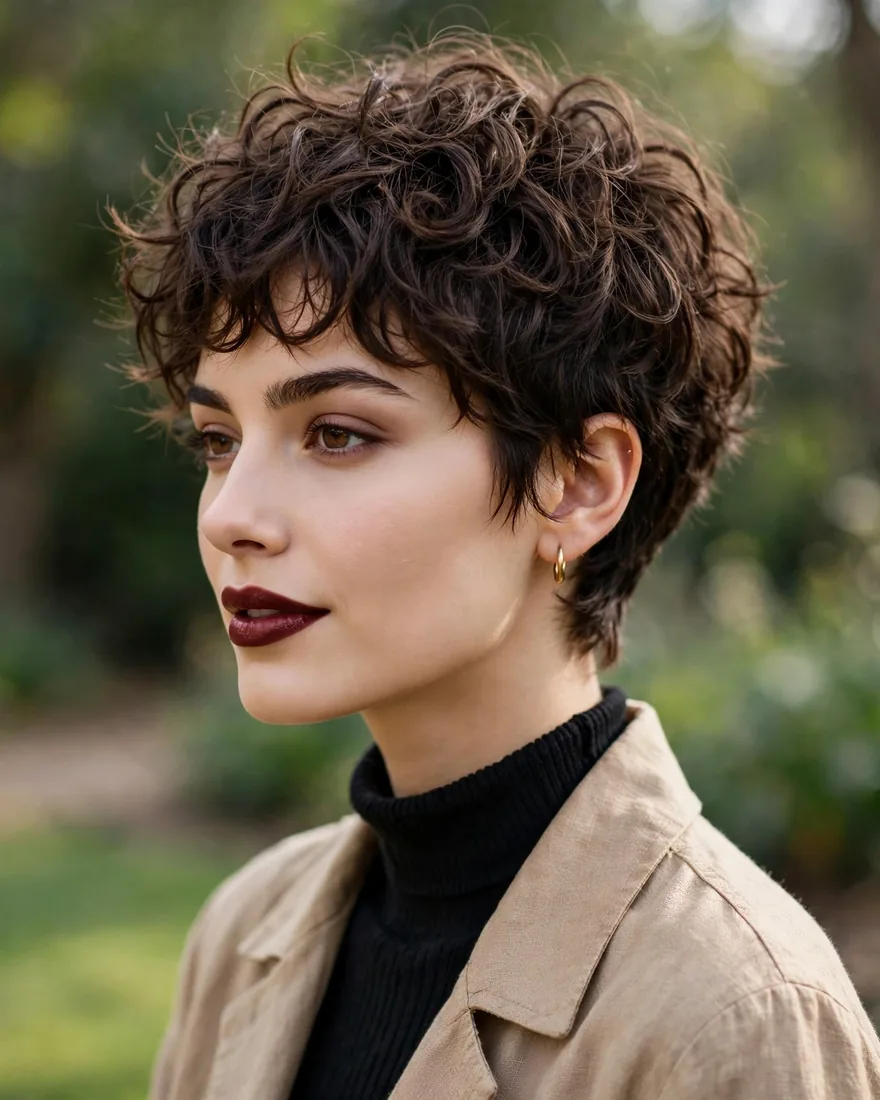
Layers everywhere, texture everywhere: the shaggy curly pixie cut is the undone cousin of the classic, with choppy pieces and a lived-in finish. It is the most forgiving pixie of all — messiness is the entire point, so bedhead looks intentional.
Benefits:
- The most low-maintenance pixie shape
- Hides cowlicks and uneven curl patterns
- Edgy, youthful energy
- Second and third-day hair looks even better
Pro Tip: Ask for point-cutting rather than blunt layering — blunt cuts on curls create shelves. For more layered curly inspiration, look at curly shag cuts for the longer version of this vibe.
How To Style: Scrunch sea salt spray or texture mousse into damp hair and air-dry without touching it. Shake the roots once dry for separation, and leave the ends piecey on purpose.
Best For: Thick 3A–3C hair, casual style lovers, anyone who hates fussy styling routines.
8. Curly Pixie Bob with Long Bangs
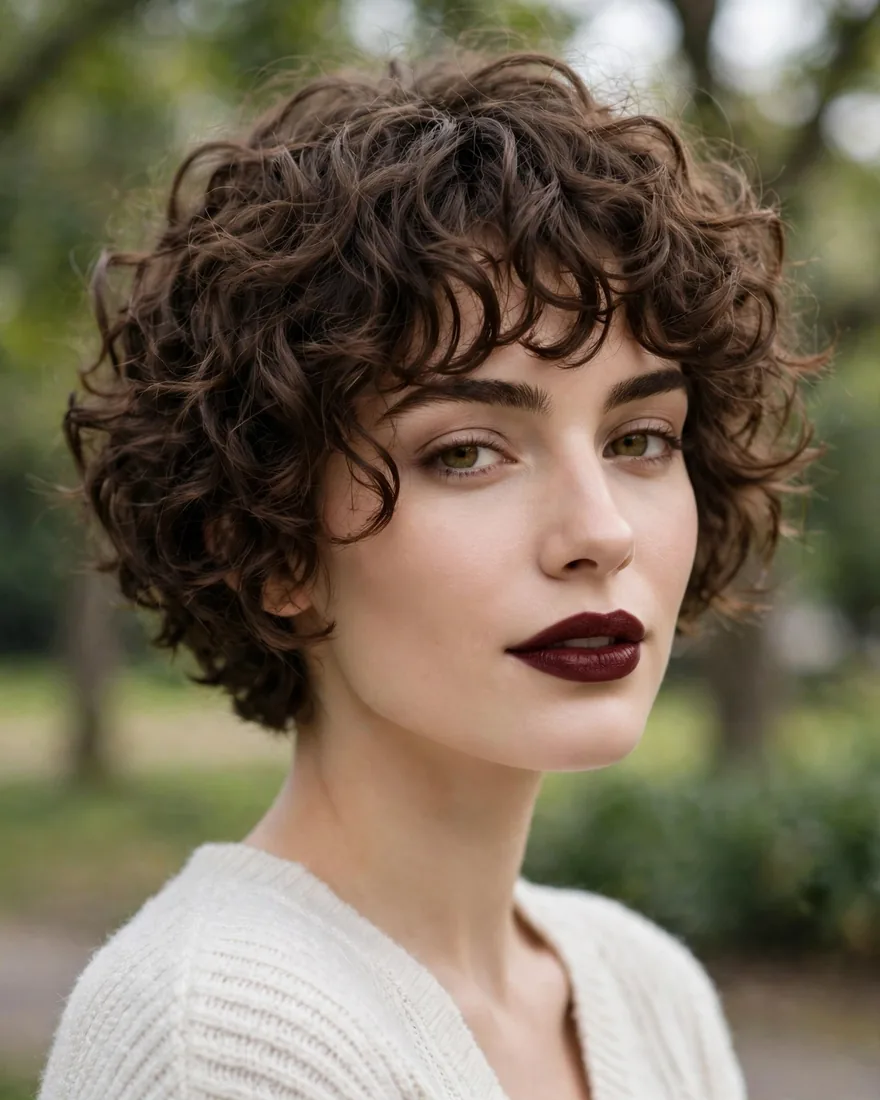
A hybrid that sits between a pixie and a bob: cropped at the back, with long curtain-like bangs framing the face. It is the gentlest entry point into short curls — you keep face-framing length while the back does all the freeing-up work.
Benefits:
- Face-framing length keeps it feminine
- Easiest pixie to grow out
- Long bangs balance strong features
- Versatile — tucks behind ears or falls forward
Pro Tip: If you are torn between lengths, compare with longer curly hairstyles first — this hybrid is for people who want short but are not ready to commit fully.
How To Style: Define the back with curl cream and diffuse; style the bangs separately with a little gel, parted in the middle or swept aside. Pin one side back with a clip for evening.
Best For: Commitment-phobes, round and heart faces, 2C–3B curls that need length to form.
9. Gray-Blending Curly Pixie
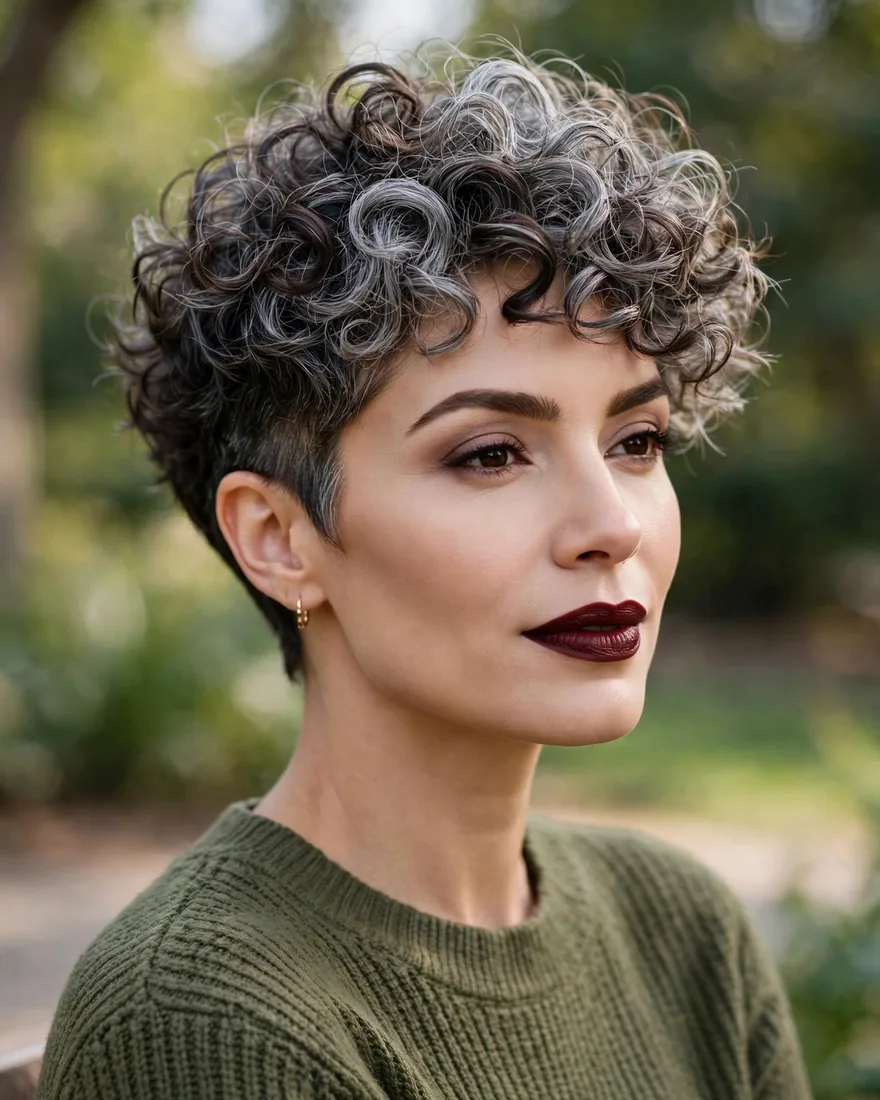
Designed for the salt-and-pepper transition: a short textured shape that turns gray regrowth into a feature rather than a problem. The curl texture breaks up the demarcation line, so growing out dye looks like an intentional color story.
Benefits:
- Makes gray transition look deliberate
- Texture disguises the dye-to-gray line
- Short length means dye grows out fast
- Silver tones look striking on short curls
Pro Tip: Plan the color with your stylist as a series of quarterly lowlight or gloss appointments — a curly pixie cut grows fast enough that a one-time fix is not enough.
How To Style: Use a purple or silver-toning conditioner once a week to keep gray bright, then style with lightweight curl cream so the curls stay bouncy rather than weighed down.
Best For: Anyone transitioning to gray, women over 40 embracing silver, 3A–4A curls with mixed pigmentation.
10. Wet-Look Slicked-Back Curly Pixie
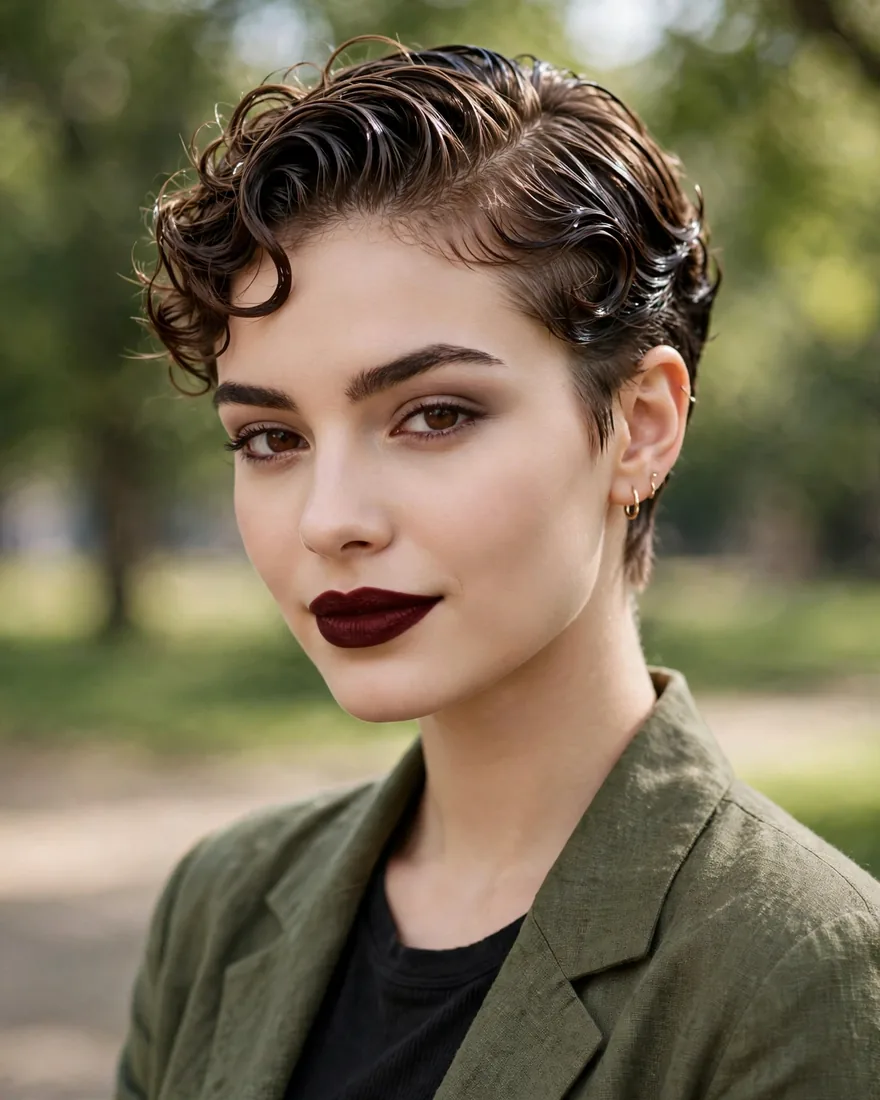
Red-carpet energy for everyday: curls are gelled back from the forehead into a glossy, sculpted finish. It is dramatic, editorial, and surprisingly practical — the gelled finish holds all day and survives humidity that would destroy a fluffy pixie.
Benefits:
- Lasts all day in heat and humidity
- High-fashion, editorial impact
- Shows off bone structure and earrings
- Great for events and photos
Pro Tip: Use a strong-hold gel on soaking-wet hair — applying gel to damp hair gives crunch and frizz instead of the smooth wet finish.
How To Style: Saturate wet hair with gel, comb everything straight back, then arrange the top curls with your fingers and let air-dry or diffuse on low. Scrunch out any crunch once fully dry, leaving the shape intact.
Best For: Oval and heart faces, strong bone structure, 2C–3C curls; perfect for nights out and events.
11. Curly Pixie with Temple Shave
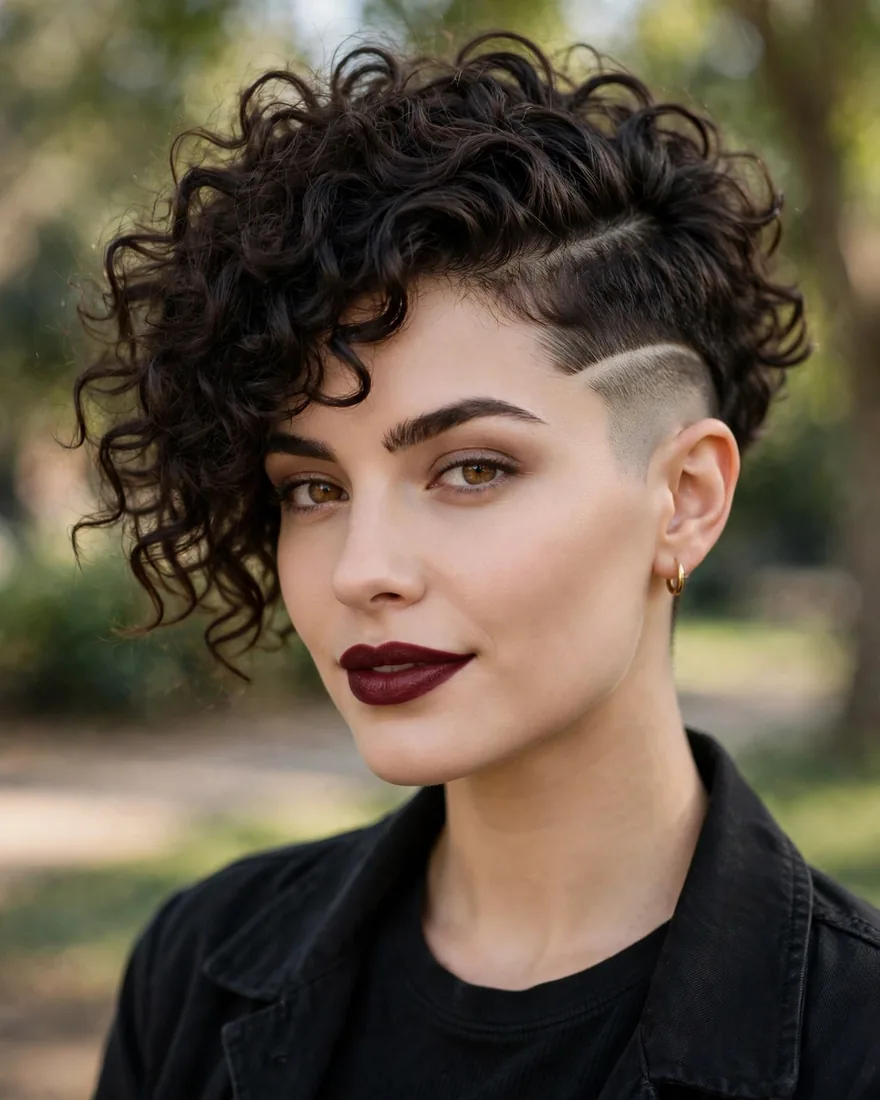
A shaved temple on one side, full curls everywhere else — the most head-turning option on this list. The shave adds edge and cuts bulk at the exact spot where thick curls tend to widen, which also makes it surprisingly flattering on round faces.
Benefits:
- Instant edge and personality
- Removes bulk at the widest part of the face
- Striking with undercut designs or patterns
- Pairs well with bold earrings
Pro Tip: Start with a narrow shave — you can always go wider at the next appointment, but a too-wide shave takes months to soften.
How To Style: Style the curls as usual with cream and a diffuser; keep the shaved section clean with a weekly lineup trim and a little oil for shine.
Best For: Thick 3B–4A hair, round faces (the shave slims the silhouette), bold dressers.
12. Messy Long-Layered Curly Pixie
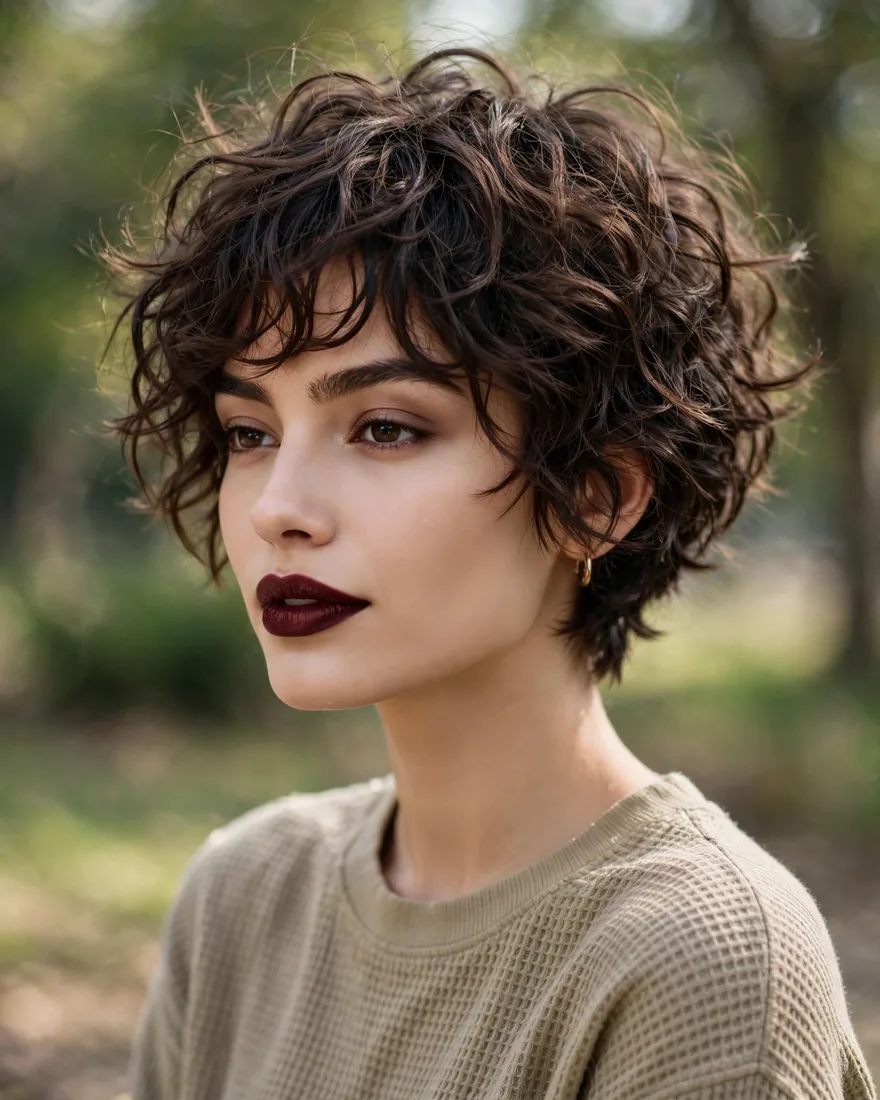
The longest pixie here: layered all over with extra length on top for curls that fall and move. It is the curly pixie cut for people who want short hair that still reads as hair — swingy, touchable, and full of movement.
Benefits:
- Keeps the most length of any pixie
- Movement and bounce from long layers
- Very forgiving grow-out
- Romantic, soft energy
Pro Tip: Long layers on curls need a dry cut almost every time — wet-cut long layers spring up unevenly and the longest pieces end up shorter than the rest.
How To Style: Rake curl cream through damp hair, then diffuse with your head flipped for root lift. Once dry, shake the layers apart with your fingers for that deliberately messy finish.
Best For: 3A–3C curls with good length retention, oval and oblong faces, romantic or boho style.
13. Curly Pixie with Short Micro Fringe
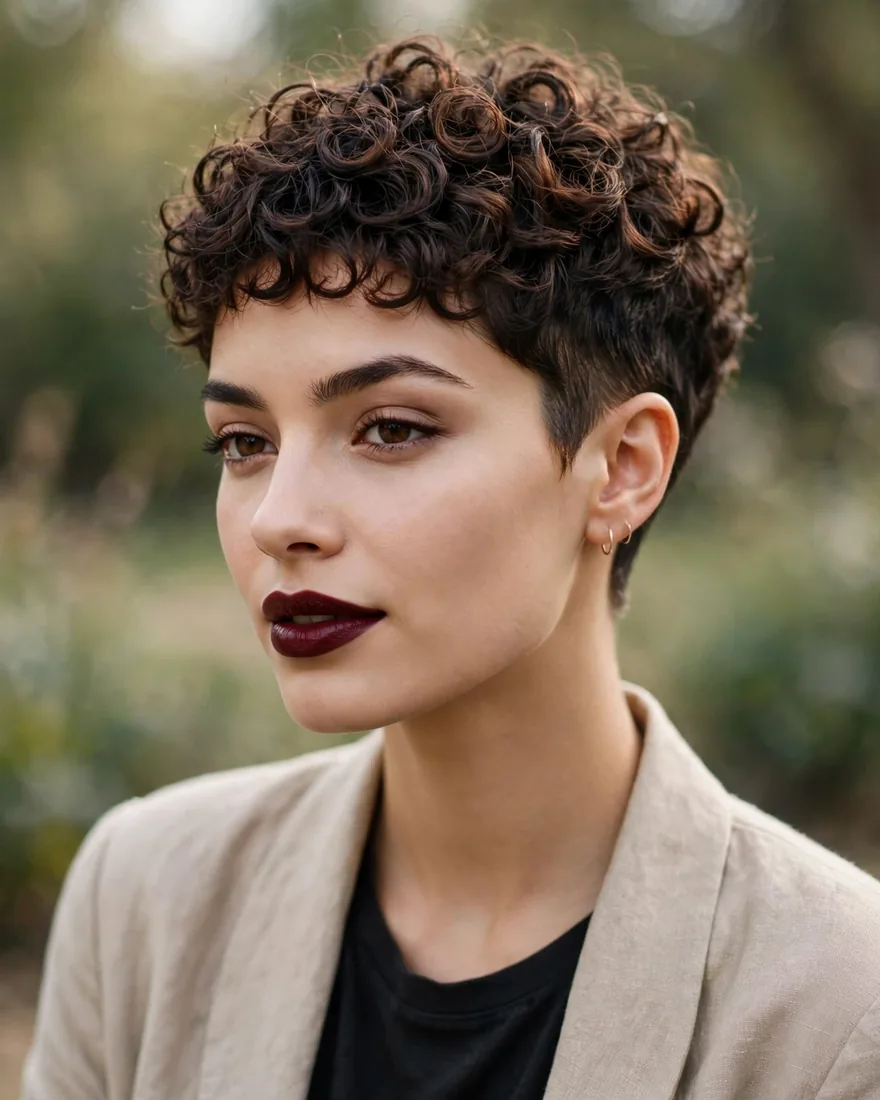
A cropped fringe of tight curls sits high on the forehead while the rest of the cut stays short and sculpted. It is bold, graphic, and unmistakable — the micro fringe frames the eyes and gives the whole cut a fashion-editorial edge.
Benefits:
- Striking, memorable silhouette
- Opens up the face and highlights the eyes
- Unique — you will not blend into a crowd
- Low daily effort once the shape is right
Pro Tip: A micro fringe must be cut dry and left slightly longer than you think — tight curls spring up, and a wet-cut micro fringe can end up an inch above where you planned.
How To Style: Work a tiny amount of gel through the fringe clumps while wet, arrange them across the forehead, and air-dry without touching. Fluff the crown for balance.
Best For: Oval and long faces, small foreheads (the fringe shortens visually), 3B–4A tight curls.
How the 13 curly pixie cut ideas compare at a glance:
| Style | Curl Pattern Fit | Upkeep Level |
|---|---|---|
| Classic Tapered Curly Pixie | 2C–4A, all patterns | Medium — trim every 4–6 weeks |
| Voluminous Curly Pixie for Fine Hair | Fine 2C–3B curls | Medium — shape holds well between trims |
| Long Top and Undercut Sides | Thick 3B–4A | Medium — undercut needs line cleanups |
| Sweeping Bangs | 2C–3B, side-falling curls | Low — bangs are easy to reshape at home |
| Asymmetrical Curly Pixie | 3A–3C with good spring | Medium — asymmetry needs precise reshaping |
| Stacked Curly Pixie | Flat-crowned 2C–3C | Medium — nape must stay tight |
| Shaggy Curly Pixie | Thick 3A–3C | Low — messiness is the point |
| Curly Pixie Bob with Long Bangs | 2C–3B needing length | Low — easiest grow-out on the list |
| Gray-Blending Curly Pixie | 3A–4A, mixed pigmentation | Medium — quarterly color appointments |
| Wet-Look Slicked-Back | 2C–3C, gel-friendly curls | High — restyle daily for the wet finish |
| Temple Shave | Thick 3B–4A | Medium — weekly shave line touch-ups |
| Messy Long-Layered | 3A–3C with length retention | Low — long layers grow out gracefully |
| Short Micro Fringe | Tight 3B–4A coils | Medium — fringe needs dry-cut precision |
How to Choose the Right Curly Pixie Cut for Your Curl Pattern and Face Shape
Choosing a curly pixie cut starts with two honest questions: what does your curl pattern actually do, and what does your face shape need? Loose 2C–3A curls have the most flexibility — they can carry longer tops, sweeping bangs, and shaggy layers without much fight. Tight 3B–4A coils spring up dramatically, so they shine in tapered, stacked, and micro-fringe shapes where the cut works with the shrinkage instead of against it. If your curl pattern is uneven — and most people’s is — name the dominant pattern at the crown, because that is what frames your face.
Face shape is the second filter. Round faces need height at the crown and diagonal lines: asymmetrical cuts, sweeping bangs, and temple shaves all elongate visually. Long faces need the opposite — width at the sides and a shorter crown, which is where shaggy and classic tapered shapes win. Heart faces suit softness around the forehead, so sweeping or long bangs balance a wider forehead. Oval faces can wear almost any version, which is why “it suited her” is the least useful thing a friend can tell you.
Bring reference photos of people with your curl pattern and your face shape — not just the cut you like. And if you are still exploring curl-friendly shapes, these hairstyles for curly hair and types of bangs guides show how the same ideas scale to different lengths before you commit to short.
The Real Maintenance Cost: Trim Schedule, Grow-Out Plan, and Morning Refresh
Here is the number nobody posts on social media: a curly pixie cut needs professional reshaping every 4–6 weeks. That is roughly 9–12 salon visits a year, and at typical curl-specialist pricing it adds up to a real annual budget — plan for it before you book, not after the shape starts collapsing. Curls grow upward and outward rather than down, so a pixie loses its silhouette fast: the sides bulk out, the nape goes fuzzy, and the crown flattens. Skipping trims does not save money; it just buys you a cut you stop wearing.
The grow-out is the second thing to plan. A curly pixie takes roughly 8–12 months to reach a short bob and well over a year to reach shoulder length, and months 3–6 are the awkward zone — the top is too long to spike and too short to lie flat. The fix is simple: keep the nape and sides trimmed while the top grows, so the in-between stage looks like a longer pixie instead of a neglected one. Many people find the short hair grow-out path useful here, since the same shaping tricks apply as length returns.
The morning routine is the easy part. Mist the crown and bangs with water until damp, work a pea-sized amount of curl cream through the flattened pieces, scrunch, and let it air-dry or hit it with a diffuser for two minutes. A curly pixie rarely needs rewashing between wash days — a targeted refresh of the front and crown takes under five minutes, which is the payoff for all those trims.
Curly Pixie Cut for Thin or Thinning Hair: What Actually Works
Thin or fine curls can absolutely wear a curly pixie cut — but not every version on this list is equal for them. The winners are shapes that concentrate fullness where you have it: stacked and voluminous crowns, longer layered tops, and shaggy textures that camouflage sparse areas. The shapes to approach with caution are very short tapers and temple shaves, which can expose thin spots at the temples and hairline that longer hair used to hide.
Two rules matter more than the shape itself. First, no razor-thinning on fine curls — razors fray the ends and kill the density you are trying to fake. Second, keep product light: heavy butters and oils flatten fine curls, while a golf-ball of mousse on soaking-wet hair builds more volume than any product cocktail. Diffuse upside down on low heat until mostly dry, then leave it alone — fine curls lose volume every time you touch them after drying.
If your curls are thinning at the crown specifically, be honest with your stylist before the cut — a good curl specialist will leave strategic length exactly there. And if you are weighing how short to go, this curly wolf cut guide shows a longer layered option that keeps the same energy with more coverage.
Curly Pixie Cut FAQs
Will a curly pixie cut work with my curl pattern?
Yes — but the result varies a lot by pattern. Loose 2C–3A curls hold longer lengths on top and need less product; tight 3B–3C coils spring up dramatically, so the cut must be shaped dry with extra length left at the crown to account for shrinkage. A curl specialist will usually cut a curly pixie dry, one section at a time, so you see exactly where each curl lands.
Does a curly pixie cut age you?
Not inherently — but the wrong one can. A harsh, overly flat pixie can look severe on some faces, while volume at the crown and softness around the forehead generally read youthful. What ages a pixie fastest is neglect: grown-out sides and no shaping make any short cut look tired, which is why the 4–6 week trim schedule matters.
How often does a curly pixie cut need trimming?
Plan on a reshape every 4–6 weeks. Curls grow upward and outward rather than down, so a pixie loses its silhouette quickly — sides bulk out, the nape gets fuzzy, and the crown collapses. This is the one cost commitment you should accept before booking: roughly 9–12 salon visits a year.
How long does it take to grow out a curly pixie cut?
Expect about 8–12 months to reach a short bob, and 14–18 months to reach shoulder length — curls grow the same speed as straight hair but shrinkage hides the length. The awkward middle phase hits around months 3–6, when the top is too long to spike and too short to lay flat. Keeping the nape and sides trimmed while the top grows through that phase is what keeps it looking intentional.
Can I get a curly pixie cut with thin or fine curls?
Yes, with the right version. Stacked and voluminous cuts that concentrate fullness at the crown work best on fine curls, while very short tapers can expose thin areas at the temples. Avoid razor-thinning on fine curls — it frays the ends and kills density. Diffuse on low heat and let the top carry the volume.
Should curly hair be cut wet or dry for a pixie?
Dry cutting is the safer standard for a curly pixie. Wet curls stretch and hang longer than they will ever look once dry, so a wet cut almost always ends up shorter than planned — and shrinkage of 30–50% on tight coils means inches disappear. A dry cut lets the stylist shape each curl where it actually lives.
How do I refresh a curly pixie in the morning?
Mist the crown and bangs with water until damp, work a pea-sized amount of curl cream through the pieces that flattened overnight, then scrunch and let air-dry or hit it with a diffuser for two minutes. Curly pixies rarely need full rewashing between wash days — a targeted wet-and-reshape of the front and crown takes under five minutes.
Will a curly pixie cut suit a round face?
It can — but choose height over width. A curly pixie with volume at the crown and longer pieces at the forehead or sides elongates a round face, while a wide, rounded pixie with heavy width at the cheeks emphasizes roundness. An asymmetrical fringe or a sweeping bang is the simplest way to break up the circle.
A curly pixie cut is a commitment, not just a haircut — but it is one of the most rewarding ones you can make. Choose the shape that matches your real curl pattern and your real face shape, budget for trims every 4–6 weeks, and give yourself a two-minute morning refresh routine. Do that, and the cut stops being high-maintenance and starts being the easiest great-hair decision you ever made.