Silver Highlights – 13 Glam Ideas to Try in 2026
Silver highlights look effortless in photos, but they fail more than almost any other hair color — and most galleries never tell you why. True silver needs near-white lift and constant toning, which means silver painted over unlifted dark hair turns muddy within weeks, the toner fades faster than expected, and the upkeep bill surprises everyone who walked in expecting a one-time appointment.
The honest path starts with a feasibility check: can your base actually reach silver, and what does it cost to keep it there? Below are 13 silver highlight ideas organized by base color — from ash brown foils to silver on natural gray — each with the real lift requirements, the toner schedule nobody mentions upfront, and who each look genuinely suits. No guesswork, no muddy surprises.
Table of Contents
- 13 Silver Highlight Ideas Worth Trying
- 1. Ash Brown with Silver Foil
- 2. Black Hair with Gray Foil
- 3. Silver Money Piece
- 4. Platinum with Silver Babylights
- 5. Gray Balayage on Ash Brown
- 6. Black-to-Silver Balayage
- 7. Silver and Gray Foil Mix
- 8. Dark Brown with Silver and Platinum
- 9. Silver on Natural Gray Hair
- 10. Black-to-Gray Ombre
- 11. Silver on Curly Brown Hair
- 12. Silver Ribbons on Reddish Brown
- 13. Icy Silver on Short Hair
- How to Choose the Right Silver Tone for Your Base
- Foil vs Balayage vs Money Piece for Silver
- Keeping Silver Bright: Toner and Touch-Up Schedule
- FAQs
- Can dark brown or black hair get silver highlights?
- How long do silver highlights last?
- What is the difference between silver, gray, and white highlights?
- Do silver highlights damage hair?
- Can I do silver highlights at home?
- How do I keep silver highlights from turning yellow?
- Are silver highlights good for covering gray hair?
- How much do silver highlights cost to maintain?
13 Silver Highlight Ideas Worth Trying
1. Ash Brown with Silver Foil
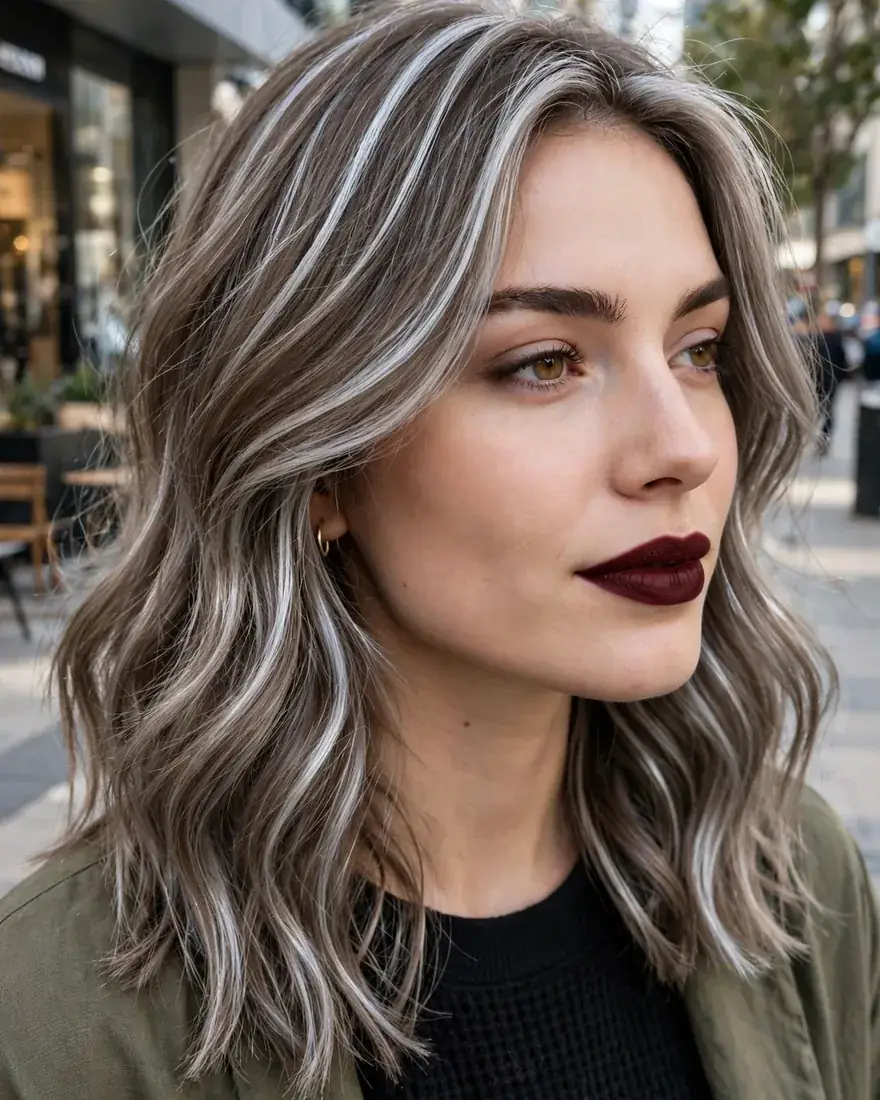
The classic entry point into silver highlights: fine silver foils woven through a cool ash-brown base for dimensional, metallic color. The ash base is the make-or-break detail — it cancels the warmth that would otherwise turn silver foils yellow, keeping every strand icy from root to tip.
Benefits:
- Ash base keeps silver crisp instead of drifting brassy
- Foils give precise, even lift for the cleanest silver result
- Grows out softer than all-over bleach with no harsh line
Pro Tip: Ask for a true silver toner at the bowl, not just purple shampoo to take home — toner is what makes foils read as genuinely silver rather than pale yellow.
How To Style: Straighten to show the metallic foil lines, or add loose waves for softer dimension; a weekly purple shampoo keeps the silver from warming between appointments.
Best For: Cool and neutral undertones; natural bases from level 5 to 7 that lift cleanly to pale blonde.
2. Black Hair with Gray Foil
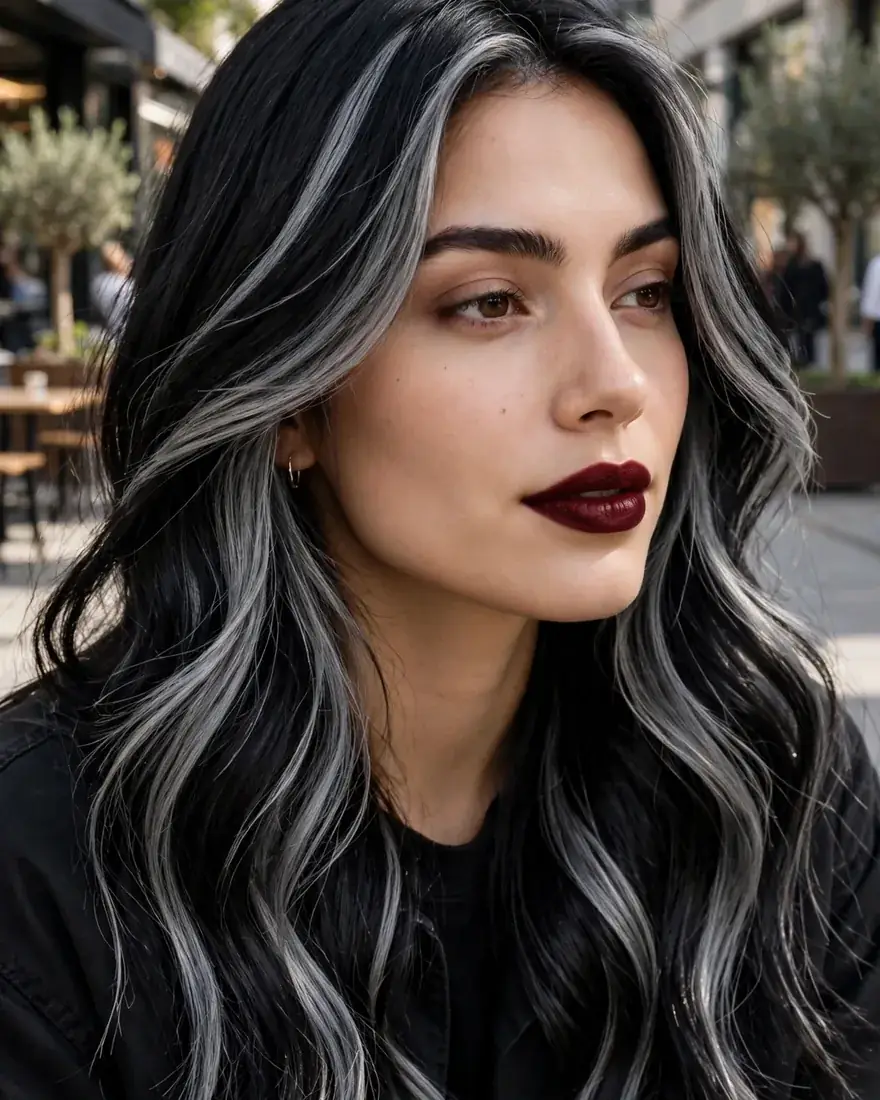
Fine gray foils sliced through black hair for maximum contrast with minimum lift. On the darkest bases, stylists usually aim for gray rather than true silver — it needs far less pre-lightening and still reads dramatic against black, which makes this the honest first step for level 1 to 2 hair.
Benefits:
- Striking contrast without the extreme lift silver demands
- Gray foils are achievable in fewer sessions than true silver
- Looks sharpest in sleek, straight styles that show the contrast
Pro Tip: This is the lift reality nobody posts about — black hair needs multiple sessions to reach silver, so gray is the achievable, healthy first stop, not a compromise.
How To Style: Wear it sleek and straight to emphasize the dark-to-gray contrast; use a blue shampoo rather than purple to stop gray foils from warming up.
Best For: Cool undertones; very dark bases that cannot safely reach white-blonde lift in a single session.
3. Silver Money Piece
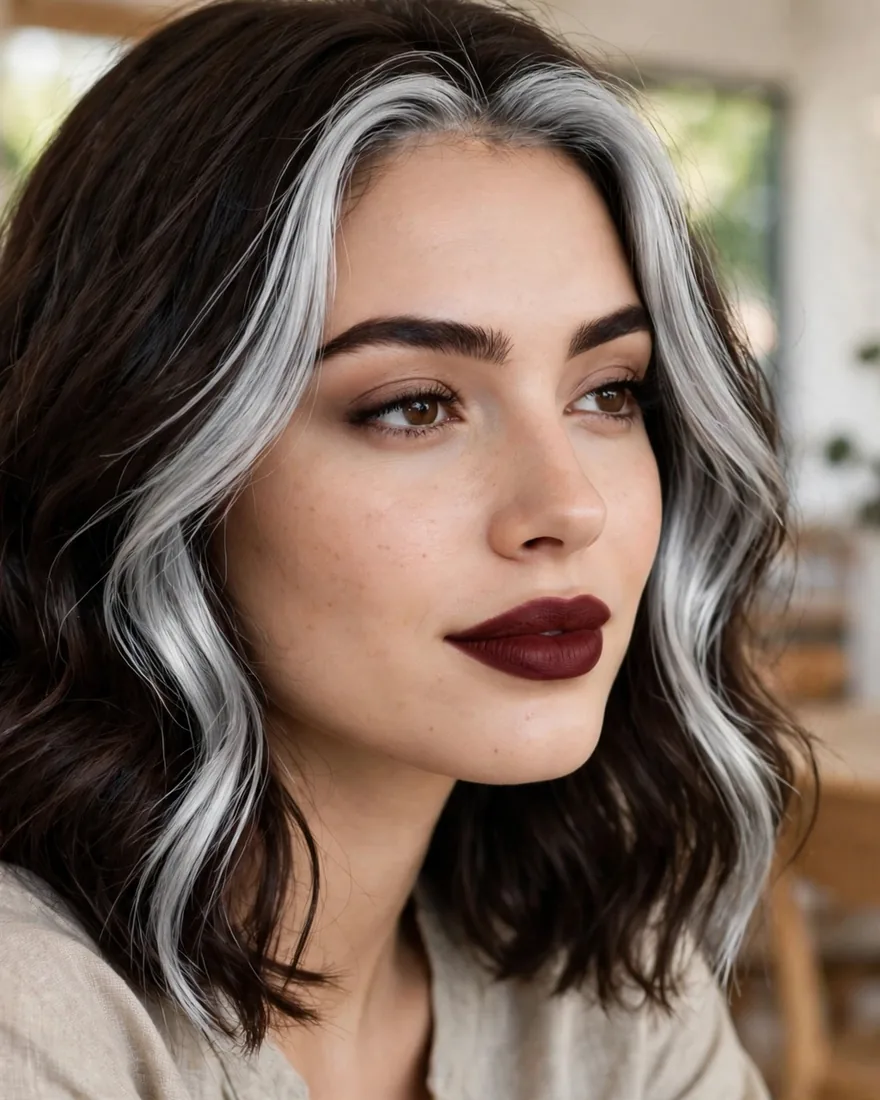
Two bright silver panels framing the face while the rest of the hair stays natural or darker. The money piece delivers the full visual impact of silver highlights exactly where it photographs — around the face — with a fraction of the bleach, cost, and upkeep of a full head.
Benefits:
- Face-framing brightness without full-head bleaching
- Faster and more affordable than all-over silver highlights
- Grows out gracefully since the back stays your natural color
Pro Tip: Keep the panels slightly wider than your instinct says — thin strips can read stripey, while a chunky face-frame looks modern and intentional.
How To Style: A center part shows both panels symmetrically; curl the face-framing pieces away from the face so the silver catches the light with movement.
Best For: Anyone testing silver before committing; oval, heart, and long face shapes that suit brightness around the face.
4. Platinum with Silver Babylights
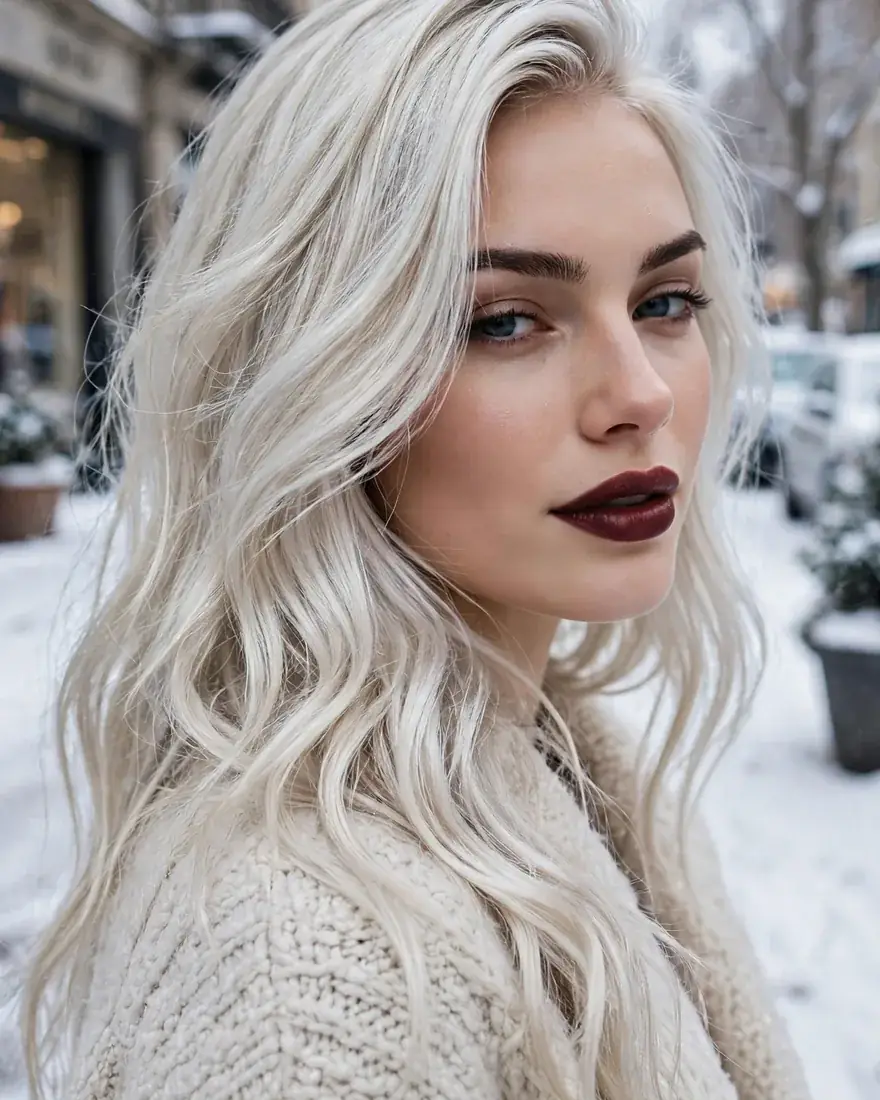
Ultra-fine babylights scattered through platinum blonde for a seamless, almost-white shimmer. Because the base is already platinum, the silver blends with no harsh lines — this is the most natural-looking way to wear silver highlights, and the iciest result achievable.
Benefits:
- Seamless blend with no visible regrowth line
- Babylights grow out invisibly for the lowest-maintenance silver
- The most even, icy silver result of any technique
Pro Tip: This only works on bases already at level 9 to 10 — on darker hair, babylights physically cannot lift pale enough to read as silver, so be realistic about your starting point. If you are building toward platinum, old money blonde is a softer intermediate step worth considering.
How To Style: Air-dry or diffuse for a soft, lived-in finish; a silver toning mask every other week maintains the icy tone without a salon visit.
Best For: Cool undertones; natural blondes or pre-lightened hair already at level 9 and above.
5. Gray Balayage on Ash Brown
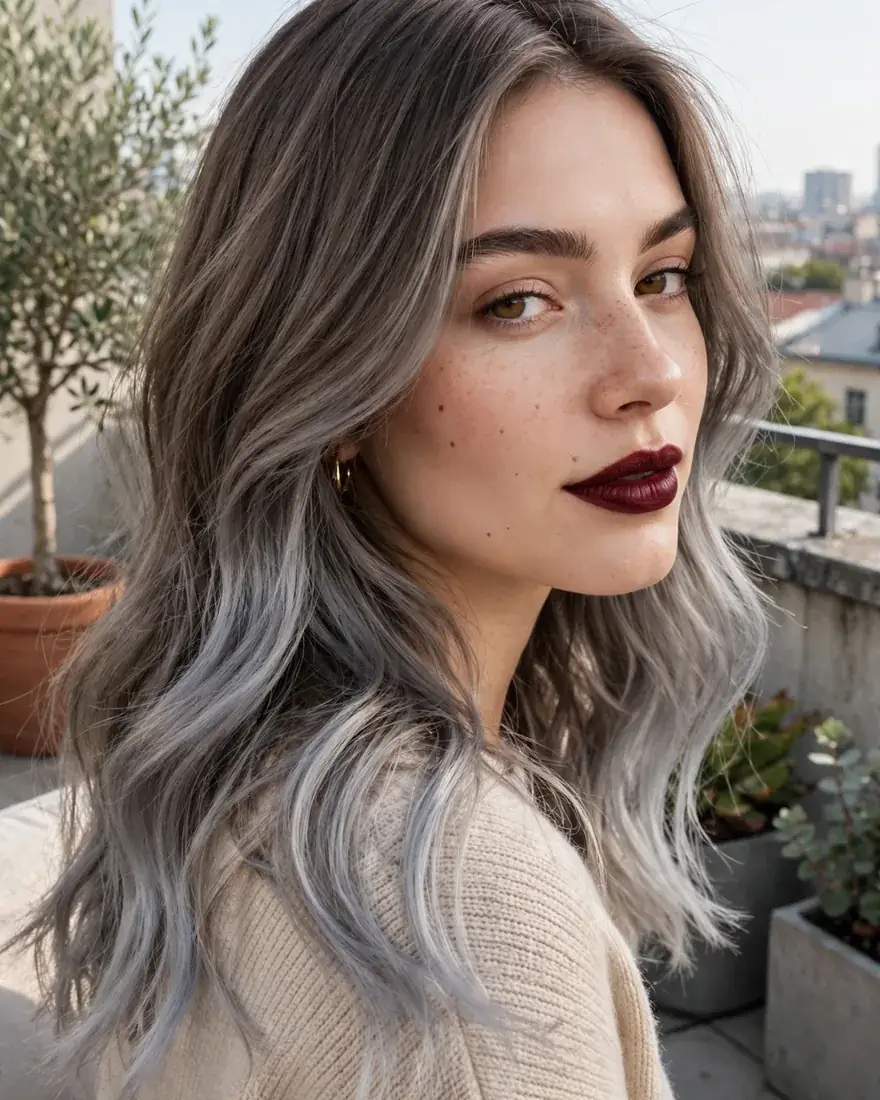
Hand-painted gray sweeps through ash brown, concentrated at the mid-lengths and ends for a soft, lived-in effect. Balayage gives a gentler transition than foils — the gray melts into the brown rather than striping through it, which suits wavy and textured hair beautifully.
Benefits:
- Soft regrowth with no harsh foil line
- Hand-painting follows natural wave and curl patterns
- Lower maintenance than foil highlights
Pro Tip: Ask for “cool gray” rather than “silver” balayage — painted pieces process in open air and rarely lift pale enough for true silver, so gray is the honest expectation. For more brunette dimension ideas, see dark brown hair inspiration.
How To Style: Beach waves show balayage dimension at its best; book a gloss refresh every 6 to 8 weeks to keep the gray from dulling.
Best For: Neutral to cool undertones; wavy or curly textures where painted dimension looks most natural.
6. Black-to-Silver Balayage
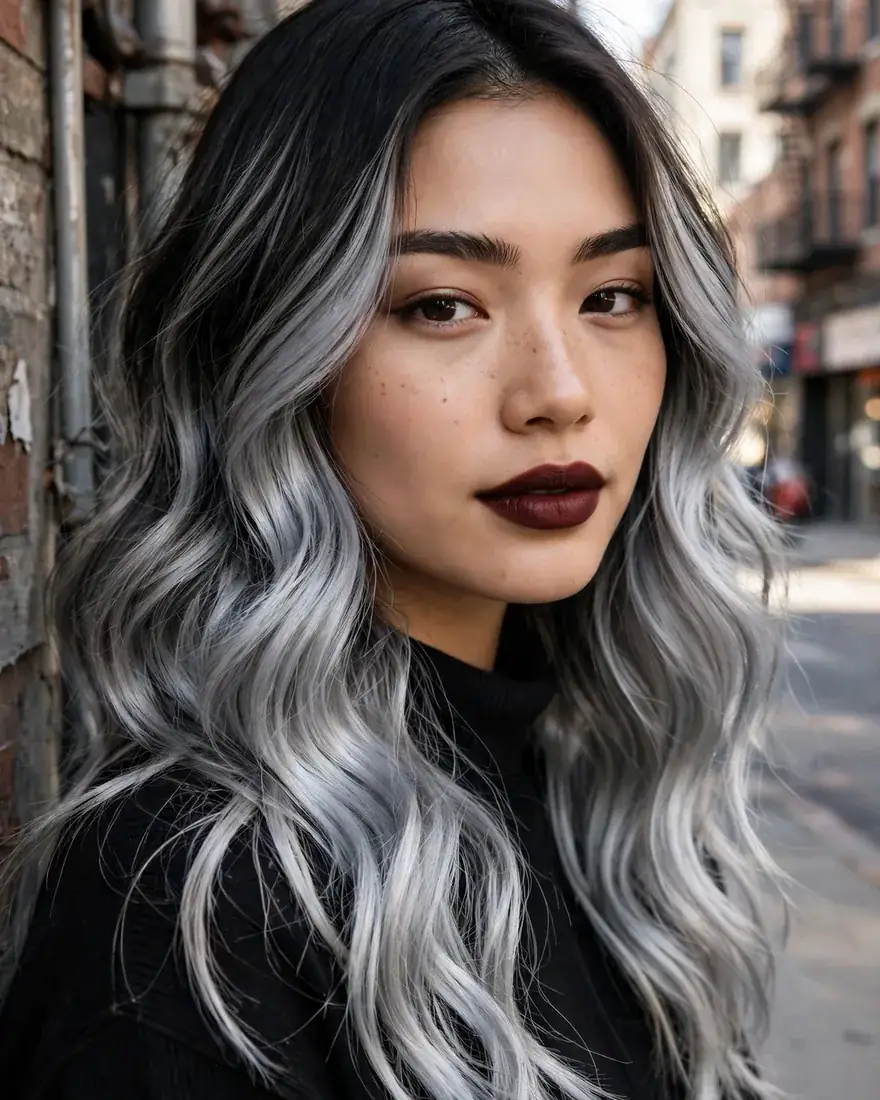
The dramatic gradient — black roots melting into silver ends through hand-painted balayage. This is the highest-contrast silver highlights look and the one demanding the most lift, so it is almost always built over two or more sessions rather than a single appointment.
Benefits:
- Maximum drama with dark roots keeping maintenance low
- The gradient hides regrowth better than foil highlights
- Long, flowing styles photograph the color melt beautifully
Pro Tip: Be honest about the lift reality — black to true silver ends takes 2 to 3 sessions, and anyone promising it in one sitting is over-promising at the expense of your hair’s health.
How To Style: Long layers and loose waves emphasize the gradient; bond-building treatments between lightening sessions protect the fragile ends.
Best For: Cool undertones; long hair that can handle repeated lightening; people committed to a multi-session color journey.
7. Silver and Gray Foil Mix
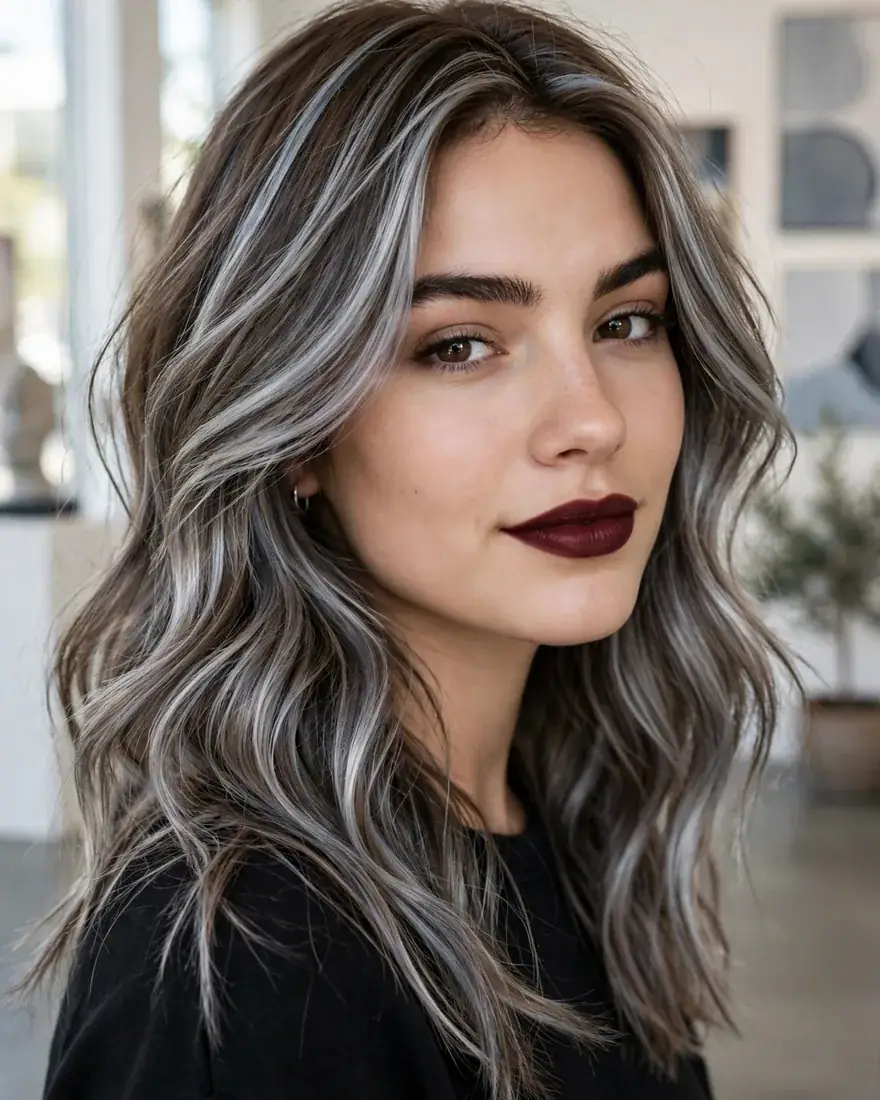
Alternating silver and gray foils for multi-dimensional cool tones. The mix of two cool shades creates a depth that single-tone silver lacks — it reads as expensive, layered color rather than flat gray, and the variation keeps the overall effect soft.
Benefits:
- Two-tone depth looks more natural than flat, single-tone silver
- Foils allow precise placement of each tone
- Dimensional color creates the illusion of thicker, fuller hair
Pro Tip: Ask your stylist to place the lighter silver foils around the crown and face with gray deeper underneath — that deliberate layering is what creates the dimension.
How To Style: A smooth blowout shows the tone variation best; alternate between purple and blue shampoo to maintain both the silver and gray tones.
Best For: Cool and neutral undertones; fine to medium hair that benefits from dimensional color.
8. Dark Brown with Silver and Platinum
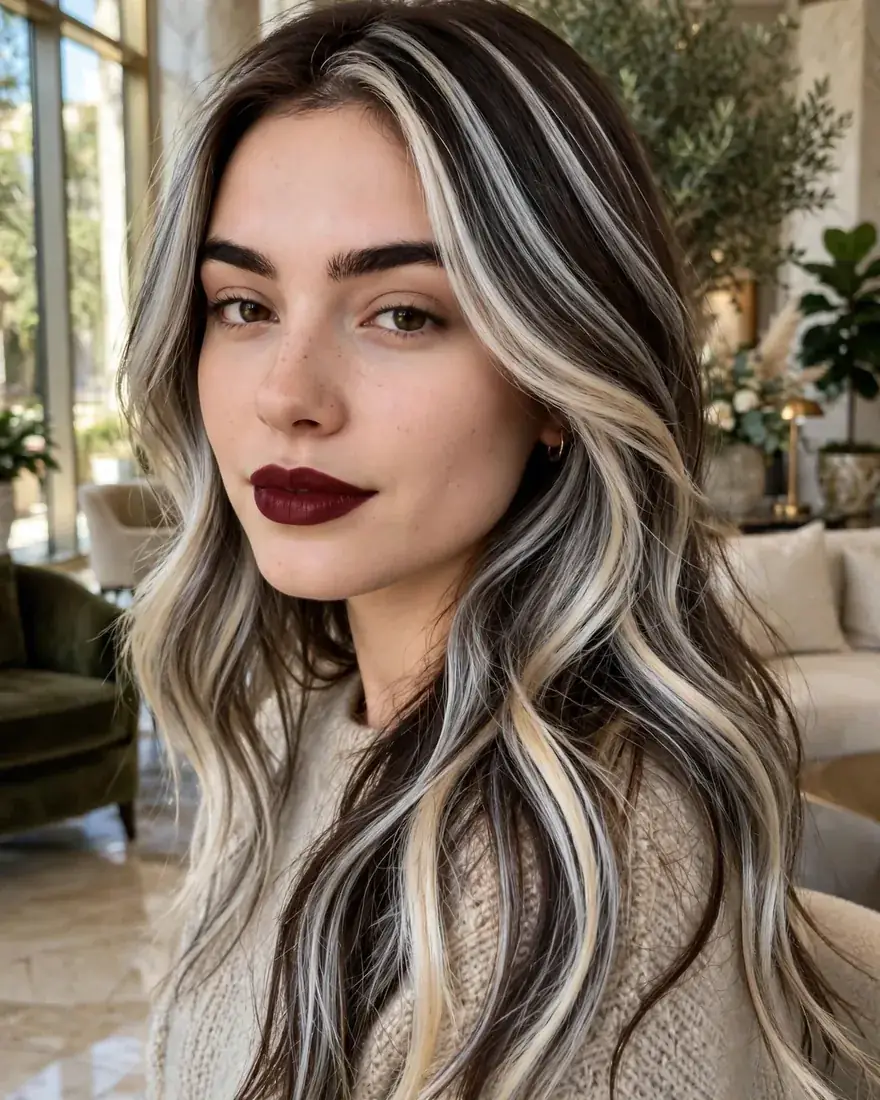
Bold silver and platinum ribbons woven through dark brown — the highest-contrast foil look for brunettes. It sits adjacent to the y2k skunk hair trend but softer: ribbons rather than chunky stripes, with the roots blended so the contrast feels deliberate, not harsh.
Benefits:
- Striking contrast without bleaching the whole head
- Ribbons can be placed to flatter your face shape
- Works on the darkest brunette bases
Pro Tip: A root shadow — a darker toner melted at the roots — is what makes this wearable day to day; it softens the line where dark meets light.
How To Style: Straight styles show the ribbon contrast most clearly; half-up styles display the placement beautifully from every angle.
Best For: Cool undertones; dark brown bases from level 3 to 4; anyone wanting drama without full-head bleach.
9. Silver on Natural Gray Hair
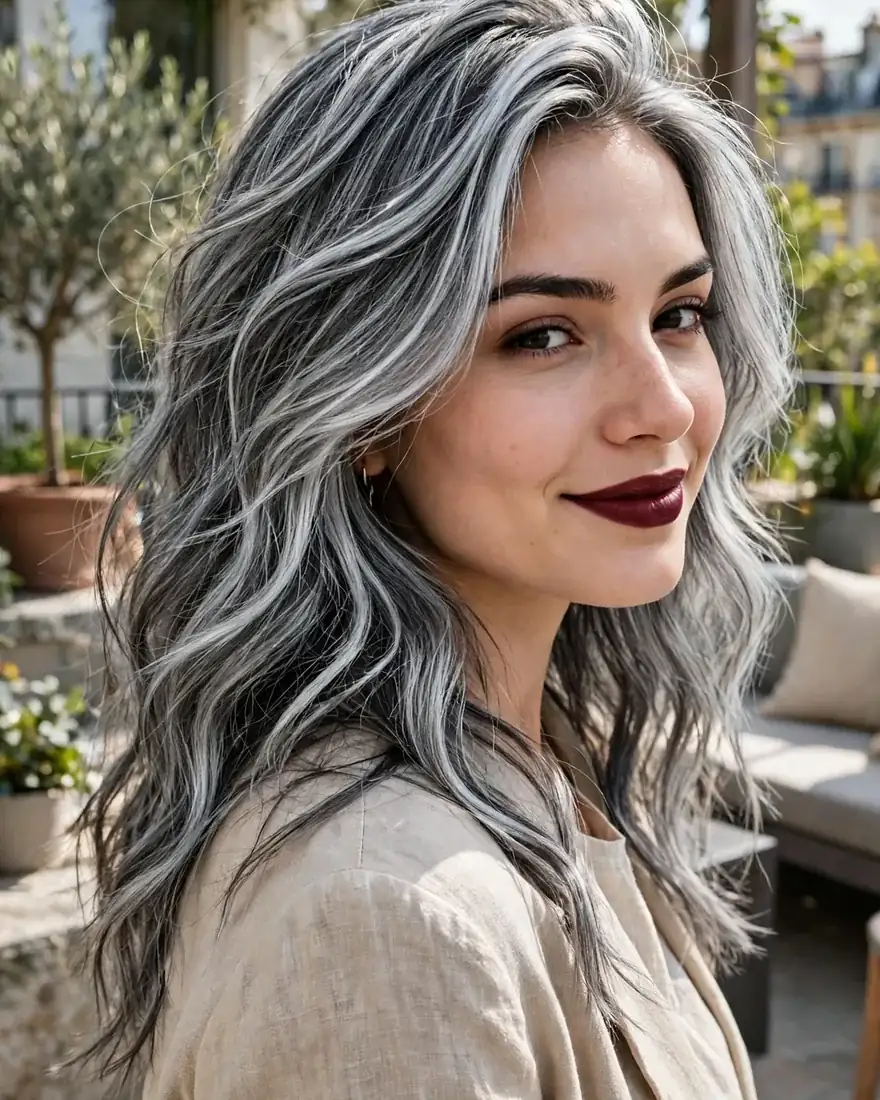
Silver highlights blended into natural gray for a polished, intentional silver — instead of fighting gray, this enhances it. The highlights even out patchy gray patterns and add the shine that natural gray hair often loses, turning “going gray” into a deliberate style choice.
Benefits:
- Works with your gray instead of covering it
- Evens out salt-and-pepper patchiness
- Far less damage than full-coverage dye
Pro Tip: Match the highlight tone to your natural gray — cool gray hair needs cool silver, while warmer gray blends better with a slightly warmer silver tone.
How To Style: Hydrating products matter most here since gray hair runs coarse; a silver gloss treatment adds back the shine gray hair loses with age.
Best For: Anyone with 30% or more natural gray; coarse gray textures; people transitioning away from full dye coverage.
10. Black-to-Gray Ombre
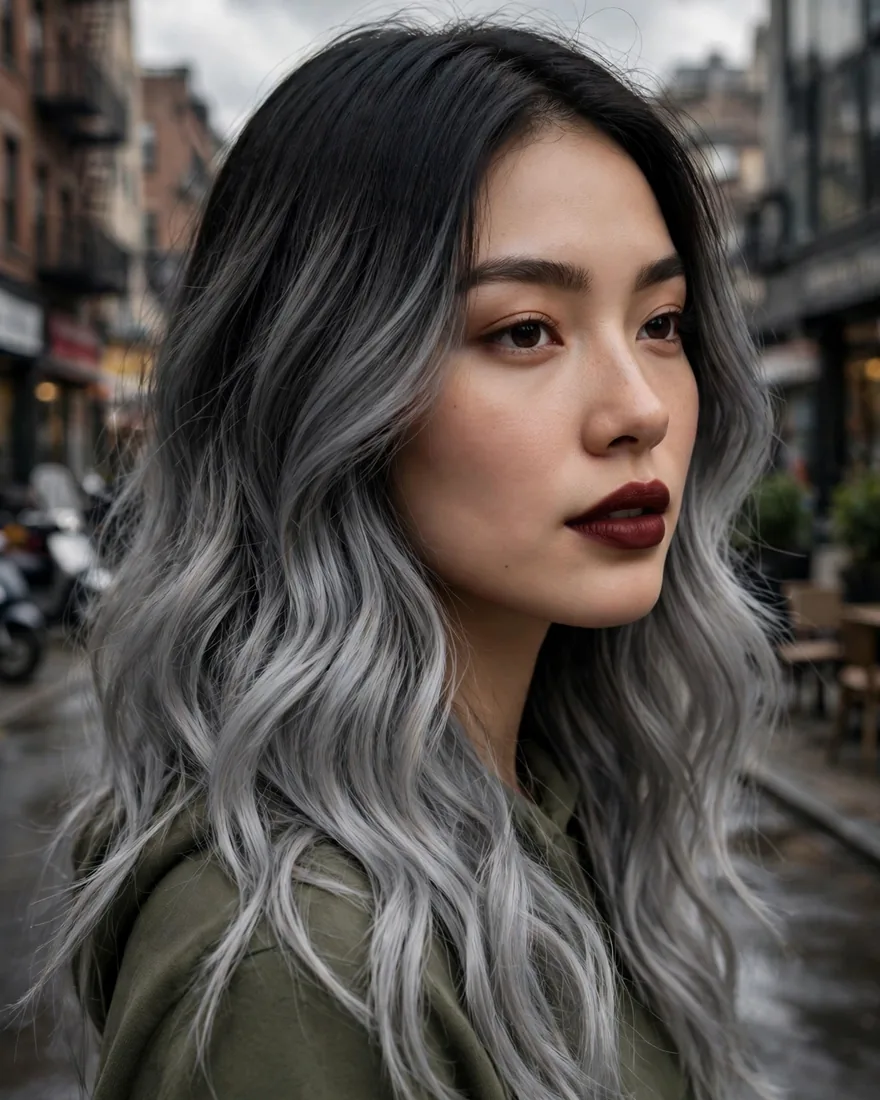
A structured gradient from black roots to gray ends — more defined than balayage, with a clearer transition zone. The ombre technique concentrates all the lightening at the ends, which keeps roots completely healthy and makes regrowth essentially invisible.
Benefits:
- Roots stay untouched, healthy, and naturally dark
- The defined gradient looks bold and modern
- Regrowth blends in with zero maintenance panic
Pro Tip: Ombre needs a toner formulated for the ends only — ask for a demi-permanent gray toner so the mid-shaft does not grab ashy and muddy.
How To Style: Straight or loosely waved styles show the gradient line best; trim the ends regularly since they carry all the chemical processing.
Best For: Cool undertones; long, healthy hair; anyone wanting the silver look with minimal root maintenance.
11. Silver on Curly Brown Hair
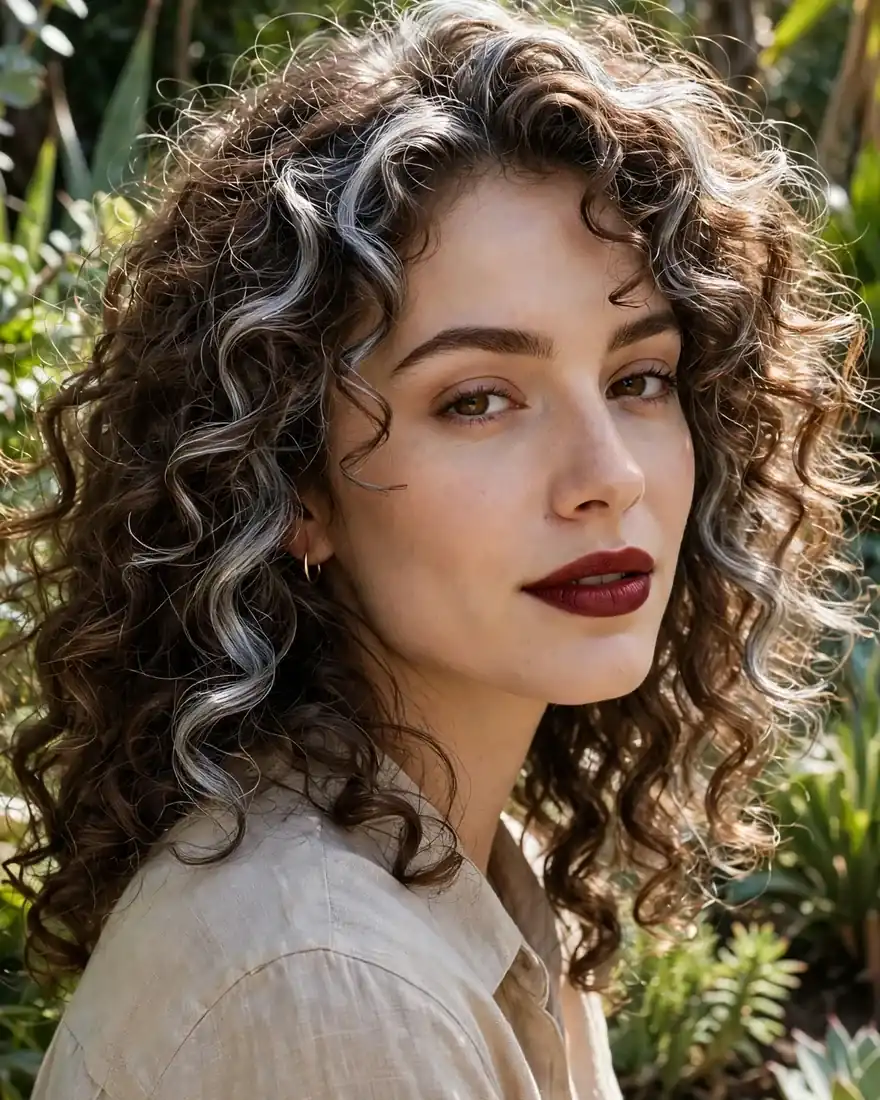
Silver pieces placed to follow the curl pattern on brown curly hair — the colorist paints or foils with each curl’s natural fall in mind. Curls display silver differently than straight hair: every curl catches light individually, so the silver sparkles and shifts rather than striping.
Benefits:
- Curls diffuse silver for a soft, sparkling effect
- Placement follows your natural texture, not against it
- Regrowth is far less visible on curly hair
Pro Tip: Curly hair is more fragile under bleach — ask for a lower-volume developer with longer processing time instead of aggressive, fast lift.
How To Style: Define curls with cream and diffuse; the silver pieces catch light as curls move — never brush them out dry.
Best For: Curly and coily textures; medium to dark brown bases; anyone wanting silver that moves with their texture.
12. Silver Ribbons on Reddish Brown
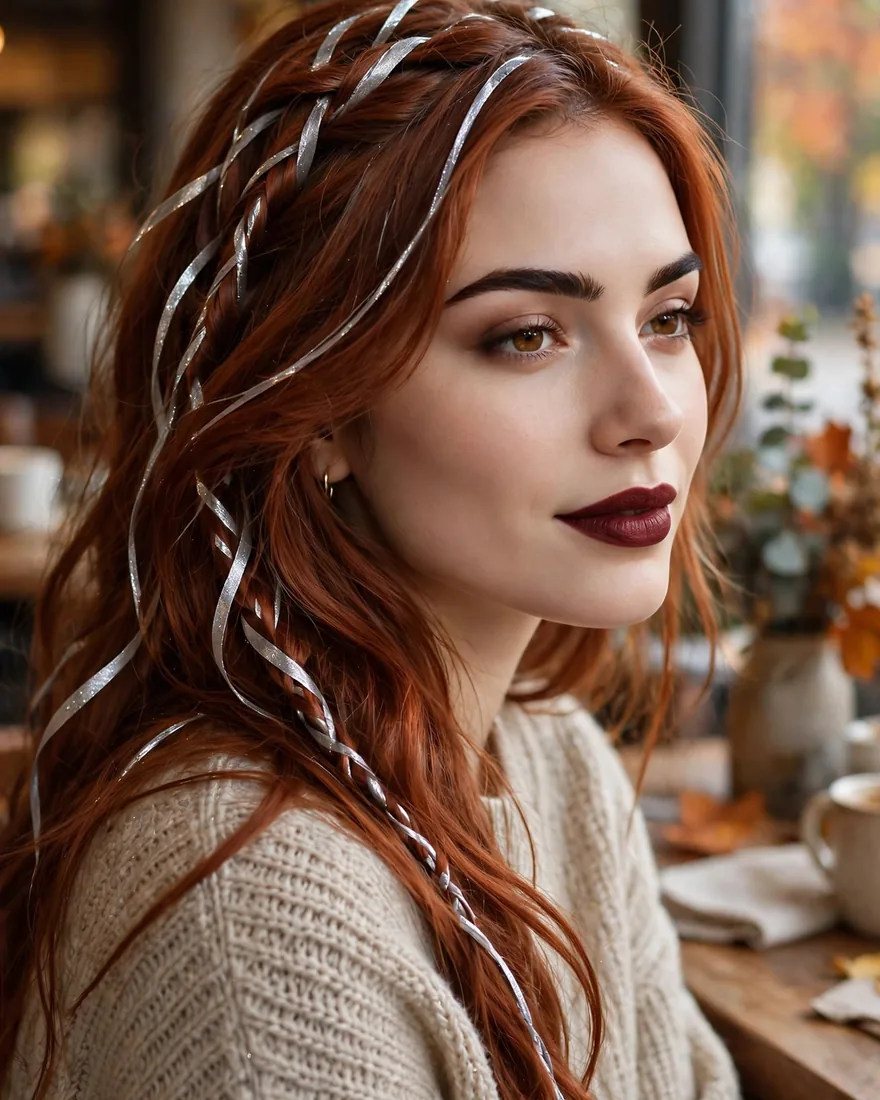
Cool silver ribbons set against warm reddish brown — the temperature contrast is the entire point of this look. It is an editorial, fashion-forward pairing: warm base meets icy ribbons for deliberate, striking tension that no single-tone color can replicate. If you love warm brunette depth, red hair ideas pair surprisingly well with this concept.
Benefits:
- The warm-cool contrast is unique and genuinely eye-catching
- Ribbons are lower-commitment than all-over silver
- Suits warm undertones better than most silver looks
Pro Tip: Protect the base’s warmth — do not let the stylist ash out your reddish brown during the process; the contrast only works if the base stays warm.
How To Style: A sleek blowout emphasizes the temperature contrast; a color-safe heat protectant is essential for the lightened ribbons.
Best For: Warm and neutral undertones; reddish-brown and auburn bases; fashion-forward wearers.
13. Icy Silver on Short Hair
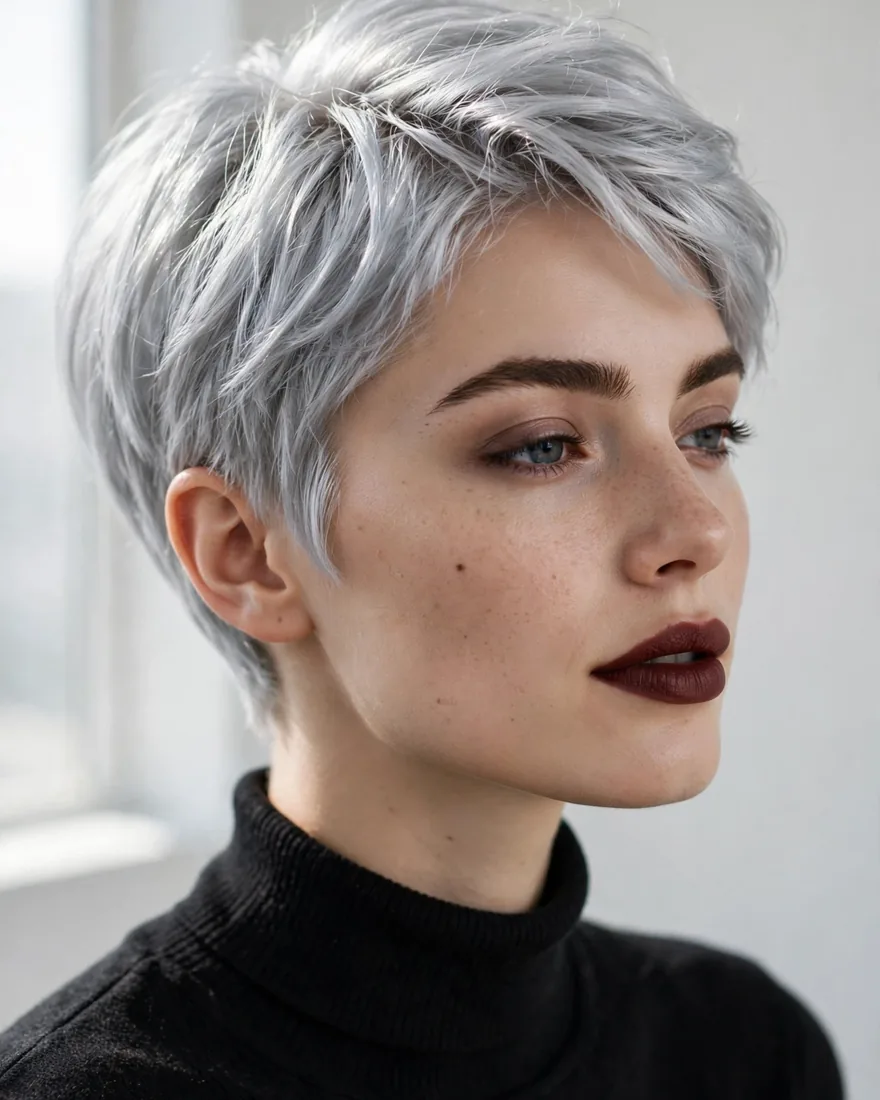
All-over icy silver on a pixie or short bob — the boldest silver highlights statement you can make. Short hair takes silver beautifully because grow-out is fast (regular trims simply remove old color) and the small canvas makes the color look intentional and chic rather than high-maintenance.
Benefits:
- Fastest grow-out of any silver look — trims remove old color
- Smaller canvas means less bleach, less time, less cost
- Reads polished and modern rather than overdone
Pro Tip: Short hair shows toner fade fastest since there is less hair to hold the tone — keep a silver toning conditioner in the shower and use it weekly.
How To Style: Textured pixie styling with matte paste; the icy color does all the talking, so keep the styling itself simple.
Best For: Cool undertones; pixies, bobs, and crops; anyone wanting maximum silver impact with minimum maintenance.
How the 13 silver highlight looks compare at a glance:
| Look | Base It Needs | Lift Level | Upkeep |
|---|---|---|---|
| Ash Brown with Silver Foil | Ash brown, level 5-7 | Moderate | Medium |
| Black Hair with Gray Foil | Black, level 1-2 | Moderate | Medium |
| Silver Money Piece | Any base | Moderate | Low |
| Platinum with Silver Babylights | Platinum, level 9-10 | Minimal | Low-Medium |
| Gray Balayage on Ash Brown | Ash brown, level 5-7 | Moderate | Low-Medium |
| Black-to-Silver Balayage | Black to dark brown | Very high | High |
| Silver and Gray Foil Mix | Medium to dark brown | High | Medium-High |
| Dark Brown with Silver and Platinum | Dark brown, level 3-4 | High | Medium-High |
| Silver on Natural Gray Hair | 30%+ natural gray | Minimal | Low |
| Black-to-Gray Ombre | Black to dark brown | High (ends only) | Low-Medium |
| Silver on Curly Brown Hair | Medium to dark brown curls | Moderate-High | Medium |
| Silver Ribbons on Reddish Brown | Reddish brown, auburn | High | Medium-High |
| Icy Silver on Short Hair | Any lightened base | High | Medium |
How to Choose the Right Silver Tone for Your Base
Silver, gray, and white are not interchangeable — and picking the wrong one for your skin undertone is the most common reason silver highlights disappoint. Cool undertones (veins look blue, silver jewelry flatters you) suit true icy silver and blue-based grays. Warm undertones (veins look green, gold jewelry flatters you) do better with slightly warmer silver-grays or the silver-ribbons-on-reddish-brown approach, where the warm base balances the cool ribbons. Neutral undertones can wear the full range.
Then comes the lift reality, which no gallery explains clearly. True silver needs hair lifted to level 10 — nearly white, with all yellow pigment removed. Here is the honest breakdown: natural blonde to light brown hair (level 7-9) can usually reach silver in one session. Medium to dark brown (level 4-6) typically needs two sessions. Black hair (level 1-2) needs two to three sessions, and anyone promising silver in one sitting on black hair is risking serious breakage. If your hair cannot safely reach level 10, stop at gray — gray foils on dark hair look intentional and striking, while under-lifted “silver” just looks muddy yellow-gray. If your base is already light, honey blonde hair tones can be a gentler stepping stone before committing to the iciest silvers.
Foil vs Balayage vs Money Piece for Silver
The technique matters as much as the shade. Foils give the most precise, even lift because they trap heat and process the hair consistently — that is why the iciest silver highlights are almost always foiled. The trade-off is maintenance: foils grow out with a visible line, so they need refreshing every 6 to 8 weeks. Balayage is hand-painted in open air, which means less lift — beautiful for soft gray melts on brown hair, but it rarely reaches true silver. Its advantage is the grow-out: soft, diffused, and forgiving for months. The money piece sits between the two — foiled brightness concentrated at the face, with the rest of your hair left alone, giving maximum visual impact for minimum bleach and upkeep.
Choose foils when you want the brightest, most even silver and do not mind regular salon visits. Choose balayage when you want a softer, lived-in gray-silver with easy grow-out — just accept that it will read gray rather than icy silver. Choose the money piece when you want to test silver, frame your face with brightness, or keep costs down. Many people combine them: a money piece plus balayage through the lengths gives face-framing impact with soft dimension everywhere else. For technique inspiration on dimensional color, caramel highlights show how painted dimension behaves on brunette bases.
Keeping Silver Bright: Toner and Touch-Up Schedule
Silver highlights have two separate maintenance clocks, and confusing them is why so many people end up with yellow hair. The toner — the sheer silver pigment deposited at the bowl — fades with every wash and needs refreshing every 3 to 4 weeks, either as a salon gloss or an at-home silver toning mask. The highlights themselves — the actual lightened pieces — need refreshing every 6 to 8 weeks as roots grow in. Mark both on your calendar; doing only one is how silver turns brassy.
Your home routine decides how long each salon visit lasts. Use purple shampoo once or twice a week if your silver leans icy, or blue shampoo if it leans gray — blue cancels the orange tones that purple misses on darker lift. Everything else should be sulfate-free and color-safe, since sulfates strip toner fast. A weekly deep-conditioning mask matters more for silver than for any other color because the underlying hair has been lifted so pale. And know when not to DIY: skip at-home silver if your hair is previously bleached and fragile, has henna or metallic dyes (they react unpredictably with bleach), or is box-dyed dark — all three are salon-only situations where DIY risks breakage or bizarre color results. If you are exploring the broader color landscape first, spring hair color trends and pink hairstyles cover lower-commitment fashion colors with easier upkeep.
FAQs
Can dark brown or black hair get silver highlights?
Yes, but with honest expectations about the process. Dark brown hair typically needs two lightening sessions to reach the near-white level silver requires, and black hair usually needs two to three. A skilled colorist may suggest starting with gray highlights — they need less lift, look striking against dark bases, and keep your hair healthier while you work toward silver over time.
How long do silver highlights last?
There are two timelines to track. The silver toner — the pigment that makes highlights look truly silver — fades with washing and needs refreshing every 3 to 4 weeks. The lightened highlight pieces themselves last until roots grow in, typically needing a salon refresh every 6 to 8 weeks. Purple or blue shampoo at home stretches the time between toner appointments.
What is the difference between silver, gray, and white highlights?
Silver is the brightest and iciest, with a metallic reflect that needs level-10 lift. Gray is softer and smokier, achievable with less lift, and more forgiving on darker bases. White or platinum is the palest of all — essentially colorless lift with a cool toner. Cool undertones suit silver and white best, while warm undertones often wear gray more harmoniously.
Do silver highlights damage hair?
They can, because reaching silver requires significant lightening — the most chemically demanding step in hair color. The risk depends on your starting point and hair health: virgin medium-brown hair handles it far better than previously bleached or fragile hair. Bond-building treatments during the service, lower-volume developer with longer processing, and spacing sessions weeks apart all reduce damage substantially.
Can I do silver highlights at home?
It is possible on virgin hair that is already light brown or darker blonde, using careful sectioning and a quality lightener followed by silver toner. But skip DIY entirely if your hair is previously bleached and fragile, has henna or metallic dyes (which react unpredictably with bleach), or is box-dyed dark — those situations need a professional’s assessment, and DIY attempts frequently end in breakage or uneven, muddy color that costs more to fix.
How do I keep silver highlights from turning yellow?
Yellowing happens as the silver toner washes out and underlying warmth shows through. Use purple shampoo once or twice weekly for icy silver, or blue shampoo for gray-leaning silver, since blue cancels the orange tones purple misses. Keep everything else sulfate-free, refresh the toner every 3 to 4 weeks with a salon gloss or silver mask, and limit heat styling, which accelerates tone fade.
Are silver highlights good for covering gray hair?
They are excellent for blending gray rather than covering it. Silver highlights woven through natural gray even out patchy salt-and-pepper patterns and add shine, turning grow-out into a deliberate style instead of a root emergency. This works best once you have around 30% gray; with just a few scattered grays, the contrast can look unintentional.
How much do silver highlights cost to maintain?
Silver is one of the highest-maintenance colors because of its two upkeep clocks: a toner or gloss refresh every 3 to 4 weeks plus a highlight touch-up every 6 to 8 weeks. At-home purple shampoo and silver masks keep costs down between visits, but budget for regular salon toning — skipping it is what turns silver yellow. Short hair and money pieces cost the least to maintain; full-head foils on long hair cost the most.
Silver highlights reward honesty: know your base’s lift limit, pick the tone your undertone actually supports, and commit to the toner schedule before you book the first appointment. Do that, and silver stops being the color that fails — it becomes the color that turns heads for all the right reasons, whether you choose a subtle money piece or go fully icy.